メインコンテンツにスキップ

Dell Inspiron 3148 Motherboard Replacement

必要な工具と部品

  1. Dell Inspiron 3148 Motherboard  Replacement, Back Panel: 手順 1、 2の画像 1 Dell Inspiron 3148 Motherboard  Replacement, Back Panel: 手順 1、 2の画像 2
    • Ensure the device is powered off and unplugged. Close the device and orient it face up, with the hinges further away from you.

    • Flip the device over so the backside is facing you.

  2. Dell Inspiron 3148 Motherboard  Replacement: 手順 2、 1の画像 1
    • Using the Phillips #1 screwdriver, remove all nine 7mm screws.

  3. Dell Inspiron 3148 Motherboard  Replacement: 手順 3、 2の画像 1 Dell Inspiron 3148 Motherboard  Replacement: 手順 3、 2の画像 2
    • Using the plastic opening tool, pull the back panel upward. Move the opening tool along the edge of the device and lift the panel off of your device.

    • Be aware, the back panel is kept in place by magnetic clips. They will offer some resistance, but continue to gently leverage upwards.

  4. Dell Inspiron 3148 Motherboard  Replacement, Battery: 手順 4、 1の画像 1
    • Remove the three 4mm screws holding battery in place using the Phillips #0 screwdriver.

  5. Dell Inspiron 3148 Motherboard  Replacement: 手順 5、 1の画像 1
    • Using the iFixit opening tools, lift the battery out of its housing.

  6. Dell Inspiron 3148 Motherboard  Replacement: 手順 6、 1の画像 1
    • Once loosened, use your fingers to lift the battery up and out of its housing.

    • There is a small cable which sits in a rut in the top of the battery. Ensure that it is pushed out of the way before removing completely.

  7. Dell Inspiron 3148 Motherboard  Replacement: 手順 7、 1の画像 1
    • Remove the battery completely.

  8. Dell Inspiron 3148 Motherboard  Replacement, Hard Drive: 手順 8、 3の画像 1 Dell Inspiron 3148 Motherboard  Replacement, Hard Drive: 手順 8、 3の画像 2 Dell Inspiron 3148 Motherboard  Replacement, Hard Drive: 手順 8、 3の画像 3
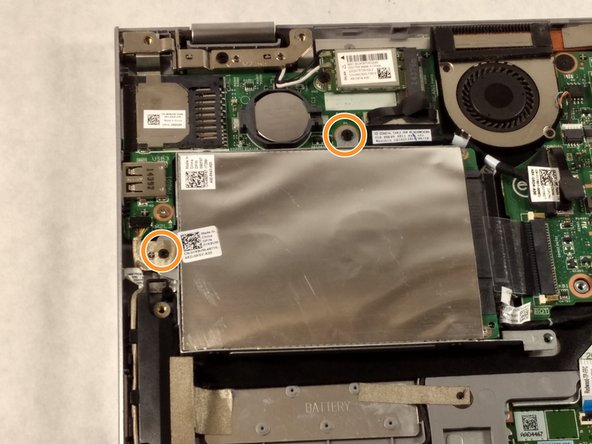
    • If there is a piece of tape connecting the hard drive and a small power cord, remove the tape.

    • Using the Phillips #0 screwdriver, remove the two 4mm screws.

  9. Dell Inspiron 3148 Motherboard  Replacement: 手順 9、 3の画像 1 Dell Inspiron 3148 Motherboard  Replacement: 手順 9、 3の画像 2 Dell Inspiron 3148 Motherboard  Replacement: 手順 9、 3の画像 3
    • Notice: there is a small data cable connecting the hard drive to the motherboard. Do not attempt to lift the hard drive all the way out before removing this cable.

    • Lift the hard drive slightly out of the device.

    • Grasp the head of the cable, not the cable itself.

    • Pull away from the hard drive, removing the data cable. The hard drive may now be fully removed.

  10. Dell Inspiron 3148 Motherboard  Replacement, Fan: 手順 10、 3の画像 1 Dell Inspiron 3148 Motherboard  Replacement, Fan: 手順 10、 3の画像 2 Dell Inspiron 3148 Motherboard  Replacement, Fan: 手順 10、 3の画像 3
    • If there is tape on your fan, remove the tape.

    • Remove the two 2mm screws on the fan enclosure using the Phillips #00 screwdriver.

  11. Dell Inspiron 3148 Motherboard  Replacement: 手順 11、 2の画像 1 Dell Inspiron 3148 Motherboard  Replacement: 手順 11、 2の画像 2
    • Unscrew the three 4mm screws holding down the heat sink of the fan using the Phillips #00 screwdriver.

    • The three 4mm screws found in the heat sink will remain attached to the heat sink. This is okay as long as they are detached from the motherboard.

  12. Dell Inspiron 3148 Motherboard  Replacement: 手順 12、 1の画像 1
    • Use the tweezers to gently pull the power supply cable from its port.

  13. Dell Inspiron 3148 Motherboard  Replacement: 手順 13、 1の画像 1
    • Grasp the fan and lift upward. Remove the fan from the device.

  14. Dell Inspiron 3148 Motherboard  Replacement, Motherboard: 手順 14、 1の画像 1
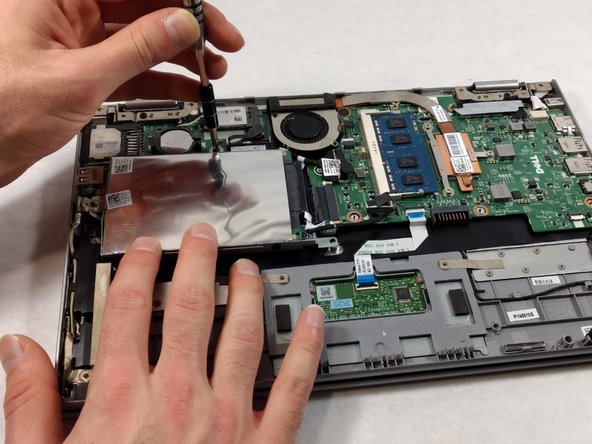
    • Remove the keyboard cable from its ZIF connector by flipping up the locking tab on the connector and then pulling the cable out.

  15. Dell Inspiron 3148 Motherboard  Replacement: 手順 15、 1の画像 1
    • Remove the touch pad cable from its ZIF connector.

  16. Dell Inspiron 3148 Motherboard  Replacement: 手順 16、 1の画像 1
    • Remove one 3.41mm screw using a Phillips #000 screwdriver.

    • Remove the two 3.41mm screws using a Phillips #000 screwdriver.

    • Remove motherboard.

終わりに

To reassemble your device, follow these instructions in reverse order.

ある他の人がこのガイドを完成しました。

作成者

2人の作成者と共同で作成されました。

David Campbell

メンバー登録日: 10/02/19

97 ポイント

1ガイドが承認済み

0 件のコメント

コメントを追加

統計データ:

過去 24時間: 0

過去 7 日: 0

過去 30 日: 0

今までの合計 117