メインコンテンツにスキップ

Dell Inspiron 17-7746 Video Card/Motherboard Replacement

必要な工具と部品

  1. Dell Inspiron 17-7746 Video Card/Motherboard Replacement, Battery: 手順 1、 1の画像 1
    • Disconnect the laptop from the AC adapter and turn off the laptop.

  2. Dell Inspiron 17-7746 Video Card/Motherboard Replacement: 手順 2、 1の画像 1
    • Place the laptop so the bottom faces up.

  3. Dell Inspiron 17-7746 Video Card/Motherboard Replacement: 手順 3、 3の画像 1 Dell Inspiron 17-7746 Video Card/Motherboard Replacement: 手順 3、 3の画像 2 Dell Inspiron 17-7746 Video Card/Motherboard Replacement: 手順 3、 3の画像 3
    • Remove the silver 15mm PH 1 screw that holds the plastic cover in place over the battery.

    • Remove the 8mm PH 1 screw that holds the plastic cover in place over the battery.

    • Keep the screws together because the length of the screws will matter when you reassemble.

  4. Dell Inspiron 17-7746 Video Card/Motherboard Replacement: 手順 4、 1の画像 1
    • Using the metal jimmy, pry up the first half of the cover.

  5. Dell Inspiron 17-7746 Video Card/Motherboard Replacement: 手順 5、 1の画像 1
    • Apply pressure with your fingertips on top of the cover and drag toward the front of the laptop. This will make the plate slide off exposing the hard drive.

  6. Dell Inspiron 17-7746 Video Card/Motherboard Replacement: 手順 6、 2の画像 1 Dell Inspiron 17-7746 Video Card/Motherboard Replacement: 手順 6、 2の画像 2
    • Remove the two black PH1 6mm screws that anchor the battery.

  7. Dell Inspiron 17-7746 Video Card/Motherboard Replacement: 手順 7、 1の画像 1
    • Grab the black tab on the battery with index finger and thumb.

    • If the Tab is broken or missing, use the plastic spudger to pry the battery out far enough to grab the battery by hand.

    • Avoid applying too much pressure on the battery with the plastic spudger. It might puncture the battery.

  8. Dell Inspiron 17-7746 Video Card/Motherboard Replacement: 手順 8、 1の画像 1
    • Pull upwards, removing the battery from the laptop.

    • Ensure replacement battery has no bulging or has no cracks and lies flat in its location.

  9. Dell Inspiron 17-7746 Video Card/Motherboard Replacement, Wireless Card: 手順 9、 3の画像 1 Dell Inspiron 17-7746 Video Card/Motherboard Replacement, Wireless Card: 手順 9、 3の画像 2 Dell Inspiron 17-7746 Video Card/Motherboard Replacement, Wireless Card: 手順 9、 3の画像 3
    • Remove the three black 6mm PH1 screws that anchor the hard drive.

    • This screw hole will be empty because the 15mm silver screw that holds the plastic cover will anchor the hard drive down when completely reassembled.

  10. Dell Inspiron 17-7746 Video Card/Motherboard Replacement: 手順 10、 2の画像 1 Dell Inspiron 17-7746 Video Card/Motherboard Replacement: 手順 10、 2の画像 2
    • Using your hands, gently lift the hard drive out of its slot.

    • Disconnect the Seta Cable attaching the hard drive to the laptop by gently wiggling loose the connector from the hard drive using your hands.

  11. Dell Inspiron 17-7746 Video Card/Motherboard Replacement: 手順 11、 1の画像 1
    • Pry up the plate covering the RAM, using the metal jimmy.

  12. Dell Inspiron 17-7746 Video Card/Motherboard Replacement: 手順 12、 2の画像 1 Dell Inspiron 17-7746 Video Card/Motherboard Replacement: 手順 12、 2の画像 2
    • Remove all eleven (11) PH1 screws.

  13. Dell Inspiron 17-7746 Video Card/Motherboard Replacement: 手順 13、 3の画像 1 Dell Inspiron 17-7746 Video Card/Motherboard Replacement: 手順 13、 3の画像 2 Dell Inspiron 17-7746 Video Card/Motherboard Replacement: 手順 13、 3の画像 3
    • As part of removing all screws the CD ROM screw is also removed using the plastic spudger.

    • Using the tip of the plastic spudger, push the metal tab towards the outer edge of the laptop. This pushes the CD ROM out.

    • Using your fingers, pull out the CD ROM.

  14. Dell Inspiron 17-7746 Video Card/Motherboard Replacement: 手順 14、 2の画像 1 Dell Inspiron 17-7746 Video Card/Motherboard Replacement: 手順 14、 2の画像 2
    • Turn the laptop over and open it up, exposing the keyboard.

  15. Dell Inspiron 17-7746 Video Card/Motherboard Replacement: 手順 15、 3の画像 1 Dell Inspiron 17-7746 Video Card/Motherboard Replacement: 手順 15、 3の画像 2 Dell Inspiron 17-7746 Video Card/Motherboard Replacement: 手順 15、 3の画像 3
    • Using the plastic spudger tool, place the tip of the spudger into the small notches at the top of the keyboard and push in the notch to release the top portion of the keyboard. Repeat on all notches.

    • Push all five tabs back to lift the keyboard.

    • Starting from the left to right makes it easier to remove the keyboard.

  16. Dell Inspiron 17-7746 Video Card/Motherboard Replacement: 手順 16、 2の画像 1 Dell Inspiron 17-7746 Video Card/Motherboard Replacement: 手順 16、 2の画像 2
    • Using the plastic spudger, lift the top part of the keyboard and gently lift the keyboard out.

    • Top of the keyboard is where the clips were holding the keyboard in place of the laptop.

    • There are flat ribbon cables that connect the keyboard, avoid breaking these cables.

    • Using your hands, gently remove the narrow flat ribbon cable from the motherboard port by gently pulling the cable.

  17. Dell Inspiron 17-7746 Video Card/Motherboard Replacement: 手順 17、 1の画像 1
    • Using your hands, gently remove the wide flat ribbon cable from the motherboard port by gently pulling the cable.

  18. Dell Inspiron 17-7746 Video Card/Motherboard Replacement: 手順 18、 1の画像 1
    • Remove the 15mm PH 1 screw holding the bottom plate in place.

  19. Dell Inspiron 17-7746 Video Card/Motherboard Replacement: 手順 19、 2の画像 1 Dell Inspiron 17-7746 Video Card/Motherboard Replacement: 手順 19、 2の画像 2
    • Close the laptop and flip it over exposing the bottom surface. Use the metal jimmy and blue opening tool, gently pry the bottom cover off. Repeat this process around the entire perimeter of the laptop.

  20. Dell Inspiron 17-7746 Video Card/Motherboard Replacement: 手順 20、 1の画像 1
    • Gently pick up the bottom cover, exposing all other components of the device.

    • If the cover is not coming off easily or seems to not be lifting off. Look for any screws you may have missed.

  21. Dell Inspiron 17-7746 Video Card/Motherboard Replacement: 手順 21、 2の画像 1 Dell Inspiron 17-7746 Video Card/Motherboard Replacement: 手順 21、 2の画像 2
    • The wireless card is near the left hinge of the laptop and has two little connectors attached to it. Gently lift the left black connector off the board and then lift the board out of the laptop.

    • Repeat the same process with the white connector.

  22. Dell Inspiron 17-7746 Video Card/Motherboard Replacement: 手順 22、 1の画像 1
    • Replace the wireless card and reconnect the black and white cables.

    • Black cable goes to the connector on the wireless card labeled as "1."

    • White cable goes to the connector on the wireless card labeled as "2."

  23. Dell Inspiron 17-7746 Video Card/Motherboard Replacement, Video Card/Motherboard: 手順 23、 3の画像 1 Dell Inspiron 17-7746 Video Card/Motherboard Replacement, Video Card/Motherboard: 手順 23、 3の画像 2 Dell Inspiron 17-7746 Video Card/Motherboard Replacement, Video Card/Motherboard: 手順 23、 3の画像 3
    • Remove all wires and ribbon cables attached to the motherboard.

    • Some Wires have small black tabs on top of them. Meaning one must grab the tab and pull directly upward, gently.

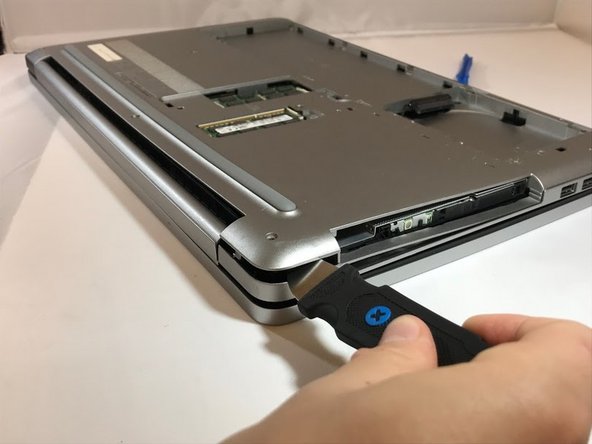
    • Some ribbon cables may require the blue opening tool to release the cable's connectors before pulling it out.

    • Finally, some cables have a plastic head with small notches on the side. Use your hand to gently wiggle this cable side to side to remove.

    • The blue opening tool is recommended to avoid damaging the cables.

    • There should be a total of 8 wires/cables that must be removed from the motherboard.

  24. Dell Inspiron 17-7746 Video Card/Motherboard Replacement: 手順 24、 1の画像 1
    • Remove the 6mm PH1 screw from the motherboard.

  25. Dell Inspiron 17-7746 Video Card/Motherboard Replacement: 手順 25、 1の画像 1
    • Grab the board near where the RAM was, and gently pull and lift.

    • If the board does not move, do not force it. This may mean you forgot to remove a screw or one of the cables.

    • Go ahead and replace the motherboard at this time.

終わりに

To reassemble your device, follow these instructions in reverse order.

作成者

5人の作成者と共同で作成されました。

Joshua Plagerman

メンバー登録日: 09/26/18

735 ポイント

4のガイドは作成済み

チーム

0 件のコメント

コメントを追加

統計データ:

過去 24時間: 0

過去 7 日: 0

過去 30 日: 3

今までの合計 730