メインコンテンツにスキップ

Dell Inspiron 14-3452 Screen Replacement

必要な工具と部品

  1. Dell Inspiron 14-3452 Screen Replacement, Battery: 手順 1、 2の画像 1 Dell Inspiron 14-3452 Screen Replacement, Battery: 手順 1、 2の画像 2
    • Remove the battery by sliding the battery release latch to the left.

    • Pull the entire battery away from the backing.

  2. Dell Inspiron 14-3452 Screen Replacement, Random Access Memory (RAM): 手順 2、 1の画像 1
    • Ensure that the laptop is completely turned off and the battery is removed.

    • Remove the two Phillips Head 5 mm #0 screws holding the backing in place.

  3. Dell Inspiron 14-3452 Screen Replacement: 手順 3、 1の画像 1
    • Pull the backing away from the laptop.

  4. Dell Inspiron 14-3452 Screen Replacement: 手順 4、 1の画像 1
    • Locate the blue RAM chip sitting in the RAM bay.

    • Use your fingertips to pry apart the white RAM securing-clips on each side of the memory-module slot until the RAM chip pops up.

  5. Dell Inspiron 14-3452 Screen Replacement: 手順 5、 1の画像 1
    • Pull the RAM chip away from the memory-module slot.

    • The RAM chip is now fully detached and ready to be replaced.

  6. Dell Inspiron 14-3452 Screen Replacement, Screen: 手順 6、 1の画像 1
    • Remove the ten Phillips Head 5 mm #0 screws from the computer backing.

    • Remove the one Phillips Head 3 mm #0 screw from the computer backing.

  7. Dell Inspiron 14-3452 Screen Replacement: 手順 7、 2の画像 1 Dell Inspiron 14-3452 Screen Replacement: 手順 7、 2の画像 2
    • Remove the white and black antenna cables from the wireless card.

  8. Dell Inspiron 14-3452 Screen Replacement: 手順 8、 1の画像 1
    • Remove the Phillips Head 3 mm #0 screw that is holding the wireless card in place.

  9. Dell Inspiron 14-3452 Screen Replacement: 手順 9、 1の画像 1
    • Slide the wireless card out of the wireless card bay.

  10. Dell Inspiron 14-3452 Screen Replacement: 手順 10、 2の画像 1 Dell Inspiron 14-3452 Screen Replacement: 手順 10、 2の画像 2
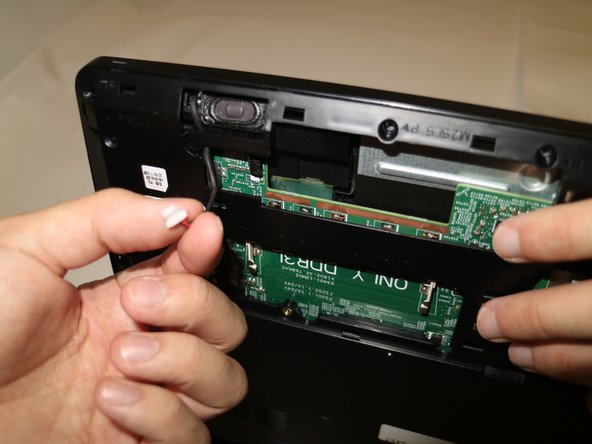
    • Using your fingertips remove the speaker cable from the motherboard by pulling the white connector away from the socket.

  11. Dell Inspiron 14-3452 Screen Replacement: 手順 11、 1の画像 1
    • Pry apart the keyboard assembly slowly as the keyboard cable will still be attached to the motherboard.

    • Use the blue Uspudger to pry apart the keyboard assembly from the bottom shell.

  12. Dell Inspiron 14-3452 Screen Replacement: 手順 12、 1の画像 1
    • Disconnect the keyboard cable from the motherboard by lifting the black latch and pulling the cable out of its socket.

  13. Dell Inspiron 14-3452 Screen Replacement: 手順 13、 2の画像 1 Dell Inspiron 14-3452 Screen Replacement: 手順 13、 2の画像 2
    • Disconnect the display cable from the motherboard by pulling the tape back and lifting the connector latch.

    • Pull the display cable away from the motherboard.

  14. Dell Inspiron 14-3452 Screen Replacement: 手順 14、 1の画像 1
    • Remove the power adapter cable from the motherboard by sliding the cable out of its socket.

  15. Dell Inspiron 14-3452 Screen Replacement: 手順 15、 1の画像 1
    • Turn laptop over to access the screen hinge screws.

    • Remove the two Phillips Head 5 mm #0 screws from the two hinges.

  16. Dell Inspiron 14-3452 Screen Replacement: 手順 16、 2の画像 1 Dell Inspiron 14-3452 Screen Replacement: 手順 16、 2の画像 2
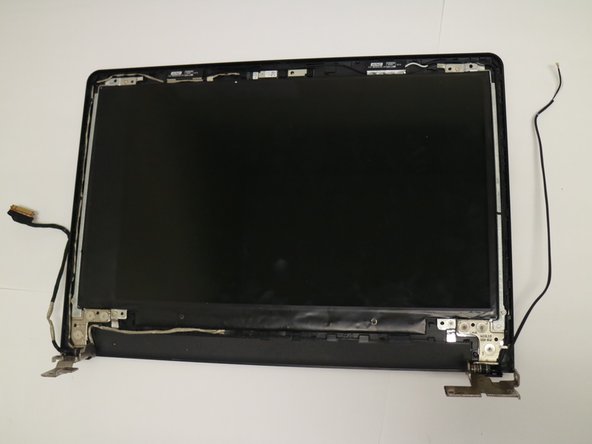
    • Using your fingertips, gently pry up the inner edges of the display bezel.

    • Lift the display bezel off the display assembly.

  17. Dell Inspiron 14-3452 Screen Replacement: 手順 17、 3の画像 1 Dell Inspiron 14-3452 Screen Replacement: 手順 17、 3の画像 2 Dell Inspiron 14-3452 Screen Replacement: 手順 17、 3の画像 3
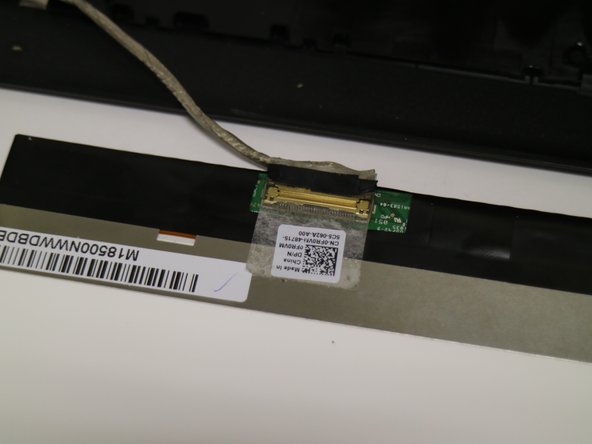
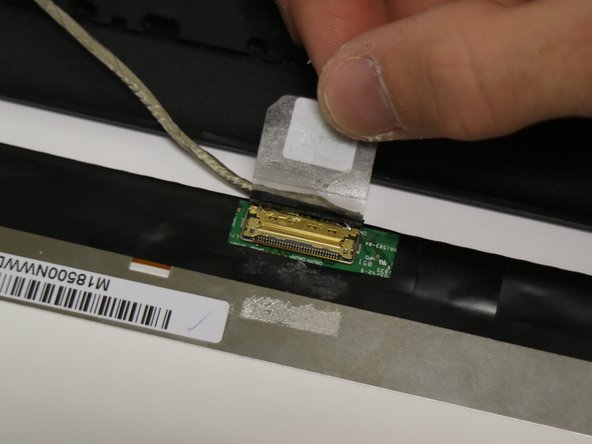
    • After removing the bezel, locate the tab indicated in the pictures.

    • Lift the tab as shown in the pictures.

    • Lift the gold latch securing the display cable to the socket.

    • Pull display cable away from the socket.

終わりに

To reassemble your device, follow these instructions in reverse order.

作成者

3人の作成者と共同で作成されました。

Alec Siegel

メンバー登録日: 01/30/18

598 ポイント

4のガイドは作成済み

チーム

Baylor, Team S2-G2, Johnson Spring 2018 Baylor, Team S2-G2, Johnson Spring 2018人のメンバー

BU-JOHNSON-S18S2G2

3 メンバー

5のガイドは作成済み

0 件のコメント

コメントを追加

統計データ:

過去 24時間: 1

過去 7 日: 5

過去 30 日: 10

今までの合計 887