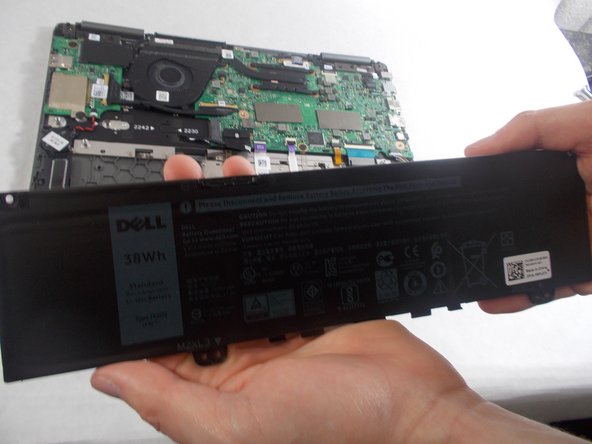
メインコンテンツにスキップ

Dell Inspiron 13-7373 Keyboard Replacement

必要な工具と部品

  1. Dell Inspiron 13-7373 Keyboard Replacement, Back Cover: 手順 1、 3の画像 1 Dell Inspiron 13-7373 Keyboard Replacement, Back Cover: 手順 1、 3の画像 2 Dell Inspiron 13-7373 Keyboard Replacement, Back Cover: 手順 1、 3の画像 3
    • Before you begin, be sure to turn off your laptop and unplug it from the outlet.

    • Remove the ten 7.5mm Phillips #00 screws from the bottom of the laptop.

    • Use an opening tool to remove the bottom half of the case from the laptop.

  2. Dell Inspiron 13-7373 Keyboard Replacement, Battery: 手順 2、 1の画像 1
    • Use a Phillips screwdriver to remove the four screws holding the battery in place.

  3. Dell Inspiron 13-7373 Keyboard Replacement: 手順 3、 2の画像 1 Dell Inspiron 13-7373 Keyboard Replacement: 手順 3、 2の画像 2
    • Pull the plastic tab on the battery cable to disconnect the cable from the battery.

  4. Dell Inspiron 13-7373 Keyboard Replacement: 手順 4、 2の画像 1 Dell Inspiron 13-7373 Keyboard Replacement: 手順 4、 2の画像 2
    • Remove the battery from the laptop.

  5. Dell Inspiron 13-7373 Keyboard Replacement, Fan: 手順 5、 1の画像 1
    • Remove the two screws holding the cover for the fan.

  6. Dell Inspiron 13-7373 Keyboard Replacement: 手順 6、 1の画像 1
    • Unplug the connector holding the fan’s wires.

    • Remove the fan from the laptop.

  7. Dell Inspiron 13-7373 Keyboard Replacement, Network Card: 手順 7、 1の画像 1
    • Use the Phillips #00 screwdriver to remove the single screw holding in the network card.

    • Remove the network card from the laptop.

  8. Dell Inspiron 13-7373 Keyboard Replacement, Daughterboard: 手順 8、 1の画像 1
    • Use the Phillips #00 screwdriver to remove the two 1mm screws holding in the daughterboard.

    • Remove the metal piece holding in the daughterboard.

    • Disconnect the two cable connectors from the daughterboard.

    • If the cables are stuck, gently wiggle them until they disconnect.

  9. Dell Inspiron 13-7373 Keyboard Replacement: 手順 9、 1の画像 1
    • Remove the daughterboard.

  10. Dell Inspiron 13-7373 Keyboard Replacement, Motherboard: 手順 10、 1の画像 1
    • Remove the seven 2mm screws securing the motherboard.

  11. Dell Inspiron 13-7373 Keyboard Replacement: 手順 11、 3の画像 1 Dell Inspiron 13-7373 Keyboard Replacement: 手順 11、 3の画像 2 Dell Inspiron 13-7373 Keyboard Replacement: 手順 11、 3の画像 3
    • Release the IO Board Cable.

    • Release the Touchpad cable.

    • Release the keyboard back-light cable.

    • Release the keyboard cable.

    • Release the eDP cable.

    • Release the dc-in cable.

    • Release the cable for the LED charging indicator by gently pulling up on the connector.

  12. Dell Inspiron 13-7373 Keyboard Replacement: 手順 12、 1の画像 1
    • Gently lift up on the motherboard to remove it.

  13. Dell Inspiron 13-7373 Keyboard Replacement, Keyboard: 手順 13、 2の画像 1 Dell Inspiron 13-7373 Keyboard Replacement, Keyboard: 手順 13、 2の画像 2
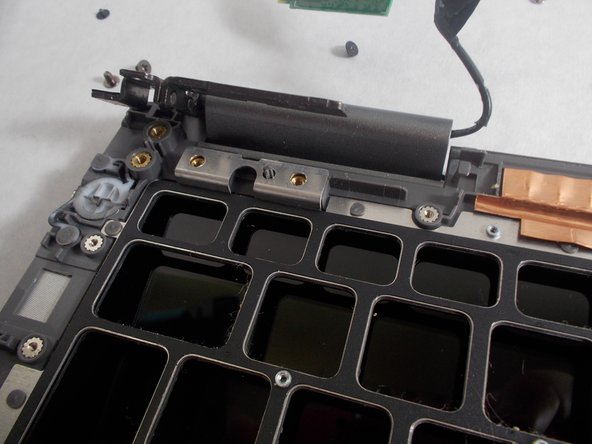
    • Use the Phillips #00 screwdriver to remove the eight 1mm screws at the back of the keyboard.

    • Remove the 3 screws holding the hinges of the laptop on each side.

  14. Dell Inspiron 13-7373 Keyboard Replacement: 手順 14、 2の画像 1 Dell Inspiron 13-7373 Keyboard Replacement: 手順 14、 2の画像 2
    • Lift up on the hinges that the three screws were removed from.

    • They are difficult to move and may require a tad bit more effort.

  15. Dell Inspiron 13-7373 Keyboard Replacement: 手順 15、 2の画像 1 Dell Inspiron 13-7373 Keyboard Replacement: 手順 15、 2の画像 2
    • Gently remove the keyboard from beneath the hinges that were lifted up.

終わりに

To reassemble your device, follow these instructions in reverse order.

作成者

2人の作成者と共同で作成されました。

Kameron Jusseaume

メンバー登録日: 10/25/19

465 ポイント

2のガイドは作成済み

チーム

UMass Dartmouth, Team S1-G4, O'Connell Fall 2019 UMass Dartmouth, Team S1-G4, O'Connell Fall 2019人のメンバー

UMASSD-O'CONNELL-F19S1G4

3 メンバー

5のガイドは作成済み

0 件のコメント

コメントを追加

統計データ:

過去 24時間: 1

過去 7 日: 9

過去 30 日: 36

今までの合計 1,523