メインコンテンツにスキップ

Dell Inspiron 13-5368 Webcam Replacement

必要な工具と部品

  1. Dell Inspiron 13-5368 Webcam Replacement, Battery: 手順 1、 2の画像 1 Dell Inspiron 13-5368 Webcam Replacement, Battery: 手順 1、 2の画像 2
    • Remove the nine 6mm Phillips #0 screws that secure the back cover of the laptop.

  2. Dell Inspiron 13-5368 Webcam Replacement: 手順 2、 2の画像 1 Dell Inspiron 13-5368 Webcam Replacement: 手順 2、 2の画像 2
    • Use a spudger to pry up and remove the back cover.

  3. Dell Inspiron 13-5368 Webcam Replacement: 手順 3、 1の画像 1
    • Remove the four 3mm Phillips #0 screws at the corners of the battery that secure it to the laptop.

  4. Dell Inspiron 13-5368 Webcam Replacement: 手順 4、 1の画像 1
    • Pull the battery cable's black tab towards the battery to disconnect it from the motherboard.

    • Pull the tab parallel to the motherboard, not straight up.

  5. Dell Inspiron 13-5368 Webcam Replacement: 手順 5、 2の画像 1 Dell Inspiron 13-5368 Webcam Replacement: 手順 5、 2の画像 2
    • Remove the battery.

  6. Dell Inspiron 13-5368 Webcam Replacement, Screen Display: 手順 6、 3の画像 1 Dell Inspiron 13-5368 Webcam Replacement, Screen Display: 手順 6、 3の画像 2 Dell Inspiron 13-5368 Webcam Replacement, Screen Display: 手順 6、 3の画像 3
    • Unscrew the 2mm screw that holds the WLAN card. Then carefully remove the WLAN card from the motherboard.

  7. Dell Inspiron 13-5368 Webcam Replacement: 手順 7、 1の画像 1
    • Detach the black and white antenna cables from the WLAN card.

  8. Dell Inspiron 13-5368 Webcam Replacement: 手順 8、 1の画像 1
    • Unplug the two display cables.

  9. Dell Inspiron 13-5368 Webcam Replacement: 手順 9、 1の画像 1
    • Unscrew the screws that are securing the laptop's hinges.

  10. Dell Inspiron 13-5368 Webcam Replacement: 手順 10、 1の画像 1
    • Detach the display from the base.

  11. Dell Inspiron 13-5368 Webcam Replacement, Webcam: 手順 11、 1の画像 1
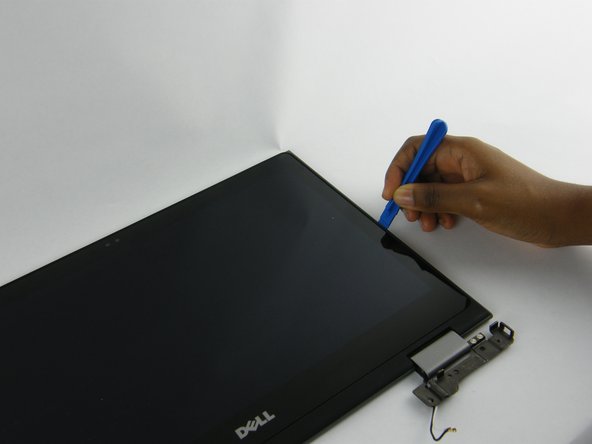
    • Use your plastic opening tool to pry the LCD back cover from the display panel.

  12. Dell Inspiron 13-5368 Webcam Replacement: 手順 12、 2の画像 1 Dell Inspiron 13-5368 Webcam Replacement: 手順 12、 2の画像 2
    • Carefully separate the back cover from the LCD screen.

    • Carefully remove the ribbon cable that holds the webcam to the screen, then unplug the webcam from the ribbon cable.

終わりに

To reassemble your device, follow these instructions in reverse order.

作成者

1人の作成者と共同作成されました。

Matt Sugrim

メンバー登録日: 09/27/17

1,042 ポイント

6のガイドは作成済み

チーム

USF Tampa, Team S14-G6, Boczar Fall 2017 USF Tampa, Team S14-G6, Boczar Fall 2017人のメンバー

USFT-BOCZAR-F17S14G6

4 メンバー

13のガイドは作成済み

0 件のコメント

コメントを追加

統計データ:

過去 24時間: 0

過去 7 日: 3

過去 30 日: 5

今までの合計 1,208