メインコンテンツにスキップ

この修理ガイドは変更されています。最新の未承認バージョンに切り替えます。

Dell Inspirion 15z-5523 Fan Replacement

必要な工具と部品

  1. Dell Inspirion 15z-5523 Fan Replacement, Fan: 手順 1、 1の画像 1
    • First turn over your computer and remove all of the rubber stoppers on the back.

  2. Dell Inspirion 15z-5523 Fan Replacement: 手順 2、 1の画像 1
    • Then remove all the screws that were under the rubber stoppers.

  3. Dell Inspirion 15z-5523 Fan Replacement: 手順 3、 1の画像 1
    • Take the screw out of the back plate.

  4. Dell Inspirion 15z-5523 Fan Replacement: 手順 4、 1の画像 1
    • Remove back plate by grabbing and lifting up.

  5. Dell Inspirion 15z-5523 Fan Replacement: 手順 5、 1の画像 1
    • Remove CD port by pulling it straight out.

  6. Dell Inspirion 15z-5523 Fan Replacement: 手順 6、 1の画像 1
    • Remove the keyboard.

  7. Dell Inspirion 15z-5523 Fan Replacement: 手順 7、 1の画像 1
    • Take screw out of the surface below the keyboard and remove the top layer of the computer off of the base.

  8. Dell Inspirion 15z-5523 Fan Replacement: 手順 8、 1の画像 1
    • Remove the battery by unscrewing the 5 screws and pull straight out.

  9. Dell Inspirion 15z-5523 Fan Replacement: 手順 9、 1の画像 1
    • Remove the three screws from the hard drive and remove by pulling straight out.

  10. Dell Inspirion 15z-5523 Fan Replacement: 手順 10、 2の画像 1 Dell Inspirion 15z-5523 Fan Replacement: 手順 10、 2の画像 2
    • Unscrew motherboard and remove the two clips.

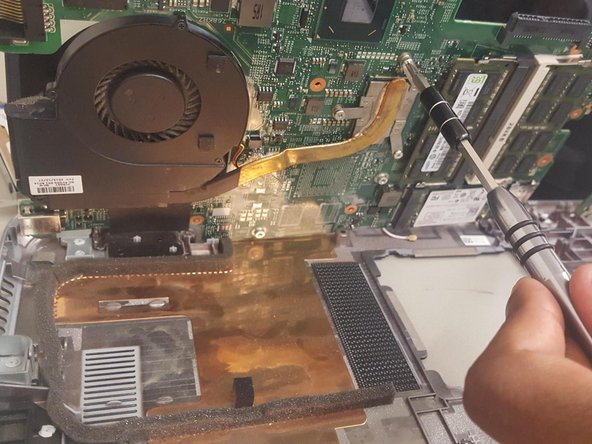
  11. Dell Inspirion 15z-5523 Fan Replacement: 手順 11、 2の画像 1 Dell Inspirion 15z-5523 Fan Replacement: 手順 11、 2の画像 2
    • Flip motherboard up, unscrew the three screws, and unclip the fan.

終わりに

To reassemble your device, follow these instructions in reverse order.

作成者

2人の作成者と共同で作成されました。

Christian Chavez

メンバー登録日: 01/23/18

729 ポイント

5のガイドは作成済み

チーム

Western Carolina University, Team S1-G5, Virtue Spring 2018 Western Carolina University, Team S1-G5, Virtue Spring 2018人のメンバー

WCU-VIRTUE-S18S1G5

4 メンバー

5のガイドは作成済み

0 件のコメント

コメントを追加

統計データ:

過去 24時間: 0

過去 7 日: 1

過去 30 日: 4

今までの合計 812