メインコンテンツにスキップ

Dell G3 3500 Disassembly

必要な工具と部品

  1. Dell G3 3500 Disassembly, Dell G3 3500 Disassembly: 手順 1、 3の画像 1 Dell G3 3500 Disassembly, Dell G3 3500 Disassembly: 手順 1、 3の画像 2 Dell G3 3500 Disassembly, Dell G3 3500 Disassembly: 手順 1、 3の画像 3
    • Turn off the computer by pressing the Windows button on the bottom left of the screen. Press power then press shut down.

  2. Dell G3 3500 Disassembly: 手順 2、 1の画像 1
    • Unplug the computer from the charging cable.

  3. Dell G3 3500 Disassembly: 手順 3、 1の画像 1
    • Close the laptop and flip it over to the back.

    • Find the 10 screws on the outer edge.

  4. Dell G3 3500 Disassembly: 手順 4、 3の画像 1 Dell G3 3500 Disassembly: 手順 4、 3の画像 2 Dell G3 3500 Disassembly: 手順 4、 3の画像 3
    • Using the #1 Philips head begin unscrewing the 10 screws.

    • Slowly and carefully keep track of the screws in a safe place

    • The back 4 screws of the back panel will not and should not come out. Make sure they are still unscrewed to the main board

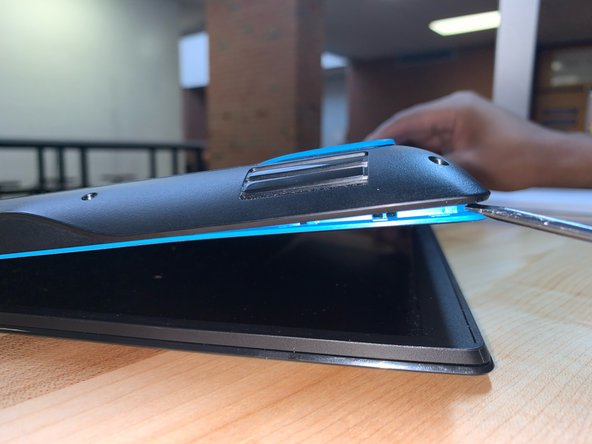
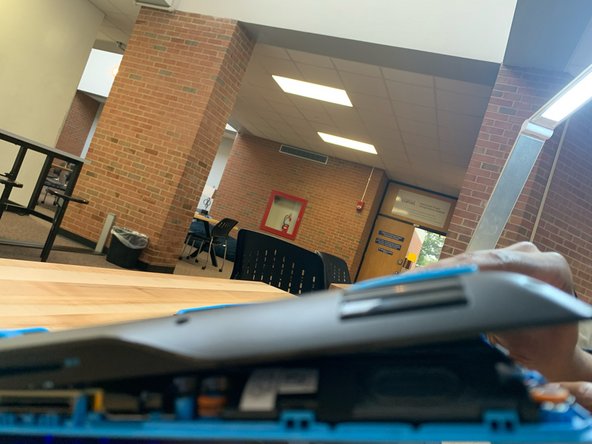
  5. Dell G3 3500 Disassembly, Pry the bottom plate open: 手順 5、 3の画像 1 Dell G3 3500 Disassembly, Pry the bottom plate open: 手順 5、 3の画像 2 Dell G3 3500 Disassembly, Pry the bottom plate open: 手順 5、 3の画像 3
    • Insert a flathead screwdriver or guitar pick in between the keyboard cover and bottom plate.

    • Carefully pry the keyboard cover and bottom plate apart until all the clips around the outer end unlatch.

    • Remove the bottom plate to reveal the internal parts of the computer.

  6. Dell G3 3500 Disassembly, Disconnect the battery: 手順 6、 2の画像 1 Dell G3 3500 Disassembly, Disconnect the battery: 手順 6、 2の画像 2
    • Locate the battery and unscrew the two #1 Philips head screws attaching it to the frame.

    • Unplug and remove the battery from the computer.

  7. Dell G3 3500 Disassembly, Take the M.2 SSD out: 手順 7、 3の画像 1 Dell G3 3500 Disassembly, Take the M.2 SSD out: 手順 7、 3の画像 2 Dell G3 3500 Disassembly, Take the M.2 SSD out: 手順 7、 3の画像 3
    • Locate the M.2 Solid State Drive.

    • Remove the #1 Philips head screw attaching it to the frame.

    • The drive will tilt up from the board once unscrewed.

    • Gently pull the drive away from the frame until it releases.

  8. Dell G3 3500 Disassembly, Remove the hard drive: 手順 8、 2の画像 1 Dell G3 3500 Disassembly, Remove the hard drive: 手順 8、 2の画像 2
    • Locate the Hard Disk Drive and unplug it from the device. Lift the black latch and pull the cord from the board carefully.

    • Remove the screws attaching it to the frame.

    • Remove the hard drive from the board.

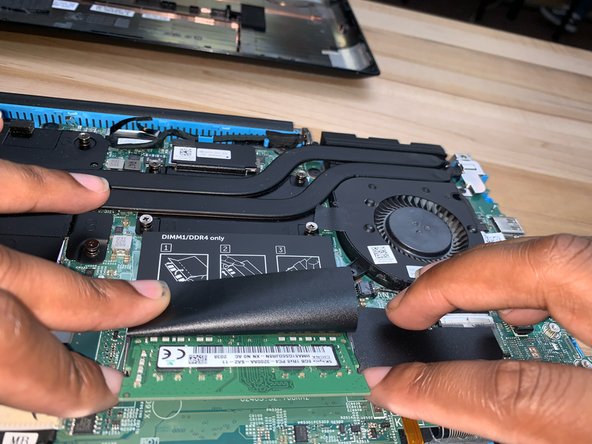
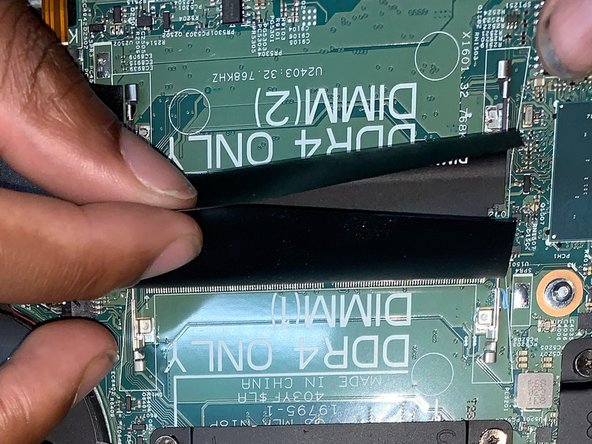
  9. Dell G3 3500 Disassembly, Remove the RAM modules: 手順 9、 3の画像 1 Dell G3 3500 Disassembly, Remove the RAM modules: 手順 9、 3の画像 2 Dell G3 3500 Disassembly, Remove the RAM modules: 手順 9、 3の画像 3
    • Locate the RAM modules.

    • Fold back the black protective cover and gently press the sides until each RAM module pops up.

    • Remove the modules from the board.

  10. Dell G3 3500 Disassembly, Remove the left fan: 手順 10、 3の画像 1 Dell G3 3500 Disassembly, Remove the left fan: 手順 10、 3の画像 2 Dell G3 3500 Disassembly, Remove the left fan: 手順 10、 3の画像 3
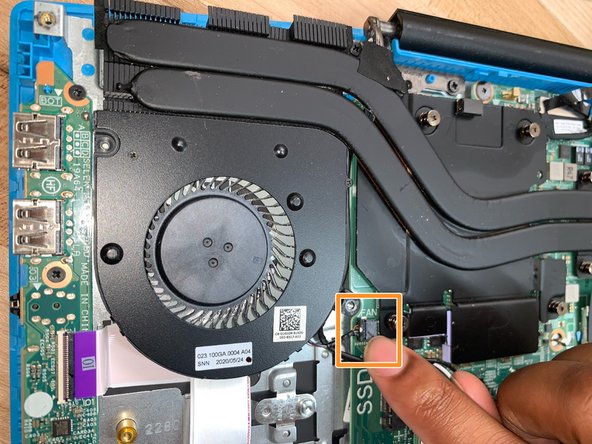
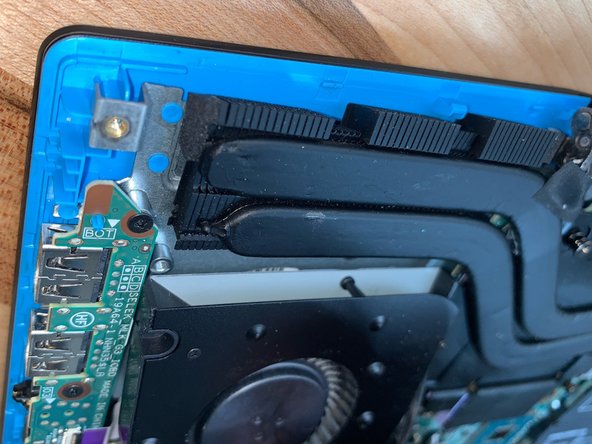
    • Locate the left fan and unscrew both #1 Philips head screws.

    • Unplug the left fan from the device and pull it away from the device.

  11. Dell G3 3500 Disassembly, Remove the right fan: 手順 11、 3の画像 1 Dell G3 3500 Disassembly, Remove the right fan: 手順 11、 3の画像 2 Dell G3 3500 Disassembly, Remove the right fan: 手順 11、 3の画像 3
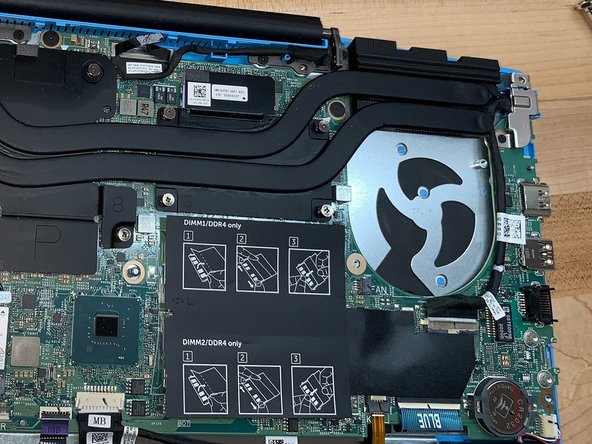
    • Locate the right fan and unscrew both #1 Philips head screws.

    • Unplug the right fan and pull away from the device.

  12. Dell G3 3500 Disassembly, Clean with a compressed air can: 手順 12、 3の画像 1 Dell G3 3500 Disassembly, Clean with a compressed air can: 手順 12、 3の画像 2 Dell G3 3500 Disassembly, Clean with a compressed air can: 手順 12、 3の画像 3
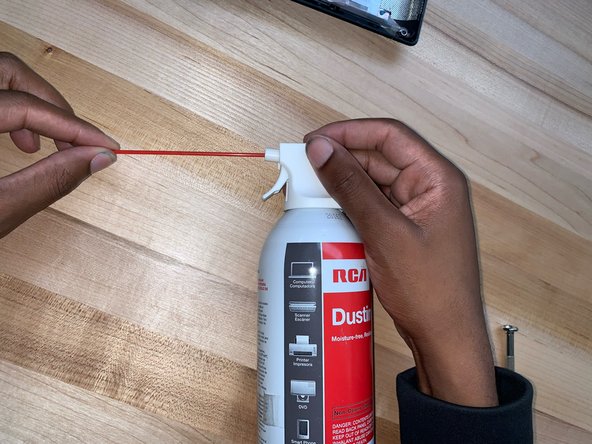
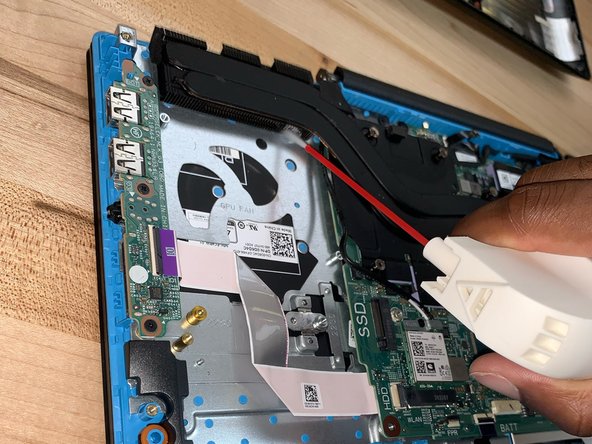
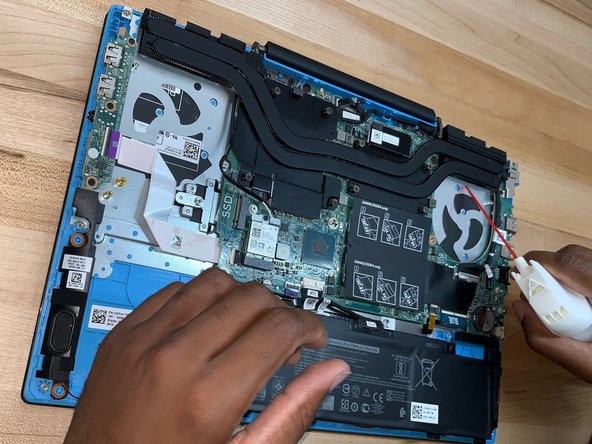
    • Attach the air straw to the compressed air can.

    • Begin gently cleaning areas of collected dust around fans and air intake vents.

    • Keep 6 inches away and do not use full pressure. Beware that the can may become very cold.

  13. Dell G3 3500 Disassembly: 手順 13、 2の画像 1 Dell G3 3500 Disassembly: 手順 13、 2の画像 2
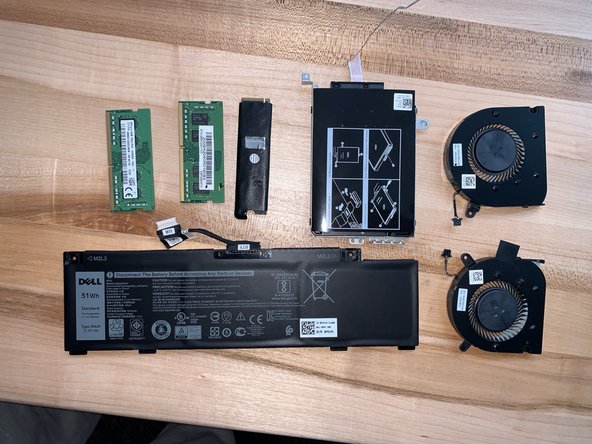
    • The computer is completely disassembled and cleaned. When reassembling, insert every piece carefully and correctly.

終わりに

To reassemble your device, follow these instructions in reverse order.

ある他の人がこのガイドを完成しました。

作成者

4人の作成者と共同で作成されました。

team fixit

メンバー登録日: 11/17/21

247 ポイント

1ガイドが承認済み

0 件のコメント

コメントを追加

統計データ:

過去 24時間: 1

過去 7 日: 39

過去 30 日: 161

今までの合計 4,088