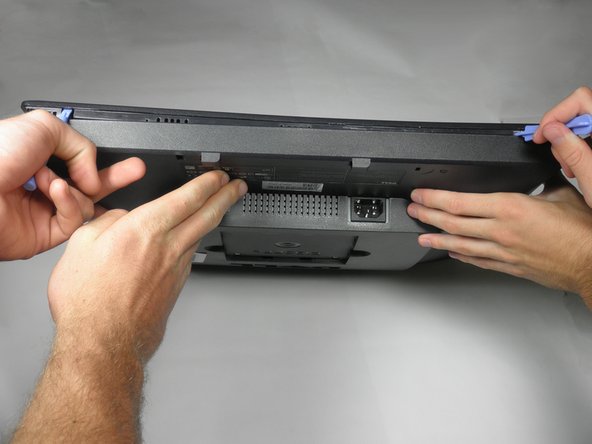
Locate the two holes on the bottom of the monitor.
Insert a plastic opening tool or spudger into the holes and gently pry the plastic apart along the groove.
This task is much easier if two people pry simultaneously at each hole.
Continue prying along the entire edge of the monitor.
When finished prying, the plastic will partially fall away from the rest of the monitor.
Do not try to fully remove the front frame yet. The frame is still attached to the buttons.
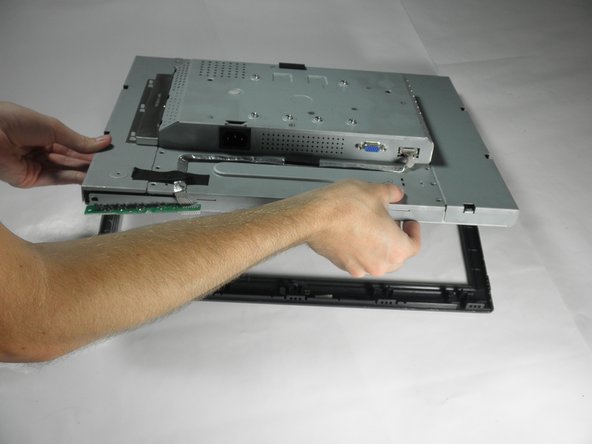
While holding the frames together, carefully flip the monitor over so it faces screen down.
Gently lift and remove remove the rear case from the monitor.
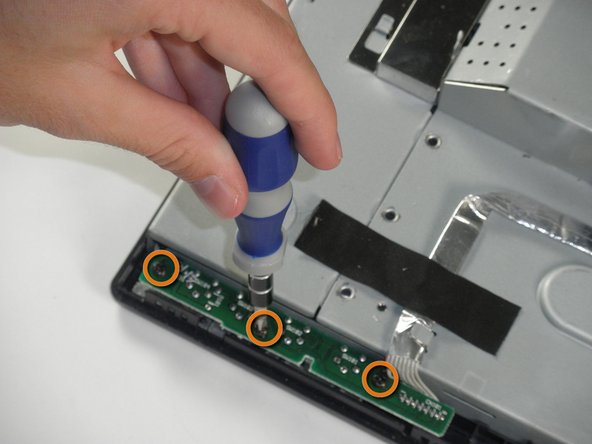
Locate the green interface button board.
Remove the three 9.71 mm Phillips #2 screws holding the interface button board to the display bezel.
Lift the monitor interior away from the front cover.
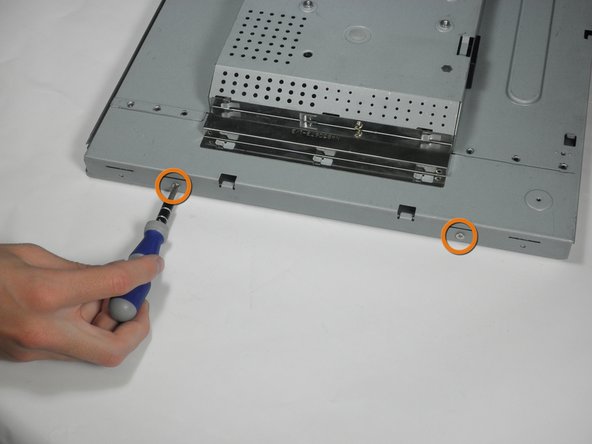
With the monitor facing down, remove the two 5.81 mm Phillips #2 screws on the right side of the metal casing.
With the monitor still facing down, remove the two 5.81 mm Phillips #2 screws on the left side of the casing.
Do attempt to pull apart the casing. There are still wires holding the front and back together.
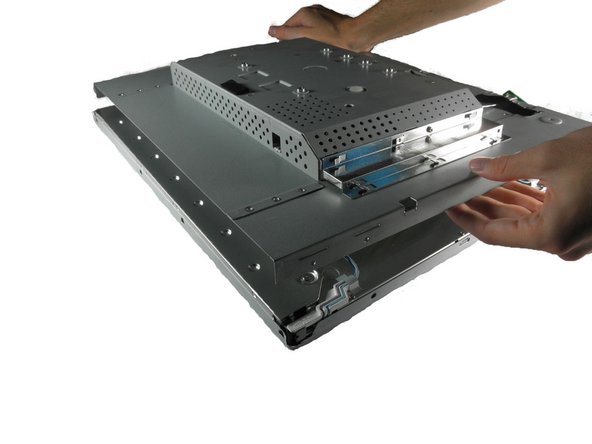
With the monitor facing down, gently lift the back case away from the rest of the monitor to expose the inverter board and mother board.
Recall that the casing is still held together by several wires. Do not attempt to fully remove the back casing.
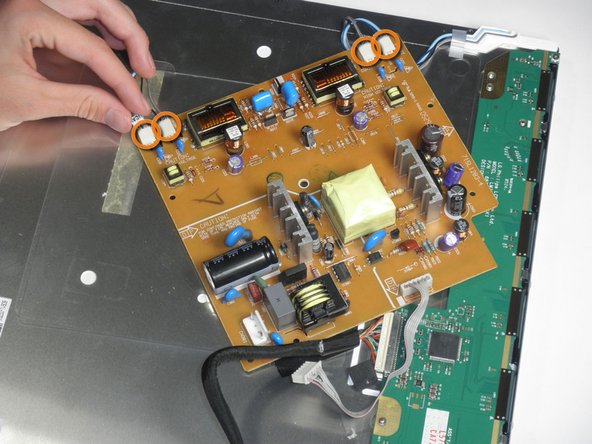
The inverter board is the smaller board in the corner.
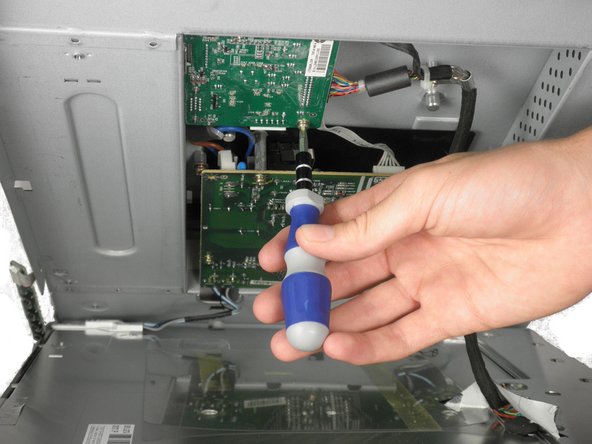
Remove the three 7.69 mm Phillips #2 screws from the inverter board.
Remove the two 7.69 mm Phillips #2 grounding screws from the wire with the black connector.
Gently pull the inverter board away from the case. Note that the board is still connected to several components by wires.
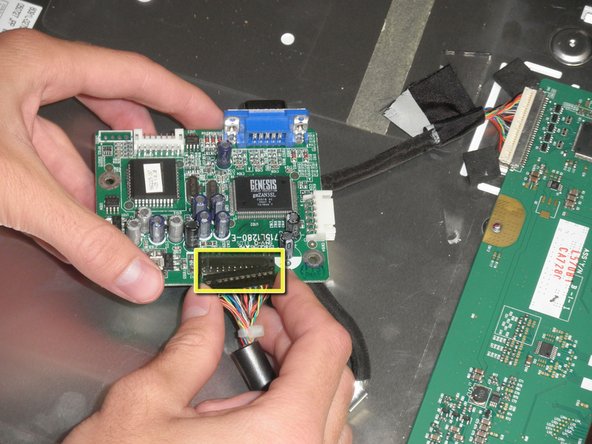
There is a wire connecting the motherboard to the inverter board. Squeeze both sides of the connector and pull to remove it from the socket.
There is another wire connecting the button board to the inverter board. Remove the second white wire connector.
A third wire connects the inverter board to the screen circuit board. Remove the black wire connector.
The inverter board can now be fully removed.
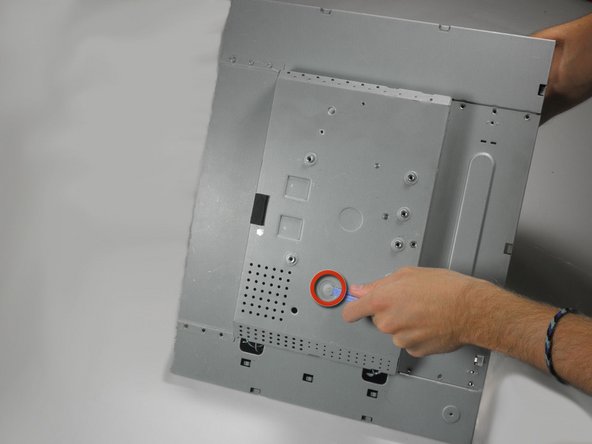
With the monitor facing down, remove the 5.84 mm Phillips #2 screw from the metal sheet.
You can now open the device up. Be careful, there are still wires attached to the motherboard.
With the monitor facing down, lift the back cover up and lay it face up, exposing the motherboard.
Remove the five 7.7 mm Phillips #2 screws from the motherboard.
この手順で使用する道具:
Tweezers
$4.99
購入する
Squeeze the plastic prong in the middle of the motherboard with a metal tweezer, while gently prying the other side with the plastic prying tool.
Be careful when using the metal tweezers . Make sure you do not make contact with any part that contains metal, for it may still have a charge. Discharge all capacitors.
This is easiest when the monitor is positioned such that motherboard is beneath the metal casing.
Remove the connector to the power outlet from the motherboard.
Remove the 4 connectors to the metal casing from the motherboard.
The motherboard can now be fully removed from the casing.
このガイドを埋め込む
サイズを選択し、以下のコードをコピーして、このガイドを小さなウィジェットとしてサイト/フォーラムに埋め込みます。
1つの手順
全ガイド
小サイズ - 600px
中サイズ - 800px
大サイズ - 1200px
プレビュー