メインコンテンツにスキップ

この修理ガイドは変更されています。最新の未承認バージョンに切り替えます。

Dell Dimension 4600 Optical Drive Replacement

必要な工具と部品

  1. Dell Dimension 4600 Optical Drive Replacement, Side Panel: 手順 1、 1の画像 1
    • Locate the case cover latch on the back of the computer.

  2. Dell Dimension 4600 Optical Drive Replacement: 手順 2、 1の画像 1
    • Using your index finger, slide and hold the cover latch down.

    • While holding the latch down, place your other hand flat on the side of the case and firmly shift the side panel to the left until it disengages.

  3. Dell Dimension 4600 Optical Drive Replacement: 手順 3、 1の画像 1
    • Grab the edge of the panel and slide it away from the case until it is removed.

  4. Dell Dimension 4600 Optical Drive Replacement, Optical Drive: 手順 4、 1の画像 1
    • Locate the Optical Drive by finding it externally on the case.

  5. Dell Dimension 4600 Optical Drive Replacement: 手順 5、 2の画像 1 Dell Dimension 4600 Optical Drive Replacement: 手順 5、 2の画像 2
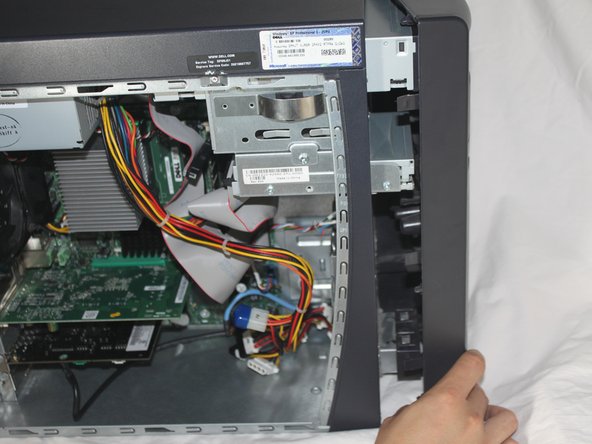
    • Press and hold the two levers located behind the front panel.

    • While holding the levers down, swing open the front panel.

  6. Dell Dimension 4600 Optical Drive Replacement: 手順 6、 1の画像 1
    • Swing the front of the case open until it separates from the main case.

  7. Dell Dimension 4600 Optical Drive Replacement: 手順 7、 3の画像 1 Dell Dimension 4600 Optical Drive Replacement: 手順 7、 3の画像 2 Dell Dimension 4600 Optical Drive Replacement: 手順 7、 3の画像 3
    • Lay the computer flat on it's side so that you are looking down on all of the components.

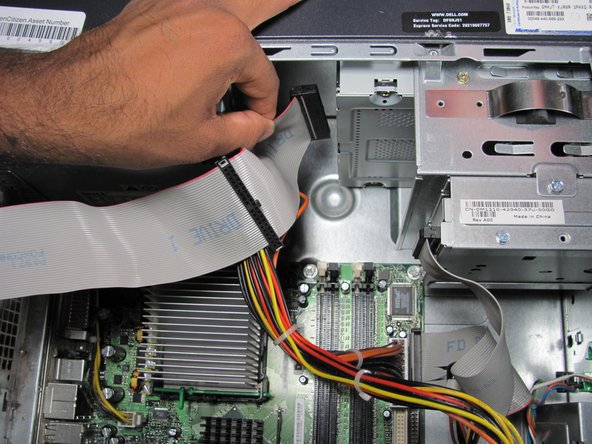
    • Locate the Drive 1 cable and where it is connected to the motherboard.

  8. Dell Dimension 4600 Optical Drive Replacement: 手順 8、 1の画像 1
    • Grasp the end of the Drive 1 cable connected to the motherboard and firmly pull upwards until it is removed.

  9. Dell Dimension 4600 Optical Drive Replacement: 手順 9、 2の画像 1 Dell Dimension 4600 Optical Drive Replacement: 手順 9、 2の画像 2
    • Locate the end of the Drive 1 cable connected to the optical drive.

    • Grasp the cable and pull firmly to disconnect it from the optical drive.

  10. Dell Dimension 4600 Optical Drive Replacement: 手順 10、 2の画像 1 Dell Dimension 4600 Optical Drive Replacement: 手順 10、 2の画像 2
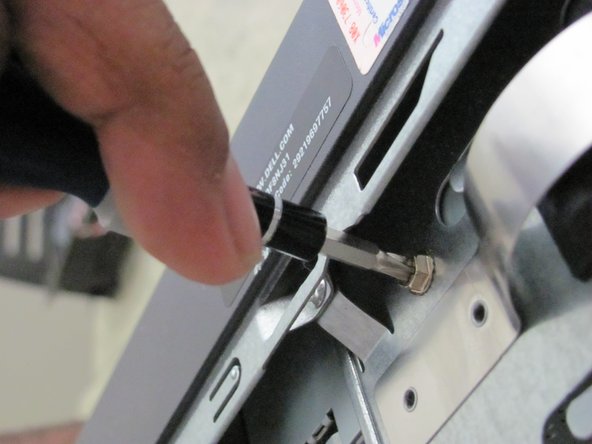
    • Locate the screw on the optical drive.

    • Remove the 7.7 mm screw by using a Phillips #2 screw-driver.

  11. Dell Dimension 4600 Optical Drive Replacement: 手順 11、 1の画像 1
    • Remove the optical drive by sliding it out of the front of the case.

終わりに

To reassemble your device, follow these instructions in reverse order.

13 の人々がこのガイドを完成させました。

作成者

9人の作成者と共同で作成されました。

Eugene

メンバー登録日: 10/12/11

216 ポイント

1ガイドが承認済み

チーム

Cal Poly, Team 6-10, Regan Fall 2011 Cal Poly, Team 6-10, Regan Fall 2011人のメンバー

CPSU-REGAN-F11S6G10

4 メンバー

11のガイドは作成済み

0 件のコメント

コメントを追加

統計データ:

過去 24時間: 0

過去 7 日: 2

過去 30 日: 4

今までの合計 6,624