メインコンテンツにスキップ

Dell DJ Front Panel Buttons Replacement

必要な工具と部品

  1. Dell DJ Front Panel Buttons Replacement, Front Panel Buttons: 手順 1、 3の画像 1 Dell DJ Front Panel Buttons Replacement, Front Panel Buttons: 手順 1、 3の画像 2 Dell DJ Front Panel Buttons Replacement, Front Panel Buttons: 手順 1、 3の画像 3
    • Disassemble the device. See the disassembly guide for further directions. Slide the internal circuit board out of the protective device shell.

    • Use the metal spudger to remove the device's center toggle button.

    • Inspect contacts on the device. Also, inspect the device buttons (front and back) for damage. Damage may include broken or missing prongs that will interrupt the devices circuit.

  2. Dell DJ Front Panel Buttons Replacement: 手順 2、 3の画像 1 Dell DJ Front Panel Buttons Replacement: 手順 2、 3の画像 2 Dell DJ Front Panel Buttons Replacement: 手順 2、 3の画像 3
    • Inspect and clean device buttons with appropriate materials.

    • Wipe down the circuit board and the buttons with a disposable wipe. Then, use a cotton swab to remove dirt and grime in the crevices of the device.

    • Disposable wipes designed for cleaning devices are most appropriate for cleaning device circuit board. Other appropriate materials include: water dampened cotton cloth, microfiber cloth, cotton swabs, and disposable wipes made for electronic devices.

  3. Dell DJ Front Panel Buttons Replacement: 手順 3、 2の画像 1 Dell DJ Front Panel Buttons Replacement: 手順 3、 2の画像 2
    • Inspect the shell of the device before placing the button pad and center toggle back into the device.

    • Look for cracks in the device's shell and identify whether the device shell is obstructing the button connection.

    • Clean the shell thoroughly using a cotton swab into the creases of the the device shell. Use a water dampened cloth to wipe down the device shell inside and out.

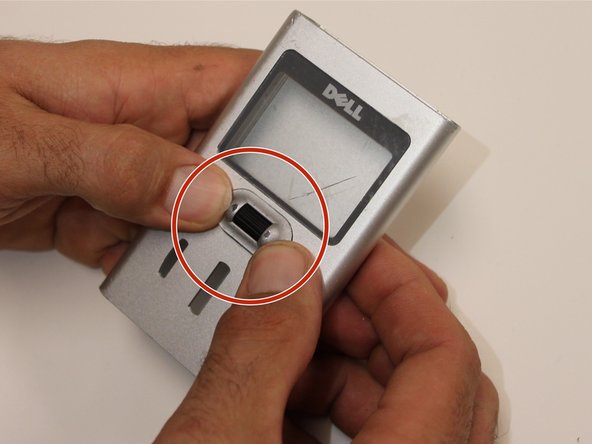
    • The center toggle (circled in red) button snaps into place. Be sure the center button is placed in correctly.

  4. Dell DJ Front Panel Buttons Replacement: 手順 4、 1の画像 1
    • After the device is assembled, power the device on. The issue with the unresposnive/sticky buttons should be repaired.

    • If the device buttons are still defective, an issue greater than the device button connection is the cause.

終わりに

To reassemble your device, follow these instructions in reverse order.

作成者

3人の作成者と共同で作成されました。

Brittany Abate

メンバー登録日: 01/03/16

407 ポイント

4のガイドは作成済み

チーム

USF Sarasota-Manatee, Team 1-1, Stewart Spring 2016 USF Sarasota-Manatee, Team 1-1, Stewart Spring 2016人のメンバー

USFSM-STEWART-S16S1G1

3 メンバー

5のガイドは作成済み

0 件のコメント

コメントを追加

統計データ:

過去 24時間: 0

過去 7 日: 1

過去 30 日: 3

今までの合計 245