はじめに
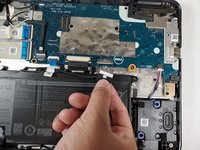
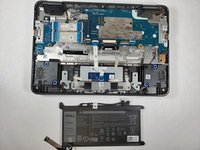
If your Dell Chromebook 3100 2-in-1 has lost its ability to hold a charge, you most likely have a dead battery, which requires replacement. A functional battery provides power to your Chromebook. Eventually, Chromebook batteries will rapidly drain after going through a repeated amount of charge cycles. If you notice that your charged battery is draining more quickly than usual, you should replace your battery.
Caution:
- Exercise caution when handling Lithium-ion batteries.
- Do not crush, drop, mutilate, or penetrate the battery with foreign objects.
- Do not apply pressure to the surface of the battery .
- Do not use tools of any kind to pry on or against the battery.
- If a battery gets stuck in a device as a result of swelling, do not try to free it as puncturing, bending, or crushing a Lithium-ion battery can be dangerous.
必要な工具と部品
-
-
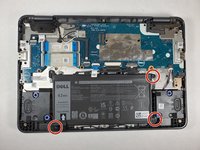
Using a Phillips #1 screwdriver, remove all nine of the 5 mm screws from the back cover.
-
-


To reassemble your device, follow these instructions in reverse order.
To reassemble your device, follow these instructions in reverse order.
2 の人々がこのガイドを完成させました。
チーム

Gateway, Team 1-1, Pee Fall 2021 Gateway, Team 1-1, Pee Fall 2021人のメンバー
GCC-PEE-F21S1G1
5 メンバー
5のガイドは作成済み