メインコンテンツにスキップ

このバージョンは誤った内容を含んでいる可能性があります。最新の承認済みスナップショットに切り替えてください。

必要な工具と部品

  1. この手順は未翻訳です。 翻訳を手伝う。

    : 手順 1、 1の画像 1
    • Set your laptop upside down on your work space.

  2. この手順は未翻訳です。 翻訳を手伝う。

    : 手順 2、 1の画像 1
    • Using tweezers, remove the circular stickers that are covering the two screws near the middle of the back cover. Stick them to the laptop next to the screws.

  3. この手順は未翻訳です。 翻訳を手伝う。

    : 手順 3、 1の画像 1
    • Using a Phillips #0 screwdriver, loosen all seven 2.5mm screws on the back cover of the device.

    • These screws will stay attached to the back cover, so just loosen them until they rattle around.

  4. この手順は未翻訳です。 翻訳を手伝う。

    : 手順 4、 1の画像 1
    • Using a plastic opening tool, begin to separate the back cover from the body of the computer.

    • If you have trouble prying a particular part of the back cover off, make sure that the nearest screws are fully loosened.

  5. この手順は未翻訳です。 翻訳を手伝う。

    : 手順 5、 1の画像 1
    • Using your hands, pull the back cover fully off of the body of the computer.

  6. この手順は未翻訳です。 翻訳を手伝う。

    : 手順 6、 3の画像 1 : 手順 6、 3の画像 2 : 手順 6、 3の画像 3
    • Using a Phillips #0 screwdriver, remove each of the five 5.5mm screws.

  7. この手順は未翻訳です。 翻訳を手伝う。

    : 手順 7、 2の画像 1 : 手順 7、 2の画像 2
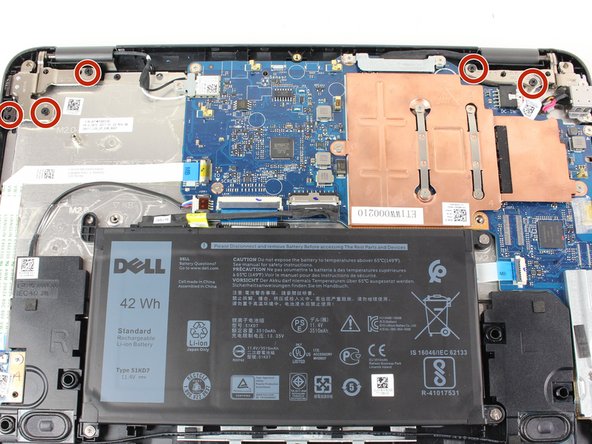
    • Using a Phillips #0 screwdriver, remove the single 3mm Phillips head screw holding down the small metal bracket that covers where the small black and white wires connect to the motherboard.

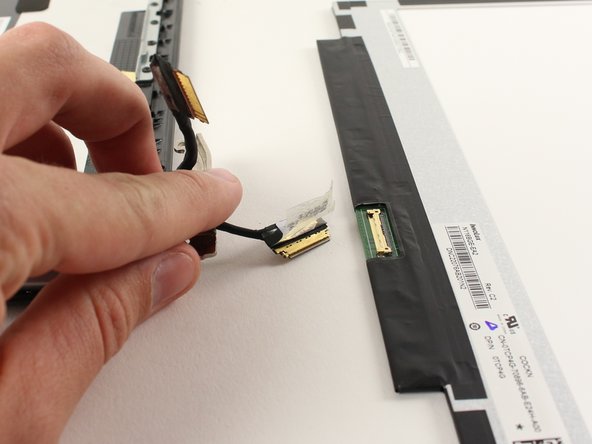
    • Once this screw has been removed. Unplug these two wires by gently puling them up and away from the motherboard. Hold the wire as close to the end as possible.

  8. この手順は未翻訳です。 翻訳を手伝う。

    : 手順 8、 1の画像 1
    • Using a Phillips #0 screwdriver, remove the two 3mm Phillips head screws from the metal bracket that covers where the wrapped cable from the screen attaches to the motherboard.

  9. この手順は未翻訳です。 翻訳を手伝う。

    : 手順 9、 2の画像 1 : 手順 9、 2の画像 2
    • Remove the screen connector cable. To do this, gently lift up on the black tab where the cable plugs into the motherboard.

    • Once you have lifted the tab, gently pull the cable horizontally away from the motherboard connector to unplug it.

  10. この手順は未翻訳です。 翻訳を手伝う。

    : 手順 10、 3の画像 1 : 手順 10、 3の画像 2 : 手順 10、 3の画像 3
    • Using a plastic opening tool, remove the plastic hinge covers by inserting the tool into the gap and prying away from the computer.

    • You should now be able to separate the screen assembly from the rest of the laptop.

  11. この手順は未翻訳です。 翻訳を手伝う。

    : 手順 11、 1の画像 1
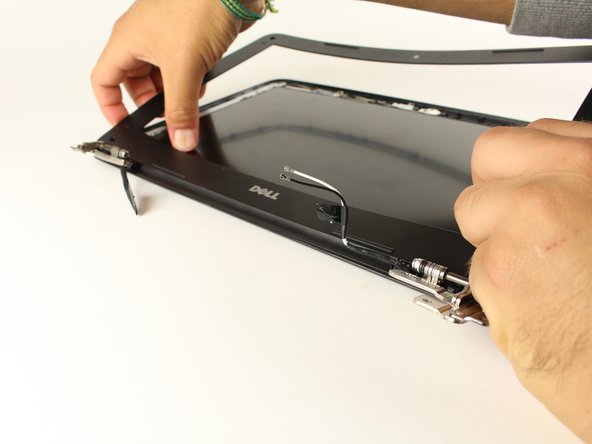
    • Once it's separated from the rest of the computer, place the screen assembly face up on your work space.

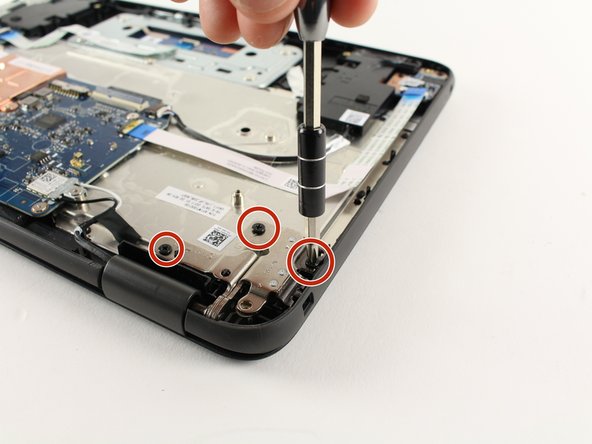
    • Using tweezers, remove all four stickers covering screws on the front. Stick these to the computer, a few inches from the screw holes.

    • Using a Phillips #0 screwdriver, remove all four 3.5mm Phillips head screws from the front of the display assembly.

  12. この手順は未翻訳です。 翻訳を手伝う。

    : 手順 12、 3の画像 1 : 手順 12、 3の画像 2 : 手順 12、 3の画像 3
    • Using a plastic opening tool to start, and then eventually your hands, pry the front most face of plastic off of the screen assembly.

  13. この手順は未翻訳です。 翻訳を手伝う。

    : 手順 13、 1の画像 1
    • Using a Phillips #0 screwdriver, remove all four silver 3mm Phillips head screws that hold the screen tabs to the bracket.

  14. この手順は未翻訳です。 翻訳を手伝う。

    : 手順 14、 1の画像 1
    • Lift the screen itself away from the rest of the assembly. Place it face down next to the rest of the assembly.

    • There will still be cables attached between the screen and the rest of the assembly. Make sure not to tug on them as this may cause damage.

  15. この手順は未翻訳です。 翻訳を手伝う。

    : 手順 15、 2の画像 1 : 手順 15、 2の画像 2
    • To unplug the screen, use tweezers to lift the small metal wire on the connector, and then gently pull the cable away from the screen.

ゴール

6 の人々がこのガイドを完成させました。

作成者

7人の作成者と共同で作成されました。

Devon Paul

メンバー登録日: 04/26/17

1,206 ポイント

6のガイドは作成済み

チーム

Cal Poly, Team S22-G1, Livingston Spring 2017 Cal Poly, Team S22-G1, Livingston Spring 2017人のメンバー

CPSU-LIVINGSTON-S17S22G1

4 メンバー

8のガイドは作成済み

コメント 1 件

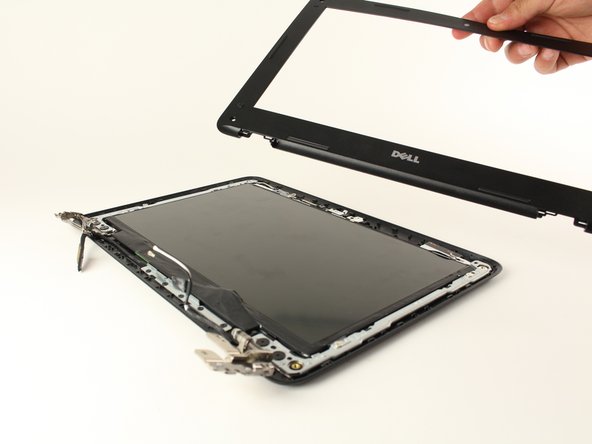
You don’t have to disconnect the display from the main body. Just be careful cause the plastic lcd bezel has strong adhesive and it is easy to crack the plastic bezel when separating it from the LCD panel.

Rick Jennings - 返信

コメントを追加

統計データ:

過去 24時間: 0

過去 7 日: 5

過去 30 日: 15

今までの合計 6,843