メインコンテンツにスキップ

Dell Alienware M11x R3 2.5" Hard Drive Replacement

必要な工具と部品

  1. Dell Alienware M11x R3  2.5" Hard Drive Replacement, Lower Case: 手順 1、 3の画像 1 Dell Alienware M11x R3  2.5" Hard Drive Replacement, Lower Case: 手順 1、 3の画像 2 Dell Alienware M11x R3  2.5" Hard Drive Replacement, Lower Case: 手順 1、 3の画像 3
    • Loosen the eight retaining screws on the base of the computer with a small Phillips screwdriver.

    • The screws have retaining washers to hold them in place, so you don't have to remove them from the base plate.

    • Remove the bottom cover from the laptop.

  2. Dell Alienware M11x R3  2.5" Hard Drive Replacement, Hard Drive: 手順 2、 1の画像 1
    • Remove the three screws attaching the hard drive tray to the laptop.

  3. Dell Alienware M11x R3  2.5" Hard Drive Replacement: 手順 3、 1の画像 1
    • Grasp the plastic tab provided, and gently pull up. This will unplug the drive from the laptop.

  4. Dell Alienware M11x R3  2.5" Hard Drive Replacement: 手順 4、 2の画像 1 Dell Alienware M11x R3  2.5" Hard Drive Replacement: 手順 4、 2の画像 2
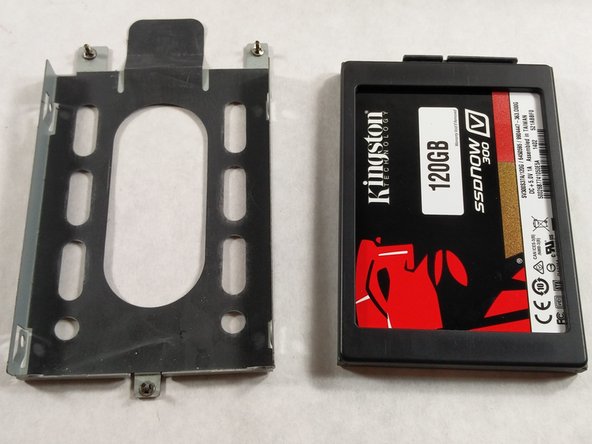
    • On both sides of the cage, there are two screws you have to unscrew to be able to remove the SSD.

  5. Dell Alienware M11x R3  2.5" Hard Drive Replacement: 手順 5、 2の画像 1 Dell Alienware M11x R3  2.5" Hard Drive Replacement: 手順 5、 2の画像 2
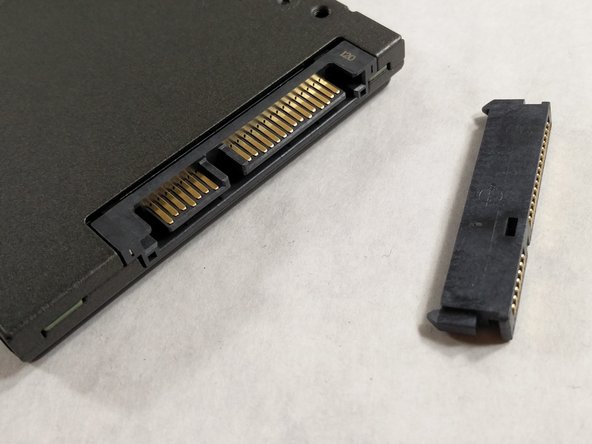
    • Finally, remove the L connector for the hard drive. You will need to put this on your new hard drive.

    • Make sure that the SSD you bought to replace this one has the same connections. I.e. able to connect to a SATA cord.

終わりに

To reassemble your device, follow these instructions in reverse order.

ある他の人がこのガイドを完成しました。

作成者

12人の作成者と共同で作成されました。

Richard Maurice

メンバー登録日: 03/08/17

534 ポイント

6のガイドは作成済み

チーム

UMass Dartmouth, Team S3-G7, Botvin Spring 2017 UMass Dartmouth, Team S3-G7, Botvin Spring 2017人のメンバー

UMASSD-BOTVIN-S17S3G7

3 メンバー

6のガイドは作成済み

0 件のコメント

コメントを追加

統計データ:

過去 24時間: 0

過去 7 日: 4

過去 30 日: 9

今までの合計 1,529