メインコンテンツにスキップ

Dell Alienware 13 Base Panel Replacement

必要な工具と部品

  1. Dell Alienware 13 Base Panel Replacement, Base Panel: 手順 1、 1の画像 1
    • Working on an electrical device while plugged in can cause injury due to electrical shock. Ensure that all external power is disconnected from the device.

    • Close the device and turn the device over.

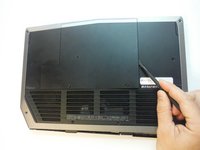
  2. Dell Alienware 13 Base Panel Replacement: 手順 2、 1の画像 1
    • Remove (2) 5 mm Phillips head screws attaching the small access panel to the base using a Phillips # 1 screwdriver.

    • The (2) screws are attached to the base panel with retaining clips and won't completely detach from the panel.

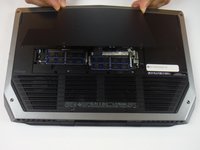
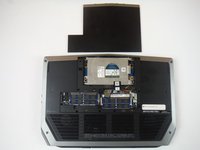
  3. Dell Alienware 13 Base Panel Replacement: 手順 3、 3の画像 1 Dell Alienware 13 Base Panel Replacement: 手順 3、 3の画像 2 Dell Alienware 13 Base Panel Replacement: 手順 3、 3の画像 3
    • Remove the small access panel using a heavy duty spudger.

終わりに

To reassemble your device, follow these instructions in reverse order.

2 の人々がこのガイドを完成させました。

作成者

3人の作成者と共同で作成されました。

Adam Russell

メンバー登録日: 09/26/16

898 ポイント

6のガイドは作成済み

チーム

USF Tampa, Team 14-2, Eyestone Fall 2016 USF Tampa, Team 14-2, Eyestone Fall 2016人のメンバー

USFT-EYESTONE-F16S14G2

3 メンバー

7のガイドは作成済み

0 件のコメント

コメントを追加

統計データ:

過去 24時間: 0

過去 7 日: 0

過去 30 日: 2

今までの合計 524