メインコンテンツにスキップ

DeWalt DWE4011 Power Switch Replacement

必要な工具と部品

  1. DeWalt DWE4011 Power Switch Replacement, Power Switch: 手順 1、 1の画像 1
    • Turn to the bottom of the device and remove the 1 1/4" screw shown using a T15 Torx Screwdriver.

  2. DeWalt DWE4011 Power Switch Replacement: 手順 2、 1の画像 1
    • Remove the outer casing by pulling the end handle away from the field case.

  3. DeWalt DWE4011 Power Switch Replacement: 手順 3、 1の画像 1
    • Unscrew the pin that is holding the main power cord in place and remove the cord.

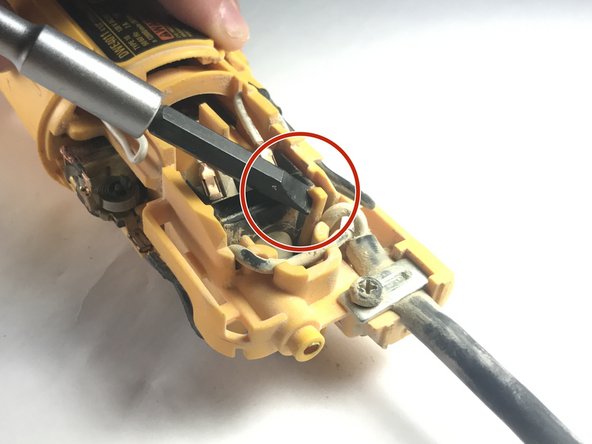
  4. DeWalt DWE4011 Power Switch Replacement: 手順 4、 2の画像 1 DeWalt DWE4011 Power Switch Replacement: 手順 4、 2の画像 2
    • Pull back the tab holding the switch box in place using a nylon spudger. There is one on top and bottom shown in the image.

  5. DeWalt DWE4011 Power Switch Replacement: 手順 5、 1の画像 1
    • Remove the switch box entirely from its normal position. Gently pull off the connections from the switch box to the motor.

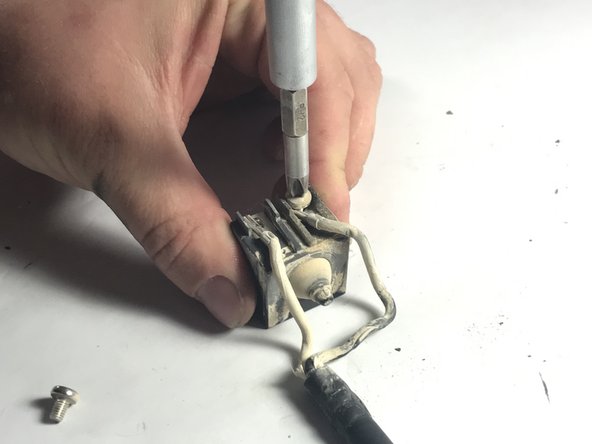
  6. DeWalt DWE4011 Power Switch Replacement: 手順 6、 2の画像 1 DeWalt DWE4011 Power Switch Replacement: 手順 6、 2の画像 2
    • Using a small Phillips head screwdriver, remove the screws that hold the white colored wires from the power cord in place.

終わりに

To reassemble your device, follow these instructions in reverse order.

ある他の人がこのガイドを完成しました。

作成者

2人の作成者と共同で作成されました。

Kory Dalesky

メンバー登録日: 04/04/19

339 ポイント

2のガイドは作成済み

チーム

0 件のコメント

コメントを追加

統計データ:

過去 24時間: 2

過去 7 日: 5

過去 30 日: 29

今までの合計 1,123