メインコンテンツにスキップ

DeWalt DW938 Brush Head Replacement

必要な工具と部品

  1. DeWalt DW938 Brush Head Replacement, Clam Shell: 手順 1、 3の画像 1 DeWalt DW938 Brush Head Replacement, Clam Shell: 手順 1、 3の画像 2 DeWalt DW938 Brush Head Replacement, Clam Shell: 手順 1、 3の画像 3
    • Use a torque bit screw driver to remove the T10 18.3 mm screw on the handle.

    • Use a torque bit screw driver to remove 6 T10 21.5 mm screws on the handle.

    • Insure power source is removed from tool.

    • Insure blade is removed from tool.

  2. DeWalt DW938 Brush Head Replacement: 手順 2、 1の画像 1
    • Carefully cut the safety sticker with a blade along the seam.

  3. DeWalt DW938 Brush Head Replacement: 手順 3、 1の画像 1
    • Remove the Clam Shell from the handle unit.

  4. DeWalt DW938 Brush Head Replacement, Switch VSR: 手順 4、 1の画像 1
    • Lift the mechanical device off the pins of the clam shell.

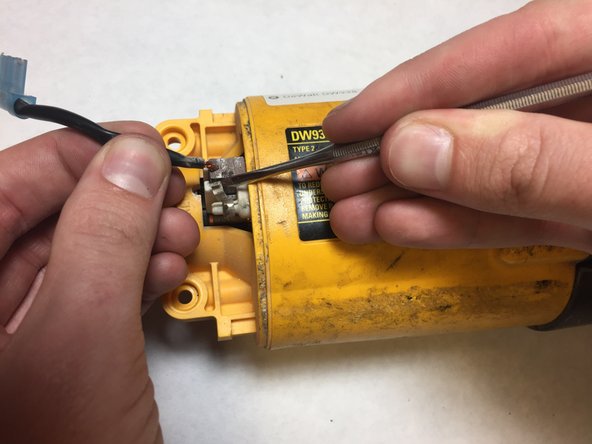
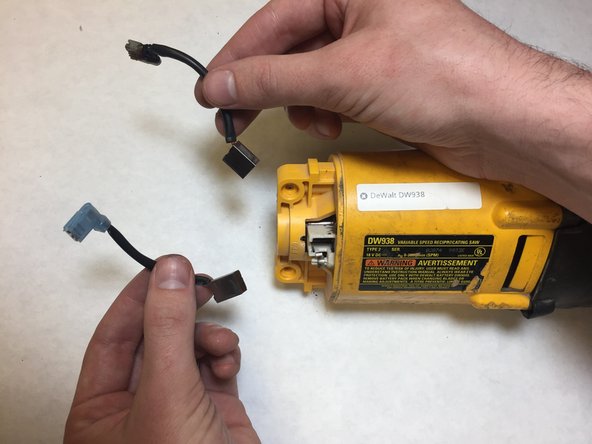
  5. DeWalt DW938 Brush Head Replacement: 手順 5、 2の画像 1 DeWalt DW938 Brush Head Replacement: 手順 5、 2の画像 2
    • Remove the red and black trigger wires from the brush leads with the pliers.

  6. DeWalt DW938 Brush Head Replacement: 手順 6、 2の画像 1 DeWalt DW938 Brush Head Replacement: 手順 6、 2の画像 2
    • Remove the VSR trigger and the lock button.

  7. DeWalt DW938 Brush Head Replacement, Brush Head: 手順 7、 3の画像 1 DeWalt DW938 Brush Head Replacement, Brush Head: 手順 7、 3の画像 2 DeWalt DW938 Brush Head Replacement, Brush Head: 手順 7、 3の画像 3
    • Push in locking clips to remove the brush head.

    • Repeat for the other brush.

終わりに

To reassemble your device, follow these instructions in reverse order.

ある他の人がこのガイドを完成しました。

作成者

2人の作成者と共同で作成されました。

Christopher Chin

メンバー登録日: 03/08/17

316 ポイント

3のガイドは作成済み

チーム

IUPUI, Team S4-G4, Baechle Spring 2017 IUPUI, Team S4-G4, Baechle Spring 2017人のメンバー

IUPUI-BAECHLE-S17S4G4

4 メンバー

3のガイドは作成済み

0 件のコメント

コメントを追加

統計データ:

過去 24時間: 0

過去 7 日: 3

過去 30 日: 11

今までの合計 1,195