メインコンテンツにスキップ

DeWalt DW920 Lock Switch Replacement

必要な工具と部品

  1. DeWalt DW920 Lock Switch Replacement, Disassembly: 手順 1、 1の画像 1
    • Using an H-5.0 bit driver remove the four T-10 Torx screws.

  2. DeWalt DW920 Lock Switch Replacement: 手順 2、 1の画像 1
    • Use 2 H-5.0 bit drivers to take out the main bolt and head.

    • There will be blue locktite on the tread.

  3. DeWalt DW920 Lock Switch Replacement: 手順 3、 1の画像 1
    • Carefully remove the two halves of the handle.

  4. DeWalt DW920 Lock Switch Replacement, Lock Switch: 手順 4、 1の画像 1
    • Locate the switch on the top of the drill right before the bending joint.

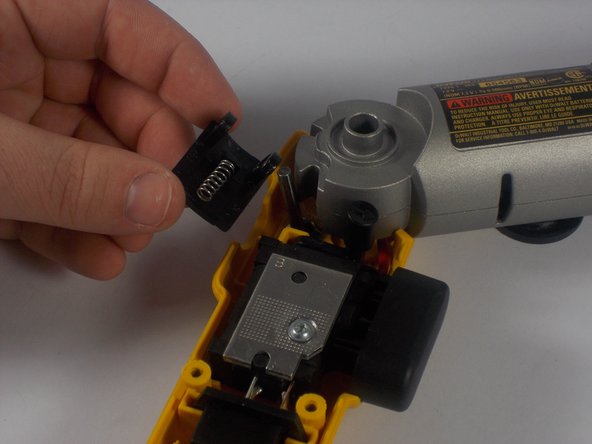
  5. DeWalt DW920 Lock Switch Replacement: 手順 5、 2の画像 1 DeWalt DW920 Lock Switch Replacement: 手順 5、 2の画像 2
    • Firmly grasp the switch with two fingers and lift it straight up. The spring should remain attached to the switch during this process.

    • It should lift right out. If it is caught on anything do not force it out.

終わりに

To reassemble your device, follow these instructions in reverse order.

作成者

2人の作成者と共同で作成されました。

Stephen Rada

メンバー登録日: 03/11/16

433 ポイント

4のガイドは作成済み

チーム

UMass Dartmouth, Team 8-2, Botvin Spring 2016 UMass Dartmouth, Team 8-2, Botvin Spring 2016人のメンバー

UMASSD-BOTVIN-S16S8G2

2 メンバー

6のガイドは作成済み

コメント 1 件

This guide was descriptive and easy to follow. Good job!

DankMemerino - 返信

コメントを追加

統計データ:

過去 24時間: 0

過去 7 日: 3

過去 30 日: 9

今までの合計 268