メインコンテンツにスキップ

DeLonghi ETAM series upper brewing piston replacement

必要な工具と部品

  1. DeLonghi ETAM series upper brewing piston replacement, DeLonghi ETAM Opening side panels: 手順 1、 2の画像 1 DeLonghi ETAM series upper brewing piston replacement, DeLonghi ETAM Opening side panels: 手順 1、 2の画像 2
    • Disconnect the power plug and remove the power cord from the device.

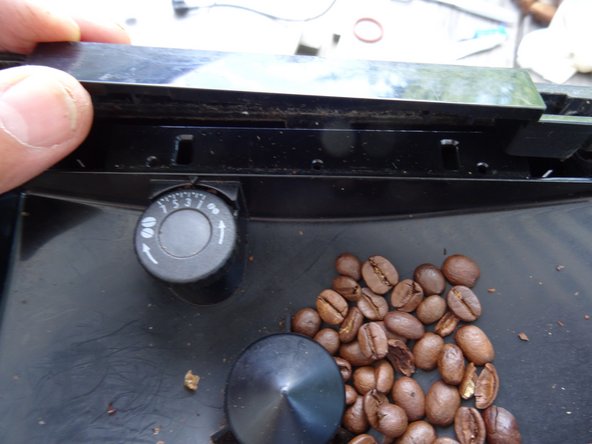
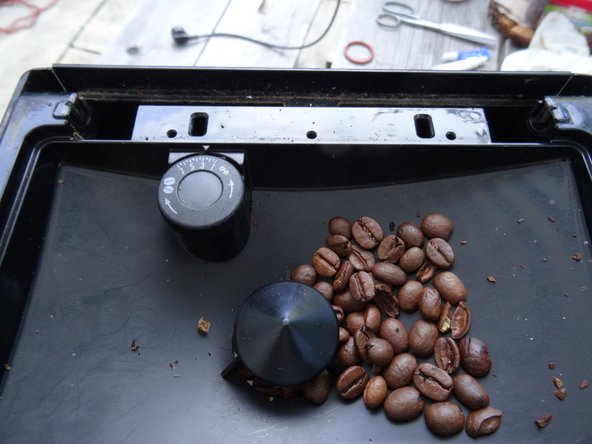
    • Remove all coffee beans. Remove all attachments such as drip tray, milk frother and water tank. Open the service door and remove the brew group.

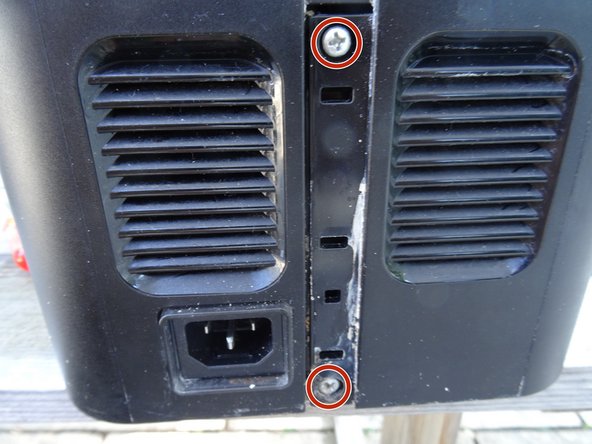
    • Unscrew the two Phillips screws

    • The Phillips screw under the water tank can remain.

  2. DeLonghi ETAM series upper brewing piston replacement: 手順 2、 2の画像 1 DeLonghi ETAM series upper brewing piston replacement: 手順 2、 2の画像 2
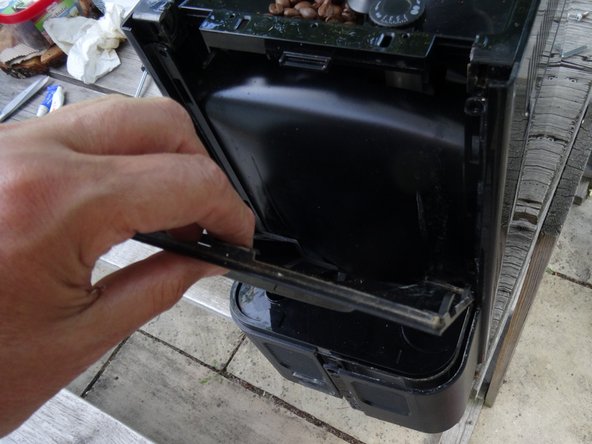
    • The bean compartment flap must be removed. It is latched on the left and right, the latch is held under tension by a spring. Compress the spring until the catch is free and lift off the flap.

  3. DeLonghi ETAM series upper brewing piston replacement: 手順 3、 3の画像 1 DeLonghi ETAM series upper brewing piston replacement: 手順 3、 3の画像 2 DeLonghi ETAM series upper brewing piston replacement: 手順 3、 3の画像 3
    • There is a plastic cover strip under the flap. It is only latched in place. Release it with a flat tool and lift it out.

  4. DeLonghi ETAM series upper brewing piston replacement: 手順 4、 2の画像 1 DeLonghi ETAM series upper brewing piston replacement: 手順 4、 2の画像 2
    • Lift the back side up and put it aside.

  5. DeLonghi ETAM series upper brewing piston replacement: 手順 5、 2の画像 1 DeLonghi ETAM series upper brewing piston replacement: 手順 5、 2の画像 2
    • The side covers are still attached to the back with two screws. They are located under a cover strip that is only snapped in place. Take off the cover strip and put it aside.

    • Unscrew the two Phillips screws.

  6. DeLonghi ETAM series upper brewing piston replacement: 手順 6、 2の画像 1 DeLonghi ETAM series upper brewing piston replacement: 手順 6、 2の画像 2
    • Push the left side panel back about 1 cm. It often jams strongly and you have to help it with a plastic opening tool.

    • Remove the left side panel.

  7. DeLonghi ETAM series upper brewing piston replacement: 手順 7、 1の画像 1
    • The right side panel is removed in the same way, but the service hatch is a bit obstructive. Open it first and push the side panel back a few millimeters. This is often difficult and you will need a plastic lever tool.

    • Close the flap again and push the sides further back. It is a bit tricky and you have to work carefully. Lift out the side panel.

  8. DeLonghi ETAM series upper brewing piston replacement, DeLonghi ETAM series top removal: 手順 8、 2の画像 1 DeLonghi ETAM series upper brewing piston replacement, DeLonghi ETAM series top removal: 手順 8、 2の画像 2
    • Some devices have a warming plate. Disconnect the flat plugs on the green/yellow protective earth conductors.

    • When reassembling, don't forget to put them back on.

  9. DeLonghi ETAM series upper brewing piston replacement: 手順 9、 2の画像 1 DeLonghi ETAM series upper brewing piston replacement: 手順 9、 2の画像 2
    • The top is fixed with screws on the left and right, depending on the type. Unscrew them.

    • Now the top can be gently lifted off.

    • Depending on the type, it is shaped differently. Some have the control panel far to the rear. Leave it for now, it is connected with cables.

  10. DeLonghi ETAM series upper brewing piston replacement, DeLonghi ETAM series control panel removal: 手順 10、 1の画像 1
    • The control panel is locked very tightly with four catches on the front. It is tricky to release these latches and you need quite a lot of force.

    • First loosen the detent on the edge. Use a thin flat-blade screwdriver to drive under the latch from behind. Insert a strong plastic lever tool into the gap between the control panel and the front. The latch opens with a loud crack.

    • Now you can open the other latches with the lever tool

    • Do not remove the control panel completely yet, it is still connected with cables.

  11. DeLonghi ETAM series upper brewing piston replacement: 手順 11、 2の画像 1 DeLonghi ETAM series upper brewing piston replacement: 手順 11、 2の画像 2
    • Lift up the control panel a little. Press the latch on the white plug and pull off the plug.

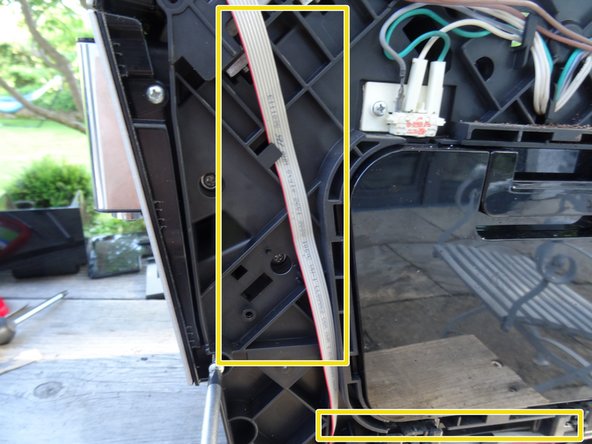
    • Unthread the ribbon cable that leads to the control electronics at the back as far as possible. This will make it longer and you can place the control panel on its side.

    • If you want to remove the control panel completely, you have to take off the cover on the control electronics and disconnect the connector. Then you can unthread the cable completely.

  12. DeLonghi ETAM series upper brewing piston replacement, Replace top brewing piston: 手順 12、 3の画像 1 DeLonghi ETAM series upper brewing piston replacement, Replace top brewing piston: 手順 12、 3の画像 2 DeLonghi ETAM series upper brewing piston replacement, Replace top brewing piston: 手順 12、 3の画像 3
    • There are six connections on the upper brewing piston: three hot water pressure lines, one non-pressurized waste water line, a hose line to the coffee spout and two cables to the microswitch. All must be removed first.

    • Pull out the clip at the top left and loosen the pressure line. Pay attention to the O-ring. It either hangs on the line or afterwards. When reassembling, replace it with a new one if possible.

    • Pull out the clamp in the middle and loosen the pressure line. Pay attention to the O-ring. It either hangs on the line or afterwards. When reassembling, replace it with a new one if possible.

    • Pull out the clamp on the bottom left and loosen the pressure line. Pay attention to the O-ring. It either hangs on the line or afterwards. When reassembling, replace it with a new one if possible.

  13. DeLonghi ETAM series upper brewing piston replacement: 手順 13、 1の画像 1
    • Disconnect the two spade connectors from the microswitch

  14. DeLonghi ETAM series upper brewing piston replacement: 手順 14、 2の画像 1 DeLonghi ETAM series upper brewing piston replacement: 手順 14、 2の画像 2
    • Take off the black bend protector on the middle pressure line.

  15. DeLonghi ETAM series upper brewing piston replacement: 手順 15、 2の画像 1 DeLonghi ETAM series upper brewing piston replacement: 手順 15、 2の画像 2
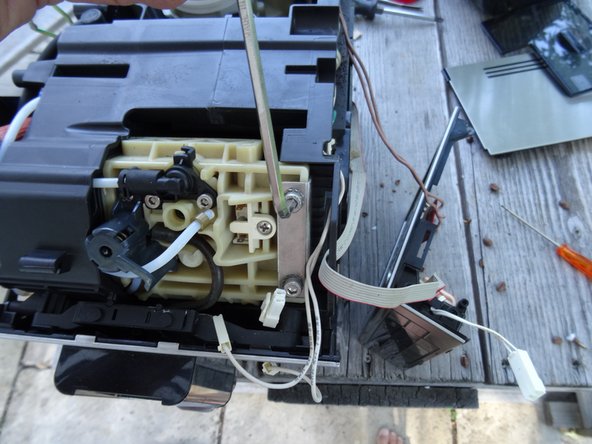
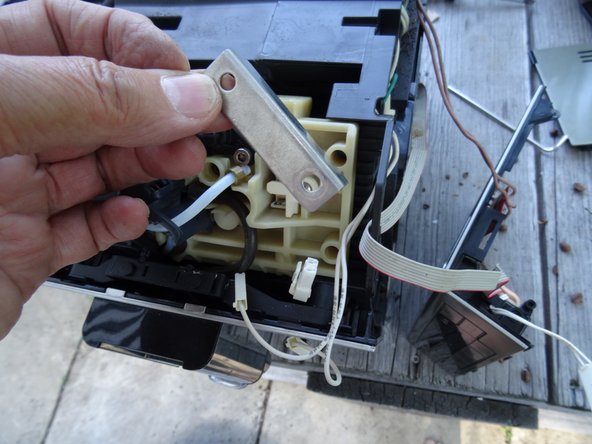
    • Unscrew the two Allen screws (4 mm).

    • Lift off the stainless steel bracket.

  16. DeLonghi ETAM series upper brewing piston replacement: 手順 16、 1の画像 1
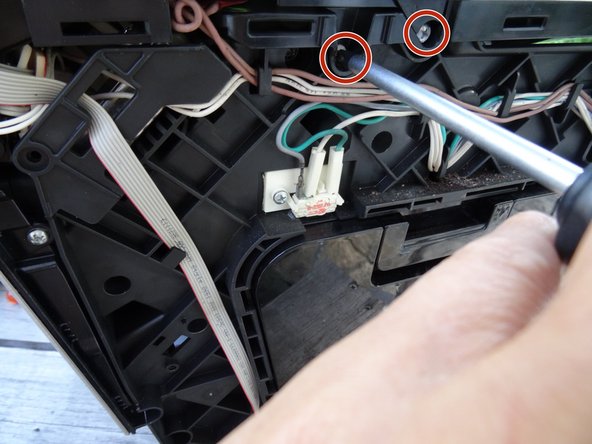
    • Unscrew the Phillips screw on the black protective plate on the left and pull off the protective plate.

  17. DeLonghi ETAM series upper brewing piston replacement: 手順 17、 1の画像 1
    • Using a flat tool, disconnect the drain hose on the left.

  18. DeLonghi ETAM series upper brewing piston replacement: 手順 18、 1の画像 1
    • Remove the two Phillips screws securing the side of the upper piston support plate.

    • The screws are in deep holes.

  19. DeLonghi ETAM series upper brewing piston replacement: 手順 19、 1の画像 1
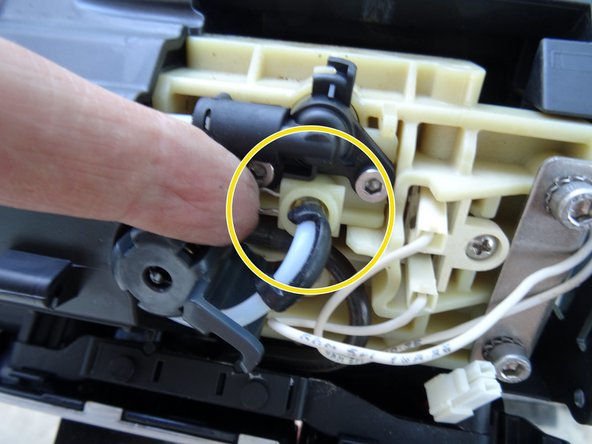
    • Pull off the hose to the coffee spout.

    • Pull out the pressure hoses that are in the way,through the openings on the left.

    • The upper piston support plate is now free. However, it is very tight and it is tricky to get it out. Be patient and work carefully. Make sure that the ribbon cable to the control panel is not damaged.

    • It'll be easier if you also detach the front panel and remove the coffee spout.

終わりに

Work through the steps in reverse order to reassemble your device.

以下の翻訳者の皆さんにお礼を申し上げます:

de en

100%

これらの翻訳者の方々は世界を修理する私たちのサポートをしてくれています。 あなたも貢献してみませんか?
翻訳を始める ›

作成者

1人の作成者と共同作成されました。

VauWeh

メンバー登録日: 10/19/15

203,382 ポイント

246のガイドは作成済み

チーム

Repair is War on Entropy Repair is War on Entropy人のメンバー

Community

25 メンバー

1,121のガイドは作成済み

0 件のコメント

コメントを追加

統計データ:

過去 24時間: 0

過去 7 日: 4

過去 30 日: 11

今までの合計 463