はじめに
This guide requires you to fully take apart the device. Be careful not to misplace any parts once you have removed them. This guide would be used if your coffee maker has no water flow.
必要な工具と部品
-
-
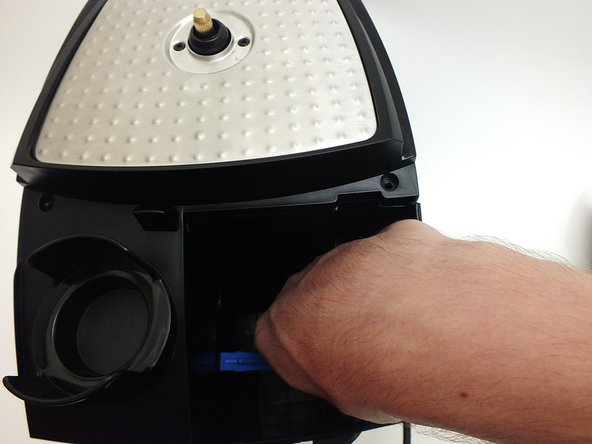
Flip open the top panel to reveal water reservoir.
-
Grab the water reservoir by the handle and lift out.
-
-
-
Flip the device on its head.
-
Using the Phillips #2 screwdriver, unscrew the four 12 mm screws found at each corner of the bottom panel.
-
Lift the panel off or flip the device over and let the panel drop out.
At least on my unit, those screws weren't Phillips, but Torx Tamperproof T20! Shame on you, De'Longhi!
I also had the Tamperproof Torx on mine - I used a Dremel tool with a small round metal bit and just carefully plunged down on the little nub in the center that makes it tamperproof. Only need to grind it down a millimeter or so, as there isn't much torque on these screws and the torx bit needs just a little depth to grab on it good enough. If you have the tools handy it saves having to buy the tamperproof bits online.
Alef Alpha - 返信
-
-
-
Flip the device on its head, front end facing you.
-
Using the Phillips #2 unscrew the two 52 mm screws found underneath the top portion of the device.
-
-
-
-
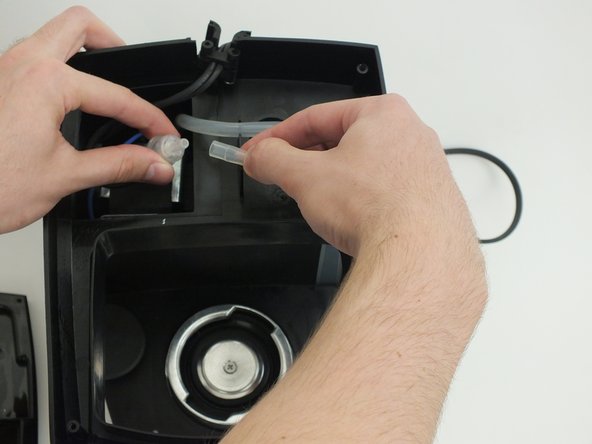
Flip the device and remove one end of the tube from the water reservoir hole.
There are two tubes connected to the water reservoir hole. The one in the first pic is the one that goes to the water valve, which is the one that you pull through to the top. The one in the second pic is the short one from the bottom of the pump that can detached from the water hole and left in place, to be transferred later to the new pump. Detaching it from the from the filter as shown adds to the impression that this is the tube to the water valve to be pulled through to the top in the next step, which the user quickly finds is impossible, it’s too short.
-
-
-
Remove each clip from the valve and core using the precision angled tweezers.
My deLonghi failed by leaking from this connection (after years of operation). After a failed attempt with what I was told was an OEM o-ring, I successfully repaired it with a "Silicone O-Ring, 7mm OD, 3mm ID, 2mm Width, VMQ Seal Rings Gasket" from Amazon. (I used a dental pick to pull out the old ring.)
This is the standard o-ring, as used e.g. in Jura devices.
VauWeh -
-
-
-
Pull out each LED with one quick tug.
-
Similarly, remove each set of wires from the setting tuner with one quick tug.
It’s better to keep the wires in place and remove the whole setter switch by prying off the knob, then removing the two screws exposed I was unable to remove the core your way because of the difficulty of getting past the setter switch, especially since at the same time you have to wrangle with getting the steamer wand out, even with the frother removed.
Also, your pic shows four wires to disconnect, there are actually five, and there’s no view of which of them go where—another reason for keeping them connected.
-
-
-
Tilt the core towards the front while lifting from the back.
Pushing to the front is impossible at first if the settings switch is still in place (see earlier comment).
Also, it’s worth mentioning that the steaming wand *will* come out with the right twisting and turning of the core. I got stuck her trying to figure out how to detach it from its hose. But the attachment is permanent. This is what led me to buy more maneuvering room by removing the settings switch with wires still attached.
-
-
-
Remove both sets of wires from the black box.
-
Remove the filter attached to the bottom of the pump.
-
-
-
Pull off the black foam from the bottom.
-
Pull off the black foam from the top.
Hello, very helpful instructions, thanks!
Would you happen to know if the machine is turning on, heating up really well but nothing is pouring and no noise is made the pump might be at fault?
I'd really appreciate the help!
Cheers
Abe
The machine uses a ‘vibration pump.’ If there is no noise, the pump is not operating. If the pump is not operating, either the pump’s coil has failed, or there is no power to the coil. Check the coil for continuity. I have a new coil that reads a stunning 12 megohms. Check in both directions — there’s a diode in series with the coil, and it will read open in one direction.
BBerapa volt uuntuk
-


To reassemble your device, follow these instructions in reverse order.
To reassemble your device, follow these instructions in reverse order.
6 の人々がこのガイドを完成させました。
チーム

Cal Poly, Team 4-2, Maness Fall 2015 Cal Poly, Team 4-2, Maness Fall 2015人のメンバー
CPSU-MANESS-F15S4G2
4 メンバー
25のガイドは作成済み
4 件のコメント
I was trying to remove the valve. I am not sure what axis to turn it on. Also how do I know if the valve is bad or the pump, or both?
Just get both parts. I think the valve is only a few dollars. The only moving part is the pump and that is by far the most likely problem.
shadowym -
Are you still taking feedback?
Die Schrauben auf der Bodenplatte sind nicht wie angegeben Kreuzschrauben sondern Safety Tamper Proof Star 6 Point.
My model EC155, serial #43222 requires a Security Torx vs. a #2 Phillips to remove the 12mm screws at each corner of the bottom panel
Mike Hines - 返信