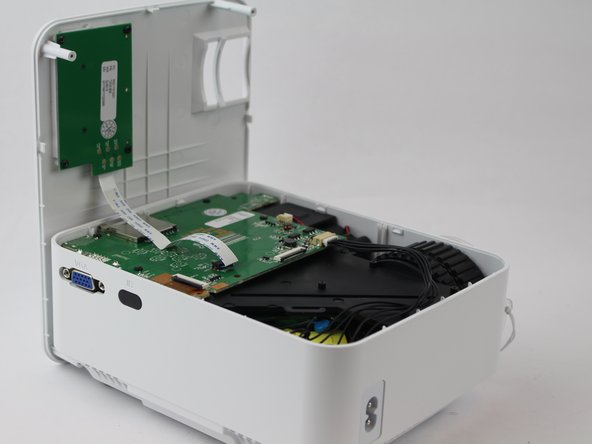
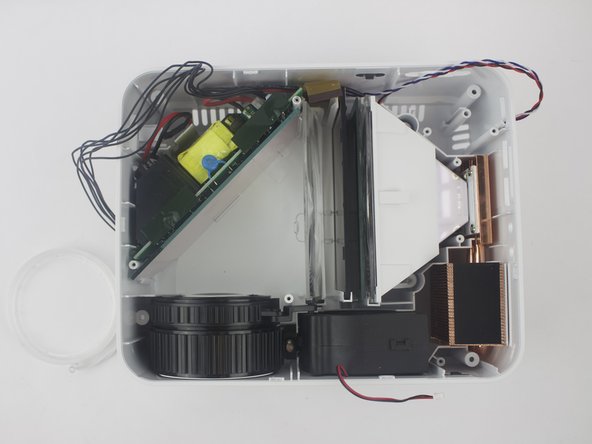
メインコンテンツにスキップ

DBPOWER T20 Disassembly

必要な工具と部品

  1. DBPOWER T20 Disassembly, DBPOWER T20 Disassembly: 手順 1、 1の画像 1
    • Flip the device and lay flat.

  2. DBPOWER T20 Disassembly: 手順 2、 1の画像 1
    • Remove the four (9 mm) screws with a PH2 screwdriver.

    • Remove the two (7 mm) located with a PH2 screwdriver.

  3. DBPOWER T20 Disassembly: 手順 3、 3の画像 1 DBPOWER T20 Disassembly: 手順 3、 3の画像 2 DBPOWER T20 Disassembly: 手順 3、 3の画像 3
    • Flip the device over and pry the top off with a plastic opening tool.

  4. DBPOWER T20 Disassembly: 手順 4、 1の画像 1
    • Remove the ribbon cable connecting the motherboard to the button control board by gently pulling it from its connector.

    which end of cable?

    Ki Ko - 返信

    looks hard and tightly connected. put an arrow

    Ki Ko - 返信

  5. DBPOWER T20 Disassembly: 手順 5、 2の画像 1 DBPOWER T20 Disassembly: 手順 5、 2の画像 2
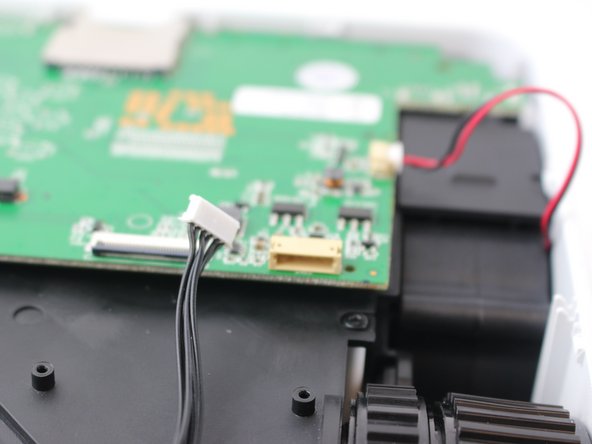
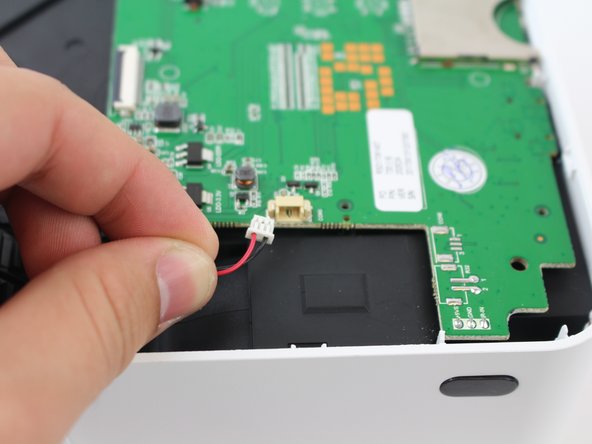
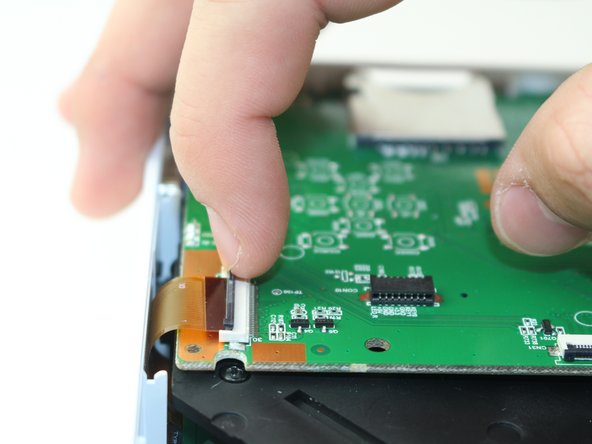
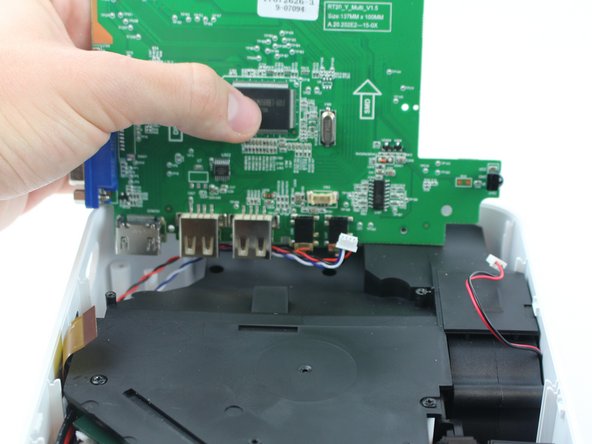
    • Remove four (6 mm) screws connecting the motherboard using a J0 screwdriver.

    one of the screws have been stripped, I’ve tried the rubber band and the glue trick, it didn’t work. What do I do to remove it? please respond

    arman waggoner - 返信

  6. DBPOWER T20 Disassembly: 手順 6、 3の画像 1 DBPOWER T20 Disassembly: 手順 6、 3の画像 2 DBPOWER T20 Disassembly: 手順 6、 3の画像 3
    • Remove the two cables connected to the motherboard: black power cable and the red/black fan cable.

    • the black cable requires more force to remove than the other cables.

  7. DBPOWER T20 Disassembly: 手順 7、 2の画像 1 DBPOWER T20 Disassembly: 手順 7、 2の画像 2
    • Lift the black latch on the ZIF connector and remove the ribbon cable that attaches the digitizer to the motherboard.

    very well explained, let's also tell the other one how it goes

    Ki Ko - 返信

  8. DBPOWER T20 Disassembly: 手順 8、 1の画像 1
    • Raise motherboard by lifting sideways and then up to avoid the ports.

    hard, very hard, I have a feeling that something will break

    Ki Ko - 返信

  9. DBPOWER T20 Disassembly: 手順 9、 2の画像 1 DBPOWER T20 Disassembly: 手順 9、 2の画像 2
    • Remove wires attaching the piezoelectric speakers to the motherboard.

  10. DBPOWER T20 Disassembly: 手順 10、 2の画像 1 DBPOWER T20 Disassembly: 手順 10、 2の画像 2
    • Remove the five screws securing the black plastic cover with a J0 screwdriver.

    • Lift up and out to remove.

終わりに

To reassemble your device, follow these instructions in reverse order.

ある他の人がこのガイドを完成しました。

作成者

5人の作成者と共同で作成されました。

Andrea Espinosa

メンバー登録日: 02/15/18

506 ポイント

3のガイドは作成済み

チーム

USF Tampa, Team S16-G2, Boczar Spring 2018 USF Tampa, Team S16-G2, Boczar Spring 2018人のメンバー

USFT-BOCZAR-S18S16G2

5 メンバー

5のガイドは作成済み

4 件のコメント

Anyone find a bulb for this thing? And/or know what else (or a quick fix) would fix a dark or burn mark on the image?

jcr4130 - 返信

haing the same issue tried to call a electronics repair place to see if the could order a new polarizing lens for me and they said they could not unless they were the ones that did the repair

derek_russell82308 -

Really? Well, crap

KweenBeeTX -

How are the lenses supposed to sit in the hompow t20 mini projector

Joseph Duffey - 返信

コメントを追加

統計データ:

過去 24時間: 0

過去 7 日: 1

過去 30 日: 14

今までの合計 2,816