はじめに
LED lights are the lights on your device that turn on to send you different messages about the functioning of your electronic router. If the LED lights on your D-Link router are fading, inconsistent, or completely off at the power up of your device, replacement may be necessary. This step-by-step instructional guide will help you do just that.
必要な工具と部品
-
-
Begin by placing the wired router face down.
-
Locate the two black plastic screw coverings at the top of the device and remove them with your fingers.
-
-
-
Use a plastic opening tool between the edges of the router and gently pry the device apart.
-
Release the clips as you work your way around the device to avoid breaking them.
-
Separate the front and back case of the router.
-
-
-
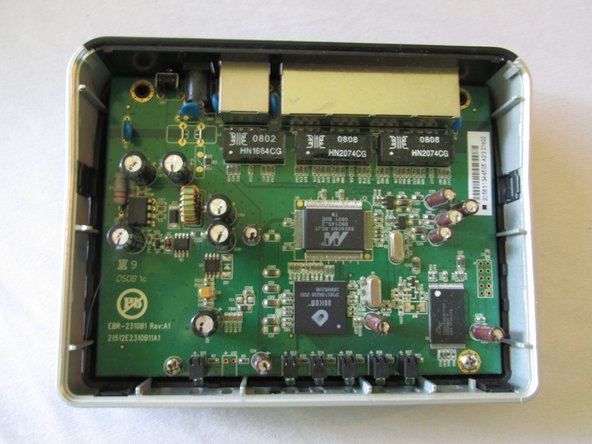
Once you have removed the top black case of the router, remove the silver casing surrounding the logic board.
-
-
-
-
Use a Phillips #2 screwdriver to remove the two screws at the bottom of the motherboard.
-
-
-
Now that you have removed all screws and the surrounding silver casing, pop the logic board out from the bottom component of the router.
-
You have now removed the logic board from your device.
-
-
-
Locate the problematic LED light on the motherboard.
-
Using a plastic opening tool, very gently tilt its black base backwards.
-
-
-
Using your soft finger, tilt the LED light base backwards so that the actual light is facing upside down, at a 180 degree angle from the others.
-
-
-
With a pair of tweezers, gently pry the LED light back and forth between its connecting wires until it is able to be removed.
-
-
-
You should now have a removed LED light, ready to be replaced with a new one.
-


To reassemble your device, follow these instructions in reverse order.
To reassemble your device, follow these instructions in reverse order.
チーム

USF Sarasota-Manatee, Team 1-4, Stewart Fall 2014 USF Sarasota-Manatee, Team 1-4, Stewart Fall 2014人のメンバー
USFSM-STEWART-F14S1G4
4 メンバー
19のガイドは作成済み