必要な工具と部品
-
-
Turn the laptop so the back is facing up.
-
Use a Phillips #00 screwdriver to remove the seven screws from the bottom cover. These will require a counter-clockwise rotation to remove. A magnet may be helpful to remove screws if they get stuck at the bottom of their inserts.
-
-
-
Start by pulling up on the lip, highlighted in Red. This will be at the back of the computer.
-
Once the back has been lifted up, begin lifting up at the orange side on the left. This will be right next to the back we just pulled up. The right side should come loose at this time; pull up on it as well
-
Lift and pull on the yellow edge, on the opposite side of the first part we pulled up on. Once this is removed, lift the panel off the computer.
-
-
-
-
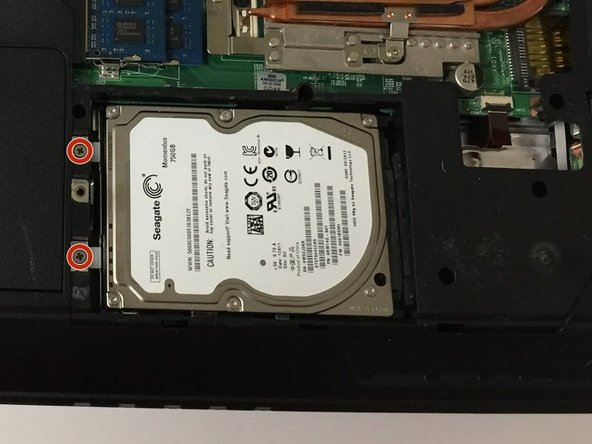
Locate the hard drive on the inside of the computer. First Image shows it outlined in red.
-
Remove the two screws holding the hard drive in place. Keep these on the side.
-


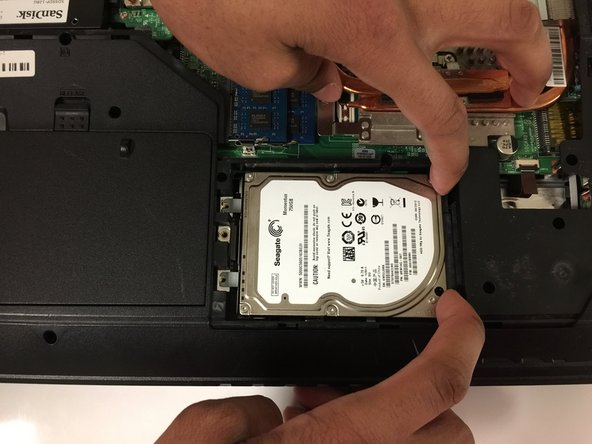

To install the new hard drive, follow the steps in reverse. Ensure the new hard drive is oriented the same as the old one. Only difference is to push the hard drive into the connectors.
To install the new hard drive, follow the steps in reverse. Ensure the new hard drive is oriented the same as the old one. Only difference is to push the hard drive into the connectors.
チーム

University of North Texas, Team S2-G7, Thomas Spring 2018 University of North Texas, Team S2-G7, Thomas Spring 2018人のメンバー
UNT-THOMAS-S18S2G7
4 メンバー
7のガイドは作成済み