メインコンテンツにスキップ

CyberHome CH-DVD 300 Disc Tray Bracket Replacement

必要な工具と部品

  1. CyberHome CH-DVD 300 Disc Tray Bracket Replacement, Top Panel: 手順 1、 2の画像 1 CyberHome CH-DVD 300 Disc Tray Bracket Replacement, Top Panel: 手順 1、 2の画像 2
    • Turn the DVD player off. Unplugging the DVD player while it is on may result in damage to the DVD player or an inserted CD.

    • Unplug the DVD player from the wall socket.

    • Locate the 15mm Phillips screws on the left side (1 screw), right side (1 screw), and back (4 screws) of the DVD Player. Use the appropriate Phillips head screwdriver to remove the six screws.

  2. CyberHome CH-DVD 300 Disc Tray Bracket Replacement: 手順 2、 2の画像 1 CyberHome CH-DVD 300 Disc Tray Bracket Replacement: 手順 2、 2の画像 2
    • Remove the top panel of the DVD Player by:

    • Sliding the top panel backwards.

    • Gently lifting the back of the top panel up.

  3. CyberHome CH-DVD 300 Disc Tray Bracket Replacement, Disc Tray Bracket: 手順 3、 2の画像 1 CyberHome CH-DVD 300 Disc Tray Bracket Replacement, Disc Tray Bracket: 手順 3、 2の画像 2
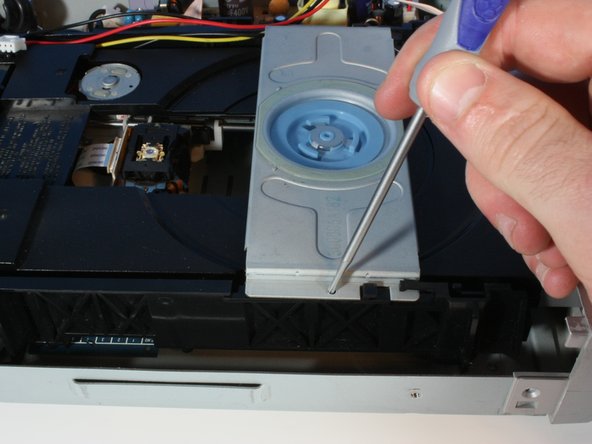
    • Remove the 6.3mm screws keeping the disc tray bracket connected to the disc tray.

  4. CyberHome CH-DVD 300 Disc Tray Bracket Replacement: 手順 4、 2の画像 1 CyberHome CH-DVD 300 Disc Tray Bracket Replacement: 手順 4、 2の画像 2
    • Lift up on the bracket by:

    • Sliding the disc tray bracket forward.

    • Lifting the back edge up.

終わりに

To reassemble your device, follow these instructions in reverse order.

3 の人々がこのガイドを完成させました。

作成者

5人の作成者と共同で作成されました。

Chris Menezes

メンバー登録日: 04/07/14

642 ポイント

5のガイドは作成済み

チーム

Cal Poly, Team 6-5, Forte Spring 2014 Cal Poly, Team 6-5, Forte Spring 2014人のメンバー

CPSU-FORTE-S14S6G5

5 メンバー

5のガイドは作成済み

0 件のコメント

コメントを追加

統計データ:

過去 24時間: 0

過去 7 日: 3

過去 30 日: 14

今までの合計 4,137