メインコンテンツにスキップ

Cuisinart DLC-10S Pro Classic 7-Cup Food Processor Internal Wiring Replacement

必要な工具と部品

  1. Cuisinart DLC-10S Pro Classic 7-Cup Food Processor Internal Wiring Replacement, Internal Wiring: 手順 1、 1の画像 1
    • Remove the four screws from the bottom of the processor with a Philips Screwdriver.

  2. Cuisinart DLC-10S Pro Classic 7-Cup Food Processor Internal Wiring Replacement: 手順 2、 1の画像 1
    • Remove the bottom casing of the processor.

  3. Cuisinart DLC-10S Pro Classic 7-Cup Food Processor Internal Wiring Replacement: 手順 3、 1の画像 1
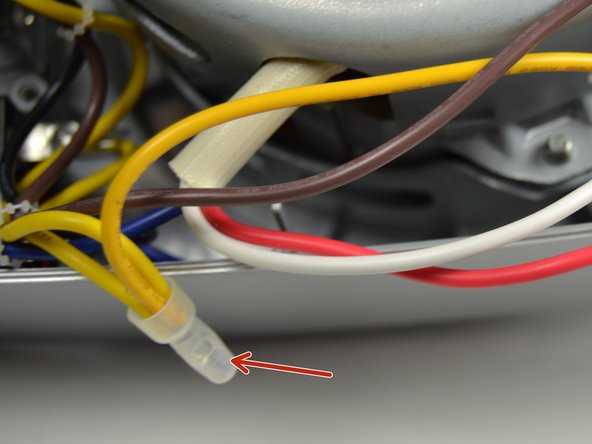
    • If any wires are frayed, cut them off where they are connected by wire nuts.

  4. Cuisinart DLC-10S Pro Classic 7-Cup Food Processor Internal Wiring Replacement: 手順 4、 1の画像 1
    • Detach the wire nut from the other connected wires.

  5. Cuisinart DLC-10S Pro Classic 7-Cup Food Processor Internal Wiring Replacement: 手順 5、 1の画像 1
    • Replace the bad wire with a new one of the same gauge.

  6. Cuisinart DLC-10S Pro Classic 7-Cup Food Processor Internal Wiring Replacement: 手順 6、 1の画像 1
    • Strip the new wire to the same length as the other wires and connect them to a wire nut.

終わりに

To reassemble your device, follow these instructions in reverse order.

ある他の人がこのガイドを完成しました。

作成者

1人の作成者と共同作成されました。

Riley Carns

メンバー登録日: 04/02/15

279 ポイント

2のガイドは作成済み

チーム

Cal Poly, Team 24-1, Lancaster Winter 2015 Cal Poly, Team 24-1, Lancaster Winter 2015人のメンバー

CPSU-LANCASTER-W15S24G1

1 メンバー

2のガイドは作成済み

0 件のコメント

コメントを追加

統計データ:

過去 24時間: 2

過去 7 日: 5

過去 30 日: 16

今までの合計 975