はじめに
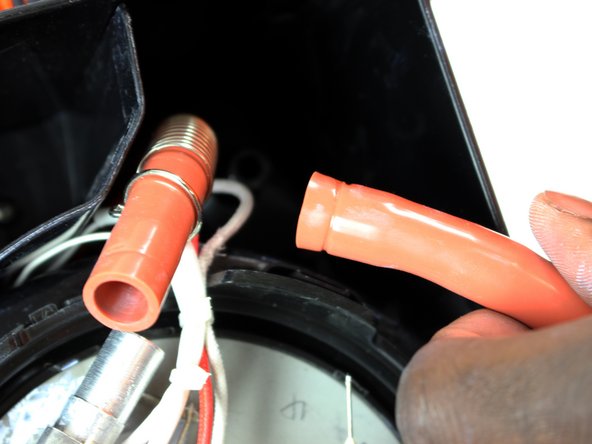
Coffee grounds may be stuck within your water hose and that could cause the damage to your coffee drinking experience. This guide will show you how to fix this problem by clearing and properly replacing the internal hoses. This exercise will require a Philips head screwdriver. Replace water hoses with High Temperature Silicone Tubing .312 ID X .472.
必要な工具と部品
-
-
Unplug the Coffee-maker from the power source.
-
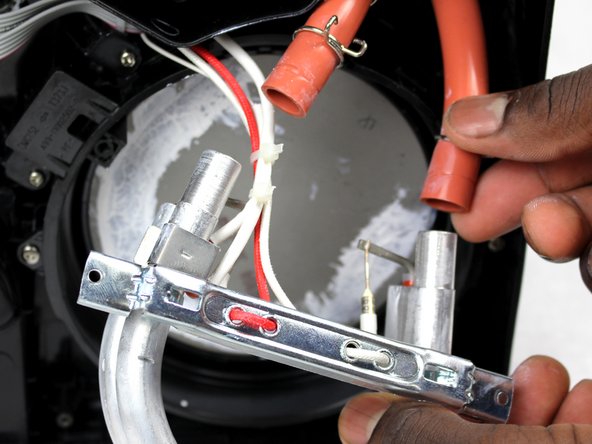
Use a Phillips head screwdriver to remove the four 7mm screws from the back and the three 8mm screws from the bottom. This will release the bottom cover.
-
-


To reassemble your device, follow these instructions in reverse order.
To reassemble your device, follow these instructions in reverse order.
2 の人々がこのガイドを完成させました。
チーム

Sam Houston State, Team S17-G2, Blackburne Spring 2018 Sam Houston State, Team S17-G2, Blackburne Spring 2018人のメンバー
SHSU-BLACKBURNE-S18S17G2
3 メンバー
4のガイドは作成済み
8 件のコメント
Um, you forgot a MAJOR detail; there is a ball valve backflow preventer in the existing hose, which MUST be transferred into the replacement hose.
If it is not replaced, the coffe machine will NOT WORK. - You are welcome.
Also, the measurements for the hose ID and OD are incorrect. The ID is at least 10 mm. I tried using the measurements you gave, which translate to 8mm ID x 12 mm OD, and that is way too small. The check valve will NOT fit into this smaller diameter tubing. The check valve body itself is 10mm in diameter. I ordered some of the size you listed and it is easily seen without measuring that the tubing doesn't come close to matching.
Oh My....I don't understand Mr. Fixya's numbers to begin with. So, not 10mm or 12mm. can you tell me what mm these should be and possibly where I could find them? My beautiful CHW-12....is now at an insane $185. What a blessing to hear that this can be repaired! thankyou soooo much xo