メインコンテンツにスキップ

Creative Zen Vision W Hard Drive Replacement

必要な工具と部品

  1. Creative Zen Vision W Hard Drive Replacement, Battery Removal: 手順 1、 3の画像 1 Creative Zen Vision W Hard Drive Replacement, Battery Removal: 手順 1、 3の画像 2 Creative Zen Vision W Hard Drive Replacement, Battery Removal: 手順 1、 3の画像 3
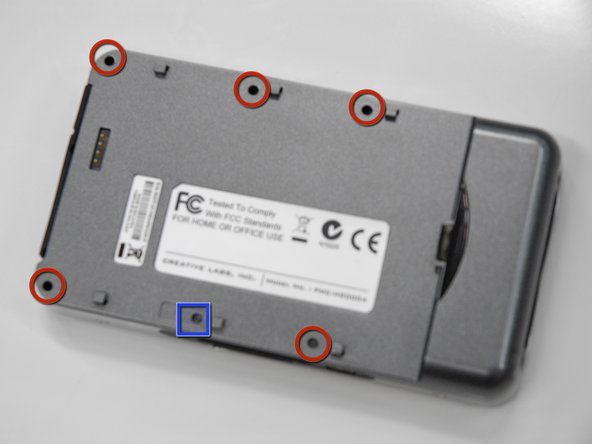
    • Push the black button and slide the battery casing to the left simultaneously, until the battery is completely separated from the device.

  2. Creative Zen Vision W Hard Drive Replacement, Back Cover: 手順 2、 1の画像 1
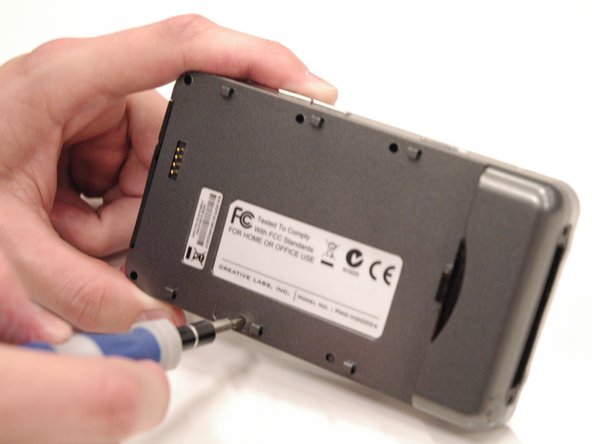
    • Remove the 2 screws (3.5 mm) on the Compact Flash insert, located on the left hand side, with a Phillips #000 screwdriver.

  3. Creative Zen Vision W Hard Drive Replacement: 手順 3、 2の画像 1 Creative Zen Vision W Hard Drive Replacement: 手順 3、 2の画像 2
    • Remove the 5 screws (5.5 mm), circled in red, using a Phillips #0. Use a flashlight if necessary.

    • Peel off the sticker that says "Creative warranty void if broken" and remove the screw (5.5 mm) underneath with a Phillips #0.

    • Be careful, some of the screws are difficult to see and can be easily stripped.

  4. Creative Zen Vision W Hard Drive Replacement: 手順 4、 3の画像 1 Creative Zen Vision W Hard Drive Replacement: 手順 4、 3の画像 2 Creative Zen Vision W Hard Drive Replacement: 手順 4、 3の画像 3
    • Carefully pull the back cover off of the rest of the device.

    • The volume control buttons and power slider may fall off when removing the cover, do not lose these small pieces.

    • The USB input cover on the bottom of the device may also fall off.

  5. Creative Zen Vision W Hard Drive Replacement, Hard Drive: 手順 5、 2の画像 1 Creative Zen Vision W Hard Drive Replacement, Hard Drive: 手順 5、 2の画像 2
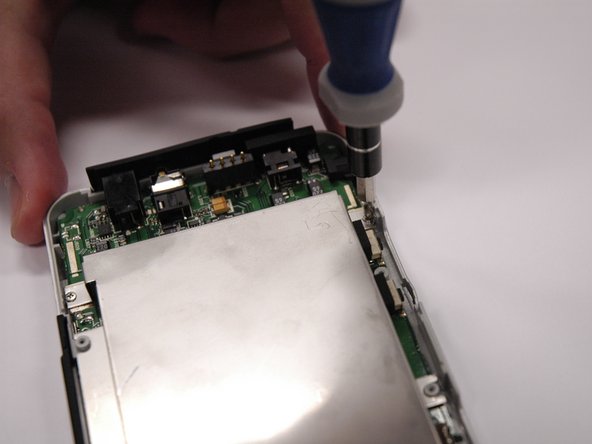
    • Remove 4 screws (3.5 mm) on the metal cover with a Phillips #0.

    • Lift the metal cover off.

  6. Creative Zen Vision W Hard Drive Replacement: 手順 6、 3の画像 1 Creative Zen Vision W Hard Drive Replacement: 手順 6、 3の画像 2 Creative Zen Vision W Hard Drive Replacement: 手順 6、 3の画像 3
    • Lift the white and black ribbon connection off of the motherboard.

    • The hard drive can now be removed.

終わりに

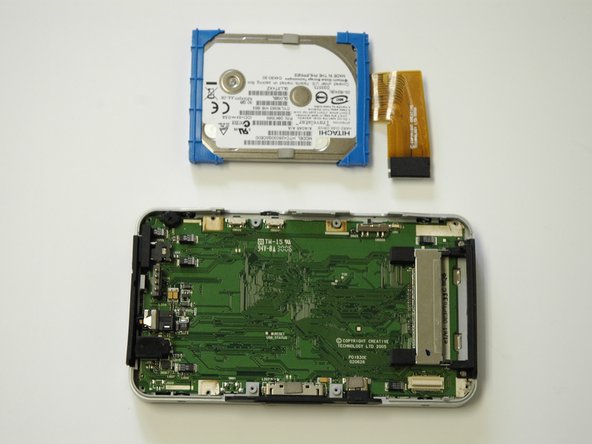
To reassemble your device, follow these instructions in reverse order.

2 の人々がこのガイドを完成させました。

作成者

3人の作成者と共同で作成されました。

Tim Wilson

メンバー登録日: 04/11/13

143 ポイント

6のガイドは作成済み

チーム

Cal Poly, Team 17-2, Regan Spring 2013 Cal Poly, Team 17-2, Regan Spring 2013人のメンバー

CPSU-REGAN-S13S17G2

4 メンバー

8のガイドは作成済み

0 件のコメント

コメントを追加

統計データ:

過去 24時間: 0

過去 7 日: 6

過去 30 日: 27

今までの合計 3,625