はじめに
This guide is designed to give instructions on how to replace the battery for the Creative Zen V Plus.
必要な工具と部品
-
-
Find the grooves around the buttons on the front and carefully remove the panel. This can be done without the use of any tools.
 FixBotに聞いてみる
-
-
-
Using a plastic opening tool, place the skinny flat end between the groove running along side of the device.
-
Using a twisting motion, detach the control panel from the device
-
-
-
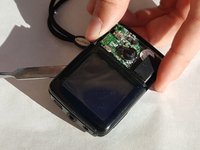
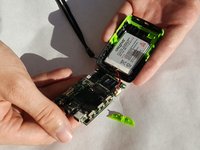
Find the groove around the outside of the green section. Use an ESD safe spudger to slowly lift the plastic panel up.
-
-
-
-
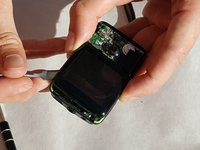
After removing the green section, find the groove around the display. Insert a ESD safe spudger and carefully lift the display.
-
-
-
The display can lift up the display but be sure not to damage any of the cables connecting it to the mother board.
-
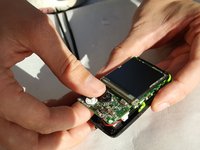
Remove the screw located under the display using the 00 Phillips head screwdriver.
-
-
-
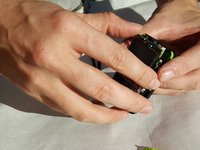
Pull up on the motherboard and display. It is glued to the base so it will require a little force. Be careful though, as the board is fragile.
-
-
-
Simply unplug the white colored battery from it's terminal and replace with the new battery.
-
This completes the battery replacement process. Well done!
-


To reassemble your device, follow these instructions in reverse order.
9 の人々がこのガイドを完成させました。
チーム

IUPUI, Team 2-5, Baechle Fall 2016 IUPUI, Team 2-5, Baechle Fall 2016人のメンバー
IUPUI-BAECHLE-F16S2G5
4 メンバー
7のガイドは作成済み
6件のガイドコメント
This is a good guide as it applies to the Zen V Plus used. My Zen V Plus, however, had a few differences: 1. my Zen’s original battery is soldered to the PCB, there is no plug. So unless the person replacing the battery is experienced at soldering the possibility for damage is very high. This board is very small and it would be very easy to damage this board with a soldering iron; 2. The battery in my unit wasn’t laying loose in the bottom of the unit it was held in with double sided tape. It was a thin, clear double sided tape that looks like ordinary scotch tape. It had a pretty good bond but it was broken fairly easily. Just treat it like everything else in the unit and be as gentle as possible. There is one more thing to be aware of; Pay close attention to the alignment of the slider (for power) to the wiper of the switch it goes to. It can be real annoying to have it all back together and then it won’t turn on.
rchilders11 - 返信 共有
Replace battery. Still, saying weak battery. ???? Change cord. Still. Weak battery. ????
Replacement batteries can be found on eBay.com. Just search on the number that is on your battery (e.g. creative ba20603r79919 battery). You can also use generic replacements, but make sure that it has similar or higher capacity, and that the dimensions are similar as your current battery.
What if i use a 500mah battery will it di??
5skimov lolz - 返信 共有