はじめに
Use this guide to replace the screen of the Creative Zen Microphoto.
必要な工具と部品
-
-
Beginning with the notch directly beneath the battery, use the plastic opening tool to loosen the battery.
-
Once the battery is free, remove it from the device.
-
-
-
Turn over the device.
-
Use the plastic opening tool to separate the front and back covers.
-
Move the opening tool around the perimeter of the device until the front cover detaches.
-
-
-
Slowly detach the front cover from the rest of the device to reveal the interior.
-
-
-
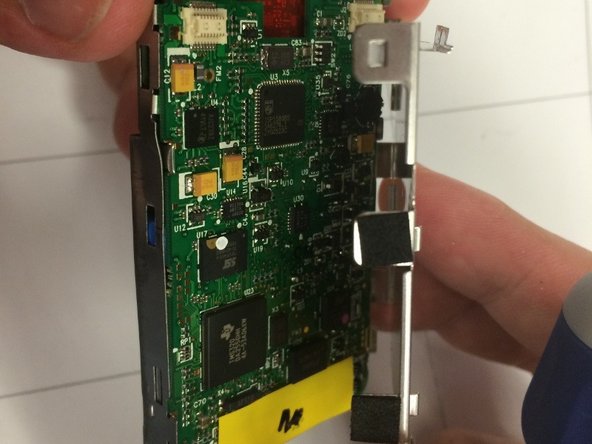
Insert the flat-head screwdriver into the notch on the bottom of the device. Pry the main board and screen from the outer shell of the device.
-
-
-
Remove the main board and screen from the outer shell.
-
-
-
-
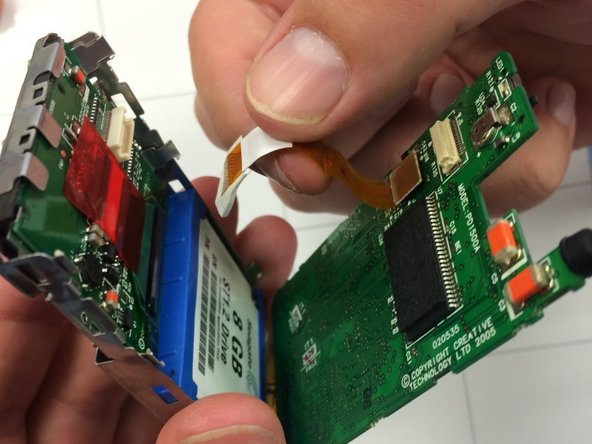
Using the flat-head screwdriver, carefully pry open the prongs on the sides of the device, and remove the main board from the screen.
-
-
-
Push the ribbon tab (sticking out below the main screen) backward through the square hole to remove the main board of the device.
-
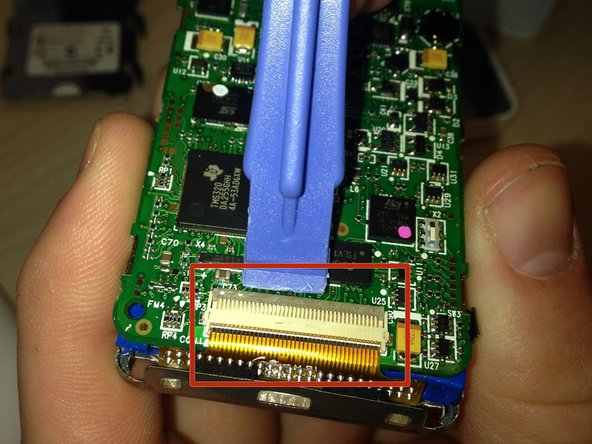
Once the wiring is removed from the front panel, release the hinge at the bottom of the device. To do so, gently pry underneath the clip (pictured) with a plastic opening tool. The clip will pop up, and the motherboard can be completely removed.
-
-
-
With a set of tweezers, Carefully pull off the the bottom blue cover and remove it from the 8 GB hard drive.
-
-
-
Using a screwdriver, remove four Philip screws from the back of the screen.
-
Place the four screws in a small baggy for later reassembly.
-
-
-
Carefully pull out the gold piece from the top of the hard drive.
-
-
-
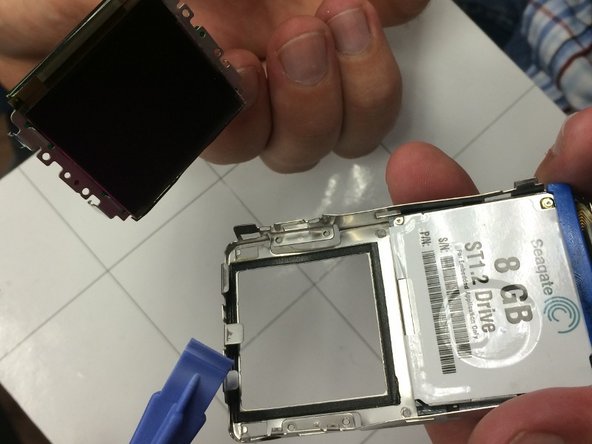
Carefully use your thumbs to pull out the screen (that is below the hard drive).
-
-
-
Look for a black strip on the side of the screen.
-
Remove the strip from the screen using your fingers or tweezers if needed.
-
-
-
With tweezers, lightly pull down on red strip in the middle of the back of the screen.
-
-
-
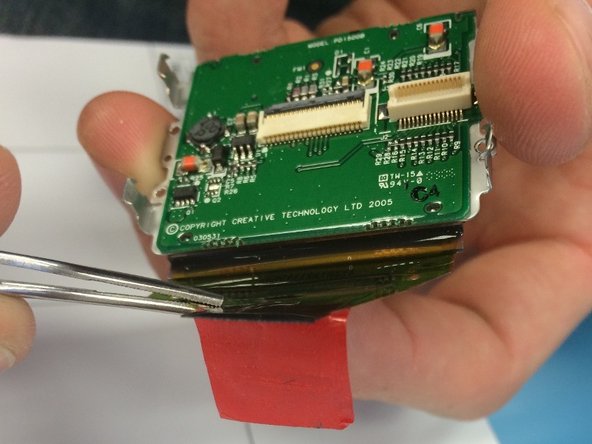
With the tweezers, carefully pull the red strip off of the back of the screen.
-
-
-
Carefully lift up the two pieces of the screen to reveal the actual back of the screen.
-
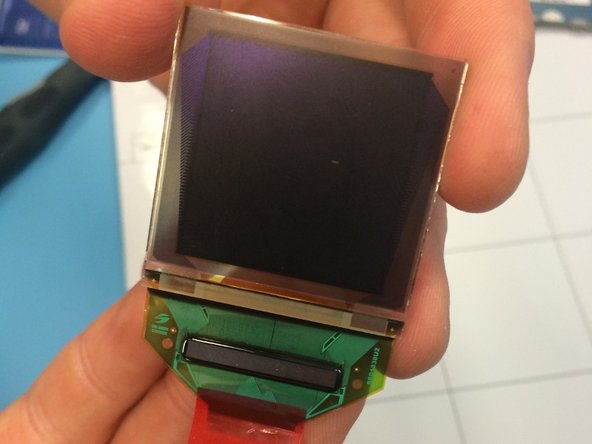
Pull out the screen from the device.
-


To reassemble your device, follow these instructions in reverse order.
To reassemble your device, follow these instructions in reverse order.
3 の人々がこのガイドを完成させました。
チーム

Ohio State, Team 1-3, Buehl Fall 2014 Ohio State, Team 1-3, Buehl Fall 2014人のメンバー
OSU-BUEHL-F14S1G3
4 メンバー
2のガイドは作成済み
7 件のコメント
Great way to destroy a Zen. Don’t pry the front off. Slide the metal cover under the battery down away from the contacts so that the tabs beside the battery contacts disengage, then press on the lower part of the battery compartment while holding the front. This keeps you from ripping the touch pad connector off and you can access everything with the front panel still glued on. Just proceed to remove the rear cover, then remove the motherboard, and you have access to the screen.
Thank u very much.
I was just coming to comment this, I wish I had read the comments first. Along with not destroying the player, it's also so much easier. This seriously needs to be corrected.
ocddev -
Where can i buy a new screen for my zen microphoto?
Seconded. Looking for a new screen. Anyone have any tips?