はじめに
My middle mouse button stopped working which can be very annoying especially in 3D cad software where rebinding requires relearning many commands.
A replacement button is only ~$0.65 + shipping from Digikey and one less thing prematurely ends up in the landfill. Look for a button the same dimensions as the one I linked, but with a greater "operating force".
You will see when you open this mouse up that every other button uses a much nicer Omron switch which explains why only the mouse wheel click button broke.
However, this is not an "easy" repair. It takes quite awhile to disassemble and reassemble this mouse.
必要な工具と部品
-
-
Let's begin!
-
First, flip it over.
-
Find two Torx screws. Use a T6 Torx driver to unscrew these. I used a small flat head screw driver to unscrew these because I did not have a T6 Torx driver.
-
-
-
There are two screws that hold the PCB in place. One is longer than the other. The SHORT one goes to where I am pointing. The long screw holds down a grounding wire. Move the wire out of the way as you take out the board.
-
There is a ribbon cable that I am pointing at which you can pull out. There are some multi-colored wires that are plugged into the board. Wiggle it out. Move it to the side when you take the board out.
-
Now lift the PCB out along with the scroll wheel. There should be some more screws which hold the metal to the plastic. Undo those if you want to.
-
The sides come apart. You must take the mainboard out in order to take the sides off. There are two latches for the left side and four on the right side. The left side also has two screws securing it to the rest of the body.
-
-
-
-
Replacing this button requires soldering. I recommend a "needle-type" soldering iron head to push the pins of the broken button out of the PCB.
-
See this guide for the initial teardown. I will pick up where Brett leaves off.
-
You will need to purchase a replacement button (Digi-Key -- EG4414-ND). But before purchasing, tear the mouse down and confirm the button is broken and it is not another problem.
-
Required tools:
-
multimeter (to confirm button malfunction)
-
soldering iron, solder, flux, wick, isopropyl
-
required screw driver heads
-
-
-
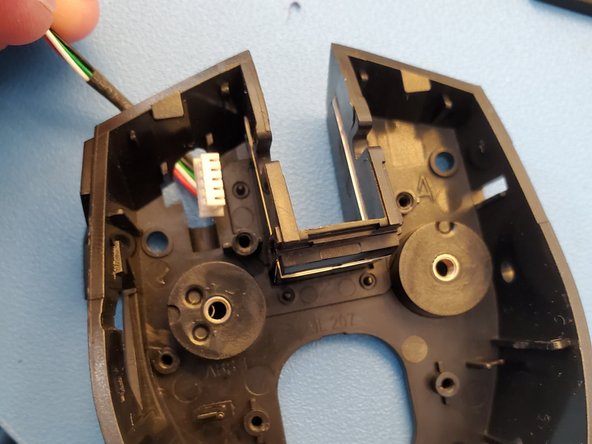
Cyan connectors: gently wiggle until wire assembly is free. Do NOT pull from wires, grab plastic connector!
-
Yellow connector: gently lift black tab straight up (~2mm) then ribbon should slide out with no force.
-
Red: unscrew
-
-
-
Requires some twisting and angling to slide the pcb out. Just be gentle and go slow.
-
-
-
Use a multimeter to check continuity of the switch in question. When the button is pressed the terminals should be connected (multimeter should show a very small resistance and audibly beep).
-
-
-
Materials required:
-
solder wire
-
flux
-
solder wick
-
iron with pointy tip
-
-
-
The button is now replaced! You can reassemble the mouse. I went ahead and disassembled completely before deep cleaning the mouse.
-
-
-
hold the mouse in one hand and use your index finger to push down on the rubber connector (shown)
-
-
-
all the parts -- complete disassembly
-
probably time to deep clean the mouse if you have used it long enough to break the button. I soaked all the non-electrical components and fasteners in soapy water before wiping with a soft cloth, rinsing, and drying.
-


To reassemble your device, follow these instructions in reverse order.
To reassemble your device, follow these instructions in reverse order.