はじめに
I have an iMac with a broken graphics card, and it seems like a waste to just throw it away, so I've decided to convert it into a monitor, and hopefully get all the accessories working. (iSight, SuperDrive, SD card reader, and Speakers)
This is a work in progress
必要な工具と部品
-
-
Connect Driver Board to display
-
I got mine here. https://item.taobao.com/item.htm?id=5381...
-
Connect a DisplayPort (male) to mini DisplayPort (female) cable to the driver board and hotglue the female end to the iMac back panel
-
-
-
-
(Optional) If you want to use the original iMac power button, connect the switch to the 12v latching module, PP12V_G3H + GND to power in, and connect the PS_ON pin to the output. Latching module should be configured to pull to ground when "on"
-
If you just want it to be always on and use the driver power button, short PS_ON to GND
-
Pinout guides here: Can anyone tell me what these PSU pin abbreviations mean? PSU 614-0446
-
-
-
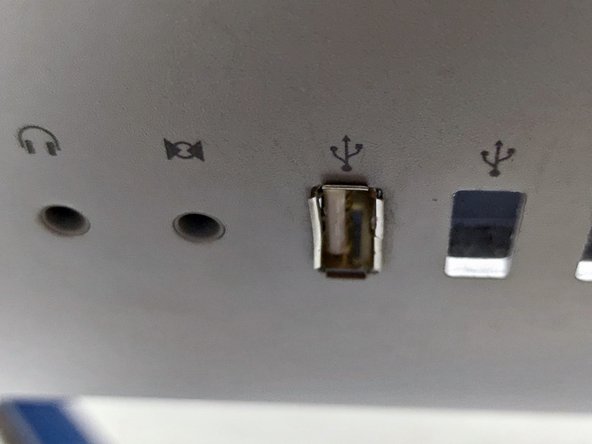
Disassemble USB Man-style hub, cut cables, insert USB sockets into usb openings, hot glue USB ports from the inside and solder everything back together
-
Something like this... https://www.amazon.com/Kikkerland-US006-...
-
you need another 5v/12v powered 4 port hub to connect the iSight, SuperDrive, SD Card Reader and the rear ports. And some donor USB cables...
-
iSight Pinout +5v = brown, D+ = Purple, D-= grey GND=black. Unfortunately Apple uses different colors for different revisions. Pinout of the iMac's built in iSight..
-
SD Card Reader Pinout +5v = orange, D+ = grey, D-= purple, GND=unshielded cable. Again, Apple uses different colors for different revisions, although you'd think the cabling color scheme would be at least internally consistent.... https://www.tonymacx86.com/threads/apple...
-
Connect the USB-SATA bridge to the SuperDrive and the USB hub. I had to cut away some plastic to fit the USB adapter
-
Power the USB hubs with the 12v pins, or use a DC-to-DC stepdown board to convert 12v to 5v. (The power supply doesn't provide a 5v rail...)
-
-
-
You can also get the Apple IR receiver working! the first wire in the left ( marked V on the board ) is D-, second is D+, third is 5V and the last wire is Ground. https://www.tonymacx86.com/threads/apple...
-
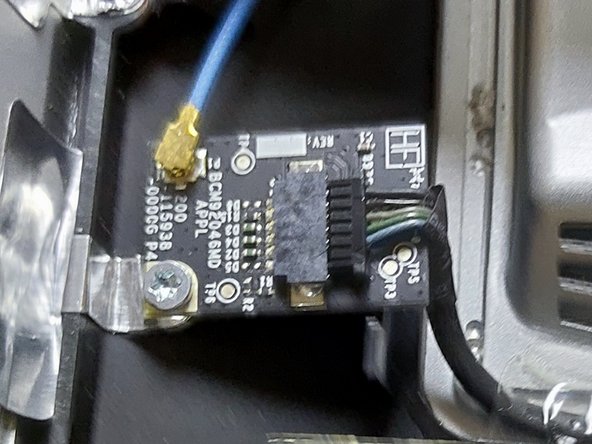
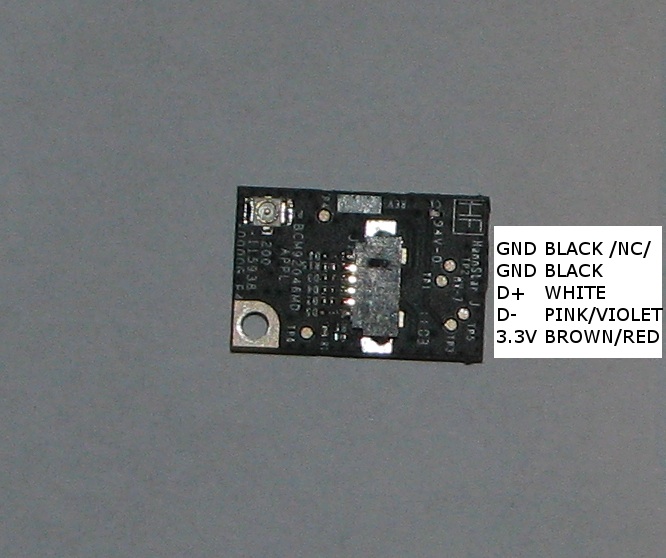
The Bluetooth module is also USB, but need a 3.3v line https://homokozo.czo.hu/iMac2011mod/iMac...
-
Hmm need more internal usb ports
-
-
-
Thinking about getting the speakers and Mic working as well. We are going to need a USB soundcard and an amplifier that can handle driving the built in 17W speakers
-
DIYaudio.com seems like a pretty deep pit to jump in.
-
Do I need a fan controller? I think I need a fan controller.
-


To reassemble your device, follow these instructions in reverse order.
To reassemble your device, follow these instructions in reverse order.
ある他の人がこのガイドを完成しました。