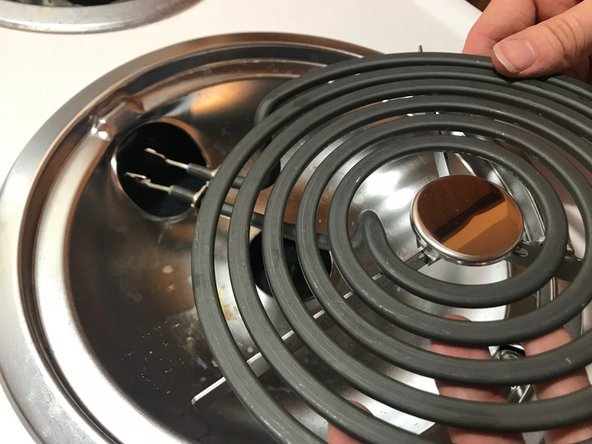
メインコンテンツにスキップ

Conventional Electric Stovetop Plug-in Burner Replacement

必要な工具と部品

  1. Conventional Electric Stovetop Plug-in Burner Replacement, Plug-in Burner: 手順 1、 1の画像 1
    • Check that the burner is turned off or your stove is unplugged.

  2. Conventional Electric Stovetop Plug-in Burner Replacement: 手順 2、 1の画像 1
    • Detach the stove burner by gently lifting it up (you can use a flat head screwdriver to lift the burner if it is stuck).

  3. Conventional Electric Stovetop Plug-in Burner Replacement: 手順 3、 2の画像 1 Conventional Electric Stovetop Plug-in Burner Replacement: 手順 3、 2の画像 2
    • Gently pull the burner from the plug in (straight back towards you). The plug in is better depicted in the second picture of this step.

  4. Conventional Electric Stovetop Plug-in Burner Replacement: 手順 4、 1の画像 1
    • Dispose of your old burner and take your new burner out of its packaging. It is ready to attach.

  5. Conventional Electric Stovetop Plug-in Burner Replacement: 手順 5、 1の画像 1
    • Gently insert the burner into the plug in, you should feel it click into place.

  6. Conventional Electric Stovetop Plug-in Burner Replacement: 手順 6、 1の画像 1
    • Gently set the burner back onto the stovetop.

  7. Conventional Electric Stovetop Plug-in Burner Replacement: 手順 7、 1の画像 1
    • Now the stove is ready to be plugged back into the wall (if you detached it) and the burner is ready to be tested to see if it is working.

終わりに

To reassemble your device, follow these instructions in reverse order.

ある他の人がこのガイドを完成しました。

作成者

1人の作成者と共同作成されました。

Chloe Martin

メンバー登録日: 10/29/18

172 ポイント

1ガイドが承認済み

0 件のコメント

コメントを追加

統計データ:

過去 24時間: 3

過去 7 日: 11

過去 30 日: 51

今までの合計 2,080