メインコンテンツにスキップ

Conair Infiniti PRO Curling Iron Motherboard Replacement

必要な工具と部品

  1. Conair Infiniti PRO Curling Iron Motherboard Replacement, Housing: 手順 1、 1の画像 1
    • Remove the Philips #1 28 mm.

    • Make sure device is unplugged and cool before attempting to replace parts.

  2. Conair Infiniti PRO Curling Iron Motherboard Replacement: 手順 2、 1の画像 1
    • Remove the Philips #1 22 mm screws.

  3. Conair Infiniti PRO Curling Iron Motherboard Replacement: 手順 3、 3の画像 1 Conair Infiniti PRO Curling Iron Motherboard Replacement: 手順 3、 3の画像 2 Conair Infiniti PRO Curling Iron Motherboard Replacement: 手順 3、 3の画像 3
    • Pry off the housing using a plastic spudger.

  4. Conair Infiniti PRO Curling Iron Motherboard Replacement, Power Cord: 手順 4、 1の画像 1
    • Pull power chord out.

  5. Conair Infiniti PRO Curling Iron Motherboard Replacement, Motherboard: 手順 5、 1の画像 1
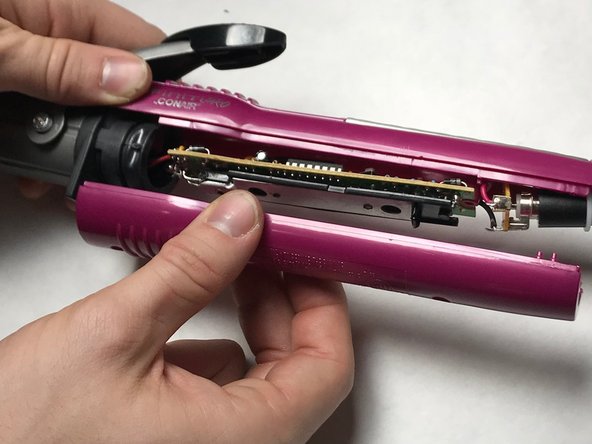
    • Heat up your soldering gun and desolder the red wire from the motherboard as shown.

    • Note the location of wire attachment.

  6. Conair Infiniti PRO Curling Iron Motherboard Replacement: 手順 6、 1の画像 1
    この手順で使用する道具:
    Desoldering Pump
    $3.99
    購入する
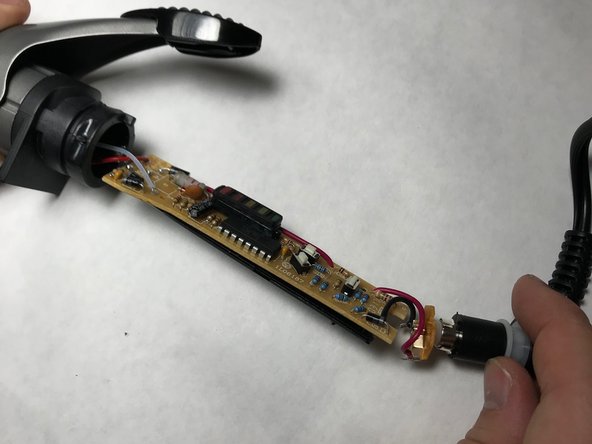
    • With your soldering gun, desolder the white wire from the motherboard as shown.

    • Note the location of wire attachment.

  7. Conair Infiniti PRO Curling Iron Motherboard Replacement: 手順 7、 1の画像 1
    • Once both wires are desoldered the motherboard can be removed.

終わりに

To reassemble your device, follow these instructions in reverse order, making sure to resolder the wires correctly into the replacement motherboard.

2 の人々がこのガイドを完成させました。

作成者

3人の作成者と共同で作成されました。

Jonathon Bruer

メンバー登録日: 11/09/17

607 ポイント

5のガイドは作成済み

チーム

IUPUI, Team S7-G5, Baechle Fall 2017 IUPUI, Team S7-G5, Baechle Fall 2017人のメンバー

IUPUI-BAECHLE-F17S7G5

3 メンバー

5のガイドは作成済み

0 件のコメント

コメントを追加

統計データ:

過去 24時間: 0

過去 7 日: 10

過去 30 日: 14

今までの合計 582