メインコンテンツにスキップ

Coleman Rechargeable Fluorescent Twin Tube Battery Replacement

必要な工具と部品

  1. Coleman Rechargeable Fluorescent Twin Tube Battery  Replacement, Battery: 手順 1、 2の画像 1 Coleman Rechargeable Fluorescent Twin Tube Battery  Replacement, Battery: 手順 1、 2の画像 2
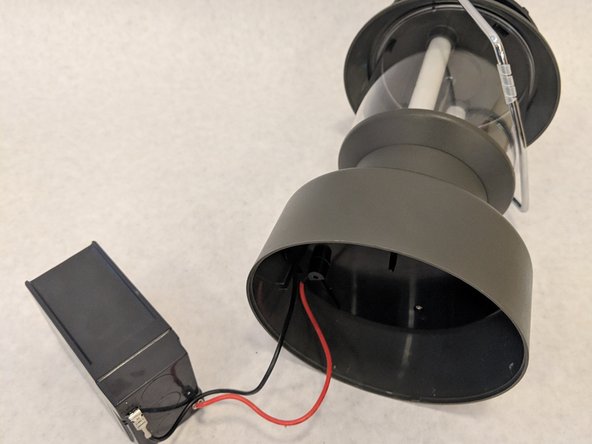
    • Carefully turn the lantern upside down.

    • Remove the three 1.2 mm Phillips #0 screws from the base of the lantern.

  2. Coleman Rechargeable Fluorescent Twin Tube Battery  Replacement: 手順 2、 1の画像 1
    • Carefully pull the bottom of the lantern to remove the base from the device.

  3. Coleman Rechargeable Fluorescent Twin Tube Battery  Replacement: 手順 3、 2の画像 1 Coleman Rechargeable Fluorescent Twin Tube Battery  Replacement: 手順 3、 2の画像 2
    • Gently pull the battery out of the slot and away from the base.

    • The battery may be held into place by adhesive strips.

  4. Coleman Rechargeable Fluorescent Twin Tube Battery  Replacement: 手順 4、 3の画像 1 Coleman Rechargeable Fluorescent Twin Tube Battery  Replacement: 手順 4、 3の画像 2 Coleman Rechargeable Fluorescent Twin Tube Battery  Replacement: 手順 4、 3の画像 3
    • Carefully detach the negative wire from the battery terminal first.

    • Next, detach the positive wire from the battery terminal.

終わりに

To reassemble your device, follow these instructions in reverse order.

作成者

3人の作成者と共同で作成されました。

Sean

メンバー登録日: 09/17/18

265 ポイント

2のガイドは作成済み

チーム

Washington State, Team S2-G1, Hope Fall 2018 Washington State, Team S2-G1, Hope Fall 2018人のメンバー

WSU-HOPE-F18S2G1

4 メンバー

8のガイドは作成済み

コメント 1 件

Sean, I’m facing a dead battery in my Coleman twin tube fluorescent lantern also. Your directions are spot on except my battery seems to be glued in with super glue! I’ve tried a heat gun and all my strength but my battery won’t come loose. I find it hard to pry under the battery because of the shape of the plastic partitions around the battery. How did you get the battery unstuck?

BilMcKelvy - 返信

コメントを追加

統計データ:

過去 24時間: 2

過去 7 日: 22

過去 30 日: 89

今までの合計 4,604