メインコンテンツにスキップ

ColecoVision Motherboard Replacement

必要な工具と部品

  1. ColecoVision Motherboard Replacement, Motherboard: 手順 1、 1の画像 1
    • Start by laying the console face down.

    • Remove the eight 15mm Phillips #1 screws from the bottom of the device.

  2. ColecoVision Motherboard Replacement: 手順 2、 2の画像 1 ColecoVision Motherboard Replacement: 手順 2、 2の画像 2
    • Flip the console back over.

    • Lift the front panel off. I would reccomended using a metal spudger along the rim of the top to safely remove it and set it aside.

  3. ColecoVision Motherboard Replacement: 手順 3、 2の画像 1 ColecoVision Motherboard Replacement: 手順 3、 2の画像 2
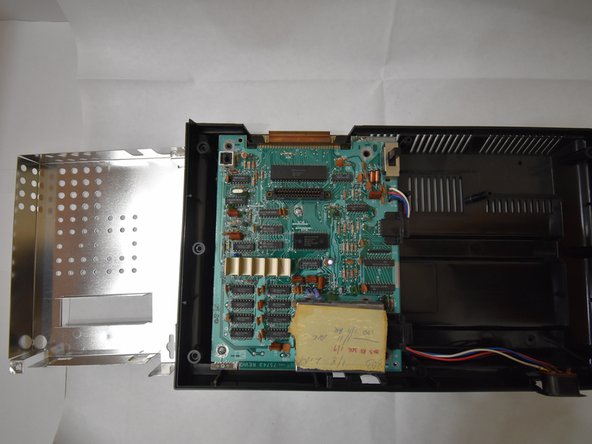
    • Remove the two 15mm Phillips #1 screws holding the casing in place.

    • Carefully lift the casing from the motherboard.

  4. ColecoVision Motherboard Replacement: 手順 4、 1の画像 1
    • Remove the center Phillips #1 screw near the cartridge slot.

    • Remove the second Phillips #1 screw near the RAM chips.

    • Carefully lift and remove the motherboard.

終わりに

To reassemble your device, follow these instructions in reverse order.

ある他の人がこのガイドを完成しました。

作成者

2人の作成者と共同で作成されました。

Krystalina

メンバー登録日: 10/24/18

121 ポイント

1ガイドが承認済み

チーム

UW Tacoma, Team S1-G2, Rose Fall 2018 UW Tacoma, Team S1-G2, Rose Fall 2018人のメンバー

UWT-ROSE-F18S1G2

4 メンバー

12のガイドは作成済み

0 件のコメント

コメントを追加

統計データ:

過去 24時間: 5

過去 7 日: 9

過去 30 日: 30

今までの合計 1,585