メインコンテンツにスキップ

Cobra SPX 5300 Audio Dial Replacement

必要な工具と部品

  1. Cobra SPX 5300 Audio Dial Replacement, Windshield Bracket Mount: 手順 1、 2の画像 1 Cobra SPX 5300 Audio Dial Replacement, Windshield Bracket Mount: 手順 1、 2の画像 2
    • Remove the four 9.5 mm Phillips #0 screws from the back of the device.

  2. Cobra SPX 5300 Audio Dial Replacement: 手順 2、 2の画像 1 Cobra SPX 5300 Audio Dial Replacement: 手順 2、 2の画像 2
    • Pull the black plastic back case off of the device.

  3. Cobra SPX 5300 Audio Dial Replacement: 手順 3、 1の画像 1
    • Lift up the motherboard and lay it flat next to the device.

    • Be careful not to sever the wires. The buttonboard is connected to the motherboard by the wires.

  4. Cobra SPX 5300 Audio Dial Replacement: 手順 4、 1の画像 1
    • Remove the windshield bracket mount.

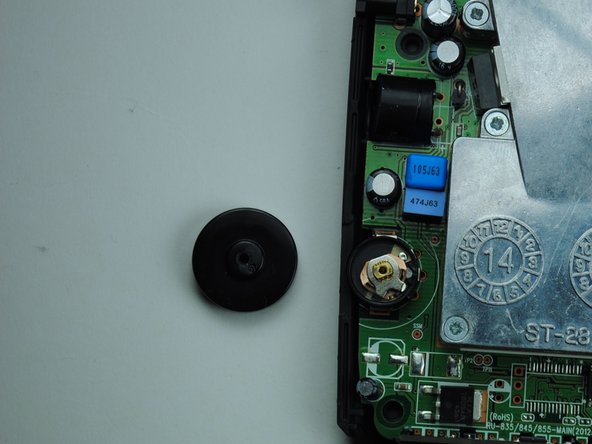
  5. Cobra SPX 5300 Audio Dial Replacement, Audio Dial: 手順 5、 1の画像 1
    • Remove the one 4.8 mm Phillips #00 screw from the center of the audio dial.

  6. Cobra SPX 5300 Audio Dial Replacement: 手順 6、 2の画像 1 Cobra SPX 5300 Audio Dial Replacement: 手順 6、 2の画像 2
    • Remove audio dial.

終わりに

To reassemble your device, follow these instructions in reverse order.

ある他の人がこのガイドを完成しました。

作成者

3人の作成者と共同で作成されました。

Samantha Delle

メンバー登録日: 09/25/15

122 ポイント

1ガイドが承認済み

チーム

University of Tampa, Team 1-2, Whiteside Fall 2015 University of Tampa, Team 1-2, Whiteside Fall 2015人のメンバー

UT-WHITESIDE-F15S1G2

4 メンバー

5のガイドは作成済み

0 件のコメント

コメントを追加

統計データ:

過去 24時間: 0

過去 7 日: 3

過去 30 日: 4

今までの合計 632