メインコンテンツにスキップ

Classen Sod Cutter HSC18AHD 2018 Lower V-Belt Replacement

必要な工具と部品

  1. 注意: 手順 1-4 は、作業進行中としてマークされている ガイド から引用されています。

    Classen Sod Cutter HSC18AHD 2018 Lower V-Belt Replacement, Safety precautions: 手順 1、 2の画像 1 Classen Sod Cutter HSC18AHD 2018 Lower V-Belt Replacement, Safety precautions: 手順 1、 2の画像 2
    • Make sure the engine is off and cool to the touch before you proceed.

  2. Classen Sod Cutter HSC18AHD 2018 Lower V-Belt Replacement: 手順 2、 1の画像 1
    • Place wheel chocks against the roller and rear wheel to prevent the machine from moving.

  3. Classen Sod Cutter HSC18AHD 2018 Lower V-Belt Replacement: 手順 3、 2の画像 1 Classen Sod Cutter HSC18AHD 2018 Lower V-Belt Replacement: 手順 3、 2の画像 2
    • Flip the gas shutoff switch next to the motor to the left into the off position.

  4. Classen Sod Cutter HSC18AHD 2018 Lower V-Belt Replacement: 手順 4、 2の画像 1 Classen Sod Cutter HSC18AHD 2018 Lower V-Belt Replacement: 手順 4、 2の画像 2
    • Grab the plastic housing at the end of the spark plug wire.

    • Pull firmly to disconnect the wire from the spark plug.

  5. Classen Sod Cutter HSC18AHD 2018 Lower V-Belt Replacement, Remove the belt shield: 手順 5、 2の画像 1 Classen Sod Cutter HSC18AHD 2018 Lower V-Belt Replacement, Remove the belt shield: 手順 5、 2の画像 2
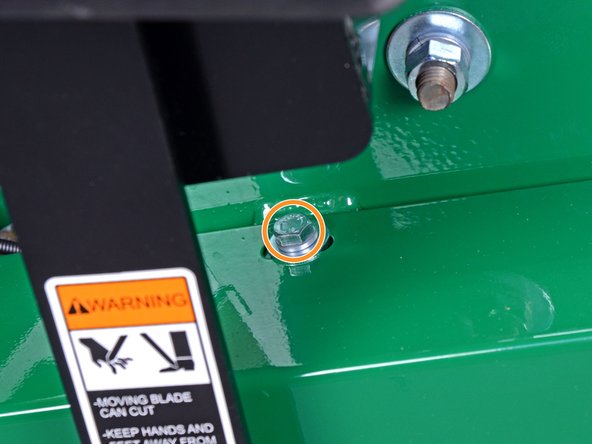
    • Use a 1/2 inch socket to remove the first two bolts from the belt shield.

    • Use a 1/2 inch socket to remove the third bolt from the belt shield.

  6. Classen Sod Cutter HSC18AHD 2018 Lower V-Belt Replacement: 手順 6、 2の画像 1 Classen Sod Cutter HSC18AHD 2018 Lower V-Belt Replacement: 手順 6、 2の画像 2
    • Remove the belt shield.

  7. Classen Sod Cutter HSC18AHD 2018 Lower V-Belt Replacement: 手順 7、 1の画像 1
    • Use a marker to mark the height of the idler pulley on the bracket.

  8. Classen Sod Cutter HSC18AHD 2018 Lower V-Belt Replacement: 手順 8、 1の画像 1
    • Use a 9/16 inch socket to loosen the nut securing the idler pulley until the pulley can freely move up and down the bracket.

    • You may need to use a 3/8 inch wrench in combination with the socket wrench to hold the bolt in place.

  9. Classen Sod Cutter HSC18AHD 2018 Lower V-Belt Replacement: 手順 9、 1の画像 1
    • Raise the idler pulley to relieve the tension from the V-belt.

  10. Classen Sod Cutter HSC18AHD 2018 Lower V-Belt Replacement: 手順 10、 1の画像 1
    • Remove the V-belt.

  11. Classen Sod Cutter HSC18AHD 2018 Lower V-Belt Replacement, Reassembly tip: 手順 11、 1の画像 1
    • Check that the idler pulley is properly tensioning the belt:

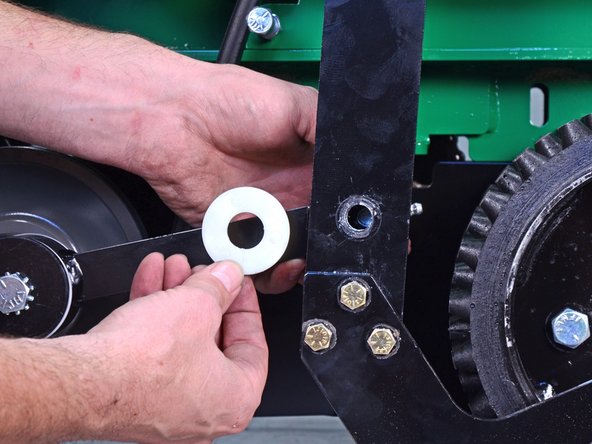
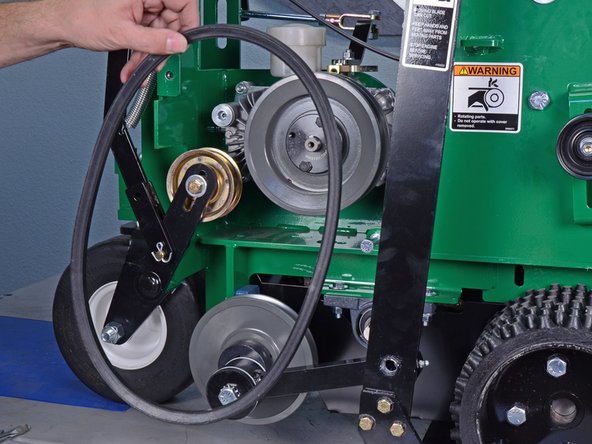
    • Use your fingers to roll the belt. If you cannot twist the belt more than a quarter turn, the belt is sufficiently tensioned. If the belt is too loose, set the idler pulley lower to tension the belt more.

  12. Classen Sod Cutter HSC18AHD 2018 Lower V-Belt Replacement, Remove the lower V-belt: 手順 12、 1の画像 1
    • Use a 3/4 inch socket to remove the bolt securing the eccentric arm to the blade arm.

    • You may need to use a 3/4 inch wrench in combination with the socket wrench to hold the nut in place.

  13. Classen Sod Cutter HSC18AHD 2018 Lower V-Belt Replacement: 手順 13、 2の画像 1 Classen Sod Cutter HSC18AHD 2018 Lower V-Belt Replacement: 手順 13、 2の画像 2
    • Remove the plastic washer from in between the eccentric arm and the blade arm.

  14. Classen Sod Cutter HSC18AHD 2018 Lower V-Belt Replacement: 手順 14、 1の画像 1
    • Remove the partially threaded bolt and plastic washer.

    • During reassembly, apply threadlocker on the bolt threads.

  15. Classen Sod Cutter HSC18AHD 2018 Lower V-Belt Replacement, Remove the lower V-belt: 手順 15、 1の画像 1
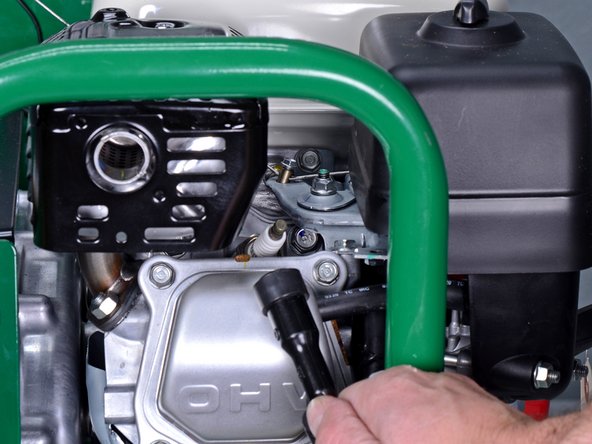
    • Move the cutter blade handle back to disengage the blade drive and relieve tension on the V-belt.

  16. Classen Sod Cutter HSC18AHD 2018 Lower V-Belt Replacement: 手順 16、 2の画像 1 Classen Sod Cutter HSC18AHD 2018 Lower V-Belt Replacement: 手順 16、 2の画像 2
    • Lift the eccentric arm to open a space to remove the V-belt.

    • Remove the V-belt.

  17. Classen Sod Cutter HSC18AHD 2018 Lower V-Belt Replacement, Reassembly tip: 手順 17、 1の画像 1
    • When installing the new V-belt, ensure it is placed to the left of the bolt as pictured.

終わりに

To reassemble your device, follow these instructions in reverse order.

2 の人々がこのガイドを完成させました。

作成者

1人の作成者と共同作成されました。

Sam Omiotek

メンバー登録日: 02/25/19

75,086 ポイント

288のガイドは作成済み

0 件のコメント

コメントを追加

統計データ:

過去 24時間: 0

過去 7 日: 3

過去 30 日: 26

今までの合計 1,144