メインコンテンツにスキップ

Clarke Floor Sander 07012A 2012 Drum Expander Replacement

必要な工具と部品

  1. 注意: 手順 1 は、作業進行中としてマークされている ガイド から引用されています。

    Clarke Floor Sander 07012A 2012 Drum Expander Replacement, Disconnect all power cables: 手順 1、 1の画像 1
    • Before you begin your repair, disconnect all power cables to reduce the risk of short circuits and electric shock.

  2. Clarke Floor Sander 07012A 2012 Drum Expander Replacement, Remove the dust bag: 手順 2、 2の画像 1 Clarke Floor Sander 07012A 2012 Drum Expander Replacement, Remove the dust bag: 手順 2、 2の画像 2
    • Pull on the dust bag to remove it from the dust tube.

    • If the dust bag doesn't slide off easily, gently twist it back and forth while pulling to free it from the tube.

  3. Clarke Floor Sander 07012A 2012 Drum Expander Replacement, Remove the dust tube: 手順 3、 1の画像 1
    • Pull up on the dust tube to remove it from the sander.

  4. Clarke Floor Sander 07012A 2012 Drum Expander Replacement, Lower the sander and lift the front cover: 手順 4、 3の画像 1 Clarke Floor Sander 07012A 2012 Drum Expander Replacement, Lower the sander and lift the front cover: 手順 4、 3の画像 2 Clarke Floor Sander 07012A 2012 Drum Expander Replacement, Lower the sander and lift the front cover: 手順 4、 3の画像 3
    • Gently lower the sander onto its left side (the side with the belt guard).

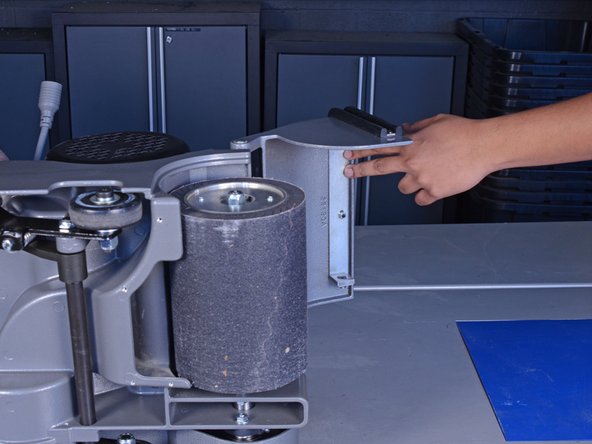
    • Lift the front cover up and out of the way of the sanding drum.

  5. Clarke Floor Sander 07012A 2012 Drum Expander Replacement, Remove the sandpaper from the drum: 手順 5、 3の画像 1 Clarke Floor Sander 07012A 2012 Drum Expander Replacement, Remove the sandpaper from the drum: 手順 5、 3の画像 2 Clarke Floor Sander 07012A 2012 Drum Expander Replacement, Remove the sandpaper from the drum: 手順 5、 3の画像 3
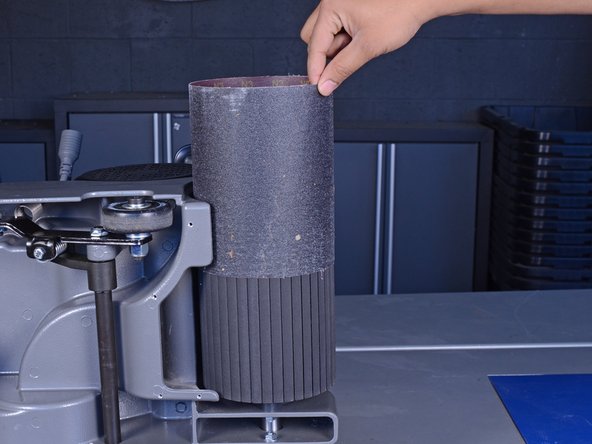
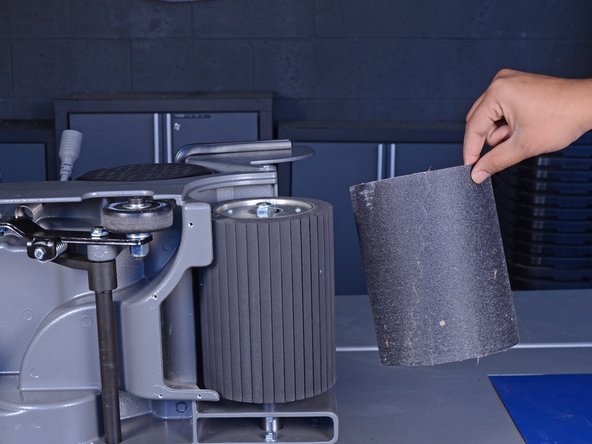
    • Pull the sandpaper loop straight up and remove it from the drum.

  6. Clarke Floor Sander 07012A 2012 Drum Expander Replacement, Remove the Nyloc nut: 手順 6、 2の画像 1 Clarke Floor Sander 07012A 2012 Drum Expander Replacement, Remove the Nyloc nut: 手順 6、 2の画像 2
    • Remove the 3/4" nyloc nut from the drum end plate.

    • Nyloc nuts can be difficult to remove. If necessary, use an impact driver or another power tool for this step.

  7. Clarke Floor Sander 07012A 2012 Drum Expander Replacement, Remove the key washer: 手順 7、 3の画像 1 Clarke Floor Sander 07012A 2012 Drum Expander Replacement, Remove the key washer: 手順 7、 3の画像 2 Clarke Floor Sander 07012A 2012 Drum Expander Replacement, Remove the key washer: 手順 7、 3の画像 3
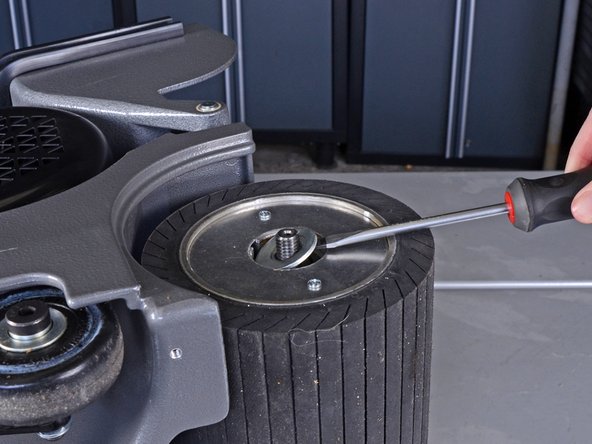
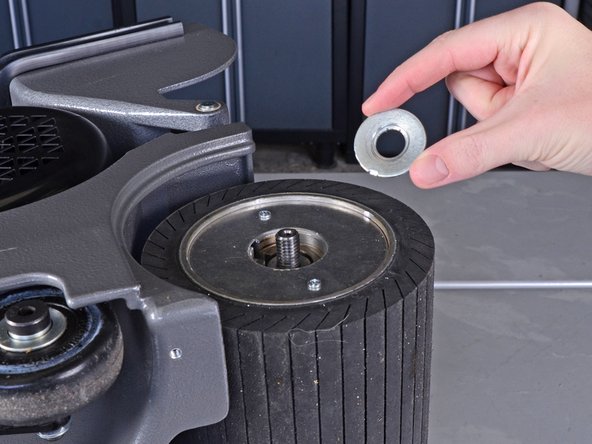
    • Use a flathead screwdriver or a prying tool to pry up the key washer and remove it from the drive shaft.

    • The key of the key washer may break off during removal. If so, replace the key washer with a new one during reassembly.

  8. Clarke Floor Sander 07012A 2012 Drum Expander Replacement, Attach the drum puller: 手順 8、 2の画像 1 Clarke Floor Sander 07012A 2012 Drum Expander Replacement, Attach the drum puller: 手順 8、 2の画像 2
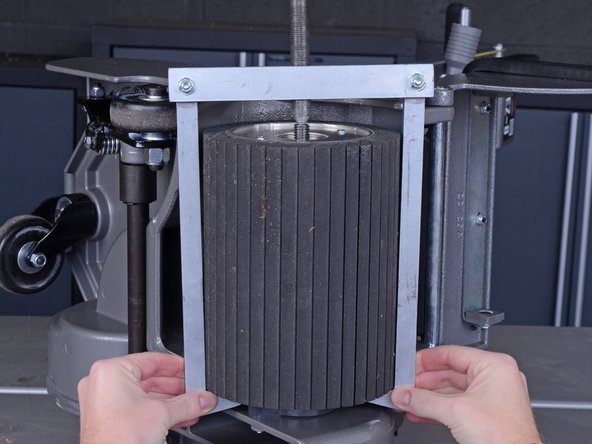
    • Place the center screw of the drum puller onto the drive shaft of the sander and hook the puller jaws around the bottom end of the drum.

  9. Clarke Floor Sander 07012A 2012 Drum Expander Replacement, Remove the drum: 手順 9、 3の画像 1 Clarke Floor Sander 07012A 2012 Drum Expander Replacement, Remove the drum: 手順 9、 3の画像 2 Clarke Floor Sander 07012A 2012 Drum Expander Replacement, Remove the drum: 手順 9、 3の画像 3
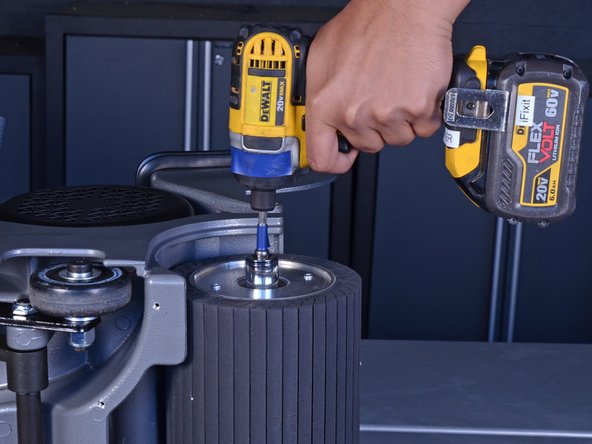
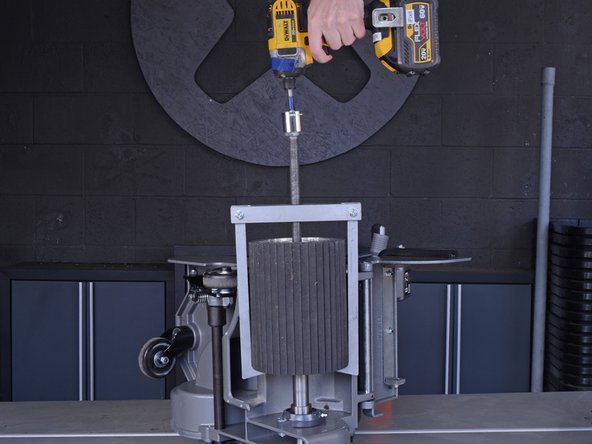
    • Use a 15/16" socket and an impact driver or a socket wrench to drive the screw of the drum puller clockwise, lifting the drum off the drive shaft.

    • Once the drum has been lifted about halfway off the shaft, it should move freely and can be lifted the rest of the way by hand.

終わりに

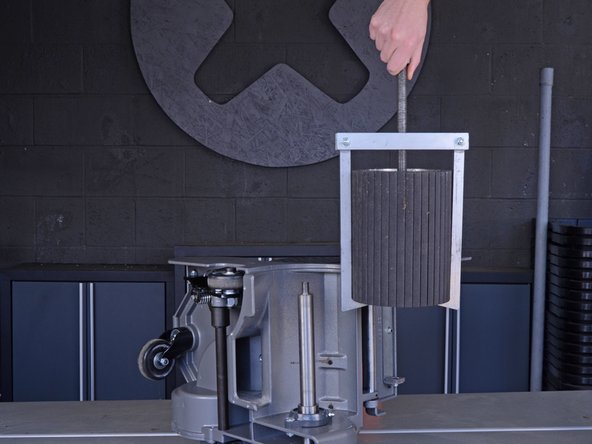
To reassemble your device, follow these instructions in reverse order.

9 の人々がこのガイドを完成させました。

Taylor Dixon

メンバー登録日: 06/26/18

67,349 ポイント

94のガイドは作成済み

コメント 1 件

seoshingare5@gmail.com

Tube Expander

the best product more details for mantion in this link

https://www.shingare.com/tube-tools/tube...


seo shingare - 返信

コメントを追加

統計データ:

過去 24時間: 4

過去 7 日: 22

過去 30 日: 107

今までの合計 5,526