メインコンテンツにスキップ

Chromo Noria Camera Replacement

必要な工具と部品

  1. Chromo Noria Camera  Replacement, Back Panel: 手順 1、 3の画像 1 Chromo Noria Camera  Replacement, Back Panel: 手順 1、 3の画像 2 Chromo Noria Camera  Replacement, Back Panel: 手順 1、 3の画像 3
    • Insert your Plastic Opening Tool into the crease between the front panel and back panel.

    • Slide the Opening Tool around the entire device. As you progress, you should see the device open.

  2. Chromo Noria Camera  Replacement: 手順 2、 1の画像 1
    • Carefully turn the device over.

    • Lay the back panel aside so you can see the device's parts.

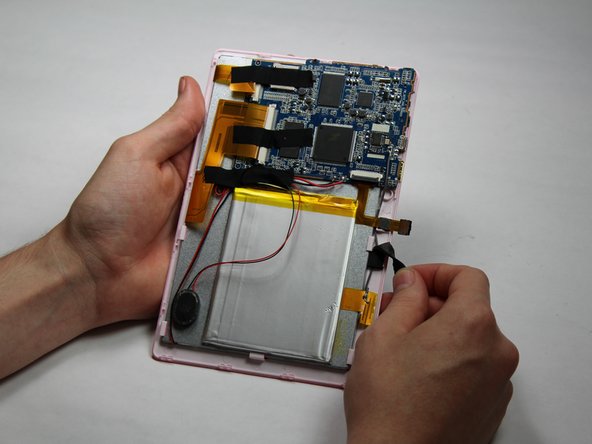
  3. Chromo Noria Camera  Replacement, Camera: 手順 3、 2の画像 1 Chromo Noria Camera  Replacement, Camera: 手順 3、 2の画像 2
    • Carefully detach one side of the black tape from the board.

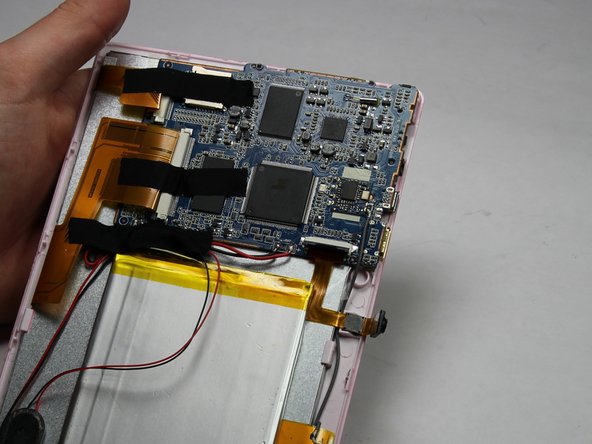
  4. Chromo Noria Camera  Replacement: 手順 4、 2の画像 1 Chromo Noria Camera  Replacement: 手順 4、 2の画像 2
    • Using a small plastic opening tool, flip the black connector up until it makes "tick" sound.

    • Now, the flexing cable is ready to be removed.

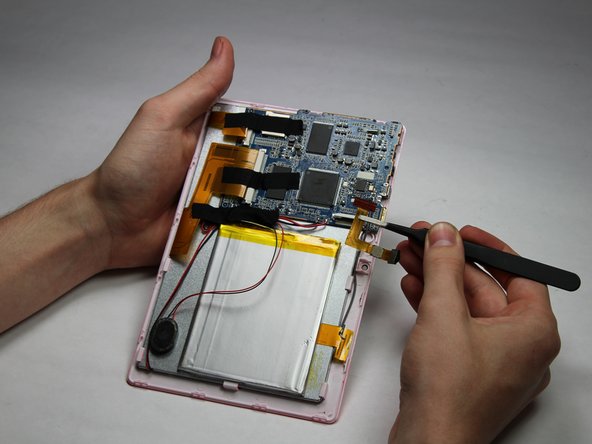
  5. Chromo Noria Camera  Replacement: 手順 5、 2の画像 1 Chromo Noria Camera  Replacement: 手順 5、 2の画像 2
    この手順で使用する道具:
    Tweezers
    $4.99
    購入する
    • Using a pair of tweezers, hold the flexing cable right below the black connector.

    • Gently pull the flexing cable out of the connector while balancing the other side of the device with another hand.

終わりに

To reassemble your device, follow these instructions in reverse order.

作成者

3人の作成者と共同で作成されました。

Ryan Rho

メンバー登録日: 10/31/16

201 ポイント

2のガイドは作成済み

チーム

Baylor, Team 5-6, Williams Fall 2016 Baylor, Team 5-6, Williams Fall 2016人のメンバー

BU-WILLIAMS-F16S5G6

3 メンバー

12のガイドは作成済み

0 件のコメント

コメントを追加

統計データ:

過去 24時間: 2

過去 7 日: 2

過去 30 日: 7

今までの合計 122