メインコンテンツにスキップ

Changing the thermostatic cartridge - Thermostatic Bath NF SIRYO CHROME

必要な工具と部品

  1. Changing the thermostatic cartridge - Thermostatic Bath NF SIRYO CHROME, Required tools: 手順 1、 1の画像 1
    • 24mm wrench

    • 21mm wrench

    • Flathead screwdriver

    • Phillips screwdriver

  2. Changing the thermostatic cartridge - Thermostatic Bath NF SIRYO CHROME, Access to the inverter: 手順 2、 3の画像 1 Changing the thermostatic cartridge - Thermostatic Bath NF SIRYO CHROME, Access to the inverter: 手順 2、 3の画像 2 Changing the thermostatic cartridge - Thermostatic Bath NF SIRYO CHROME, Access to the inverter: 手順 2、 3の画像 3
    • ATTENTION: Before any disassembly of the inverter, remember to close the water supply from the meter.

    • Check that the position of the reverse handle is on 'OFF'

    • Using a small flat screwdriver, unclip the access cover to the screw that holds it in place.

    • Using a Phillips screwdriver, unscrew the fixing screw of the handle.

  3. Changing the thermostatic cartridge - Thermostatic Bath NF SIRYO CHROME, Removal of the handle of the inverter: 手順 3、 2の画像 1 Changing the thermostatic cartridge - Thermostatic Bath NF SIRYO CHROME, Removal of the handle of the inverter: 手順 3、 2の画像 2
    • Unscrew the handle.

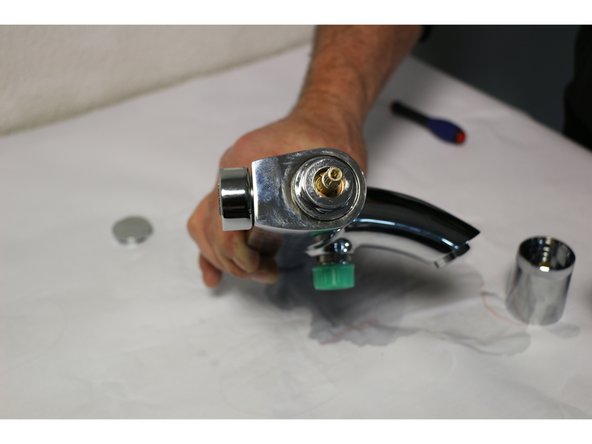
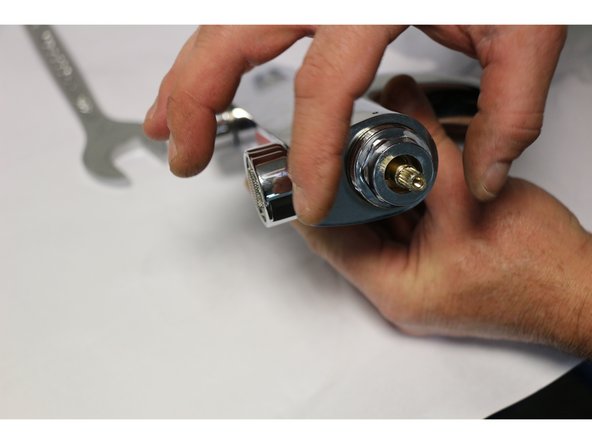
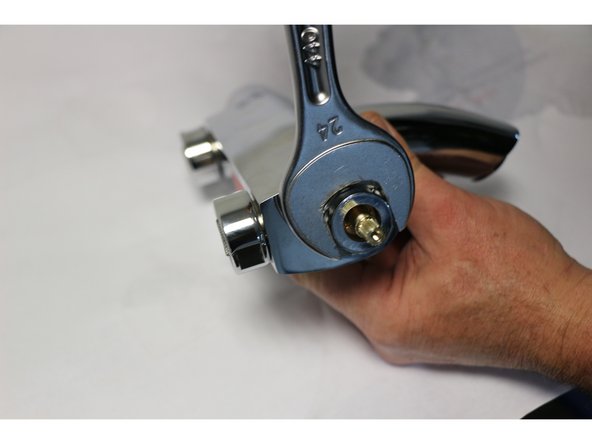
  4. Changing the thermostatic cartridge - Thermostatic Bath NF SIRYO CHROME, Disassembly of the inverter: 手順 4、 2の画像 1 Changing the thermostatic cartridge - Thermostatic Bath NF SIRYO CHROME, Disassembly of the inverter: 手順 4、 2の画像 2
    • Using a 24 flat wrench, unscrew the nut counterclockwise.

    • Remove the inverter.

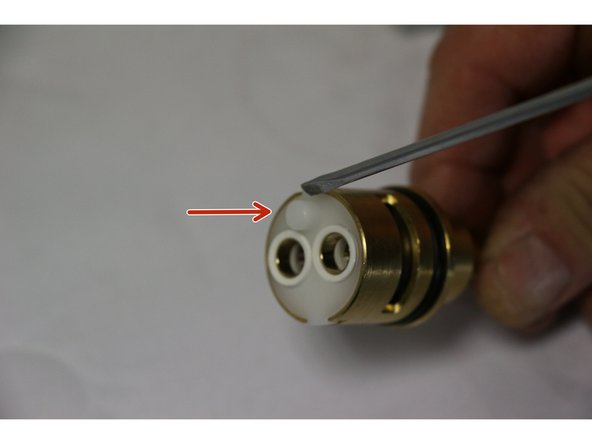
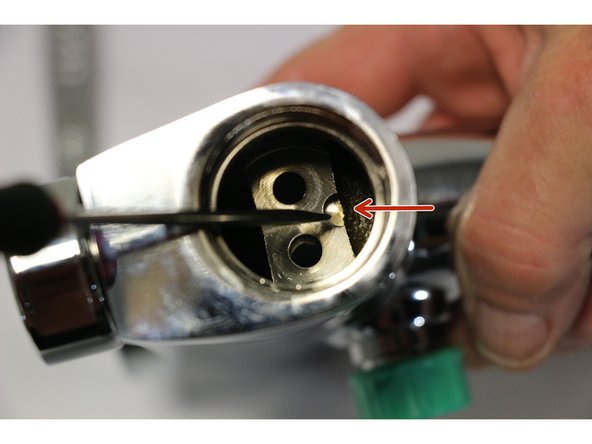
  5. Changing the thermostatic cartridge - Thermostatic Bath NF SIRYO CHROME, Replacement of the inverter: 手順 5、 3の画像 1 Changing the thermostatic cartridge - Thermostatic Bath NF SIRYO CHROME, Replacement of the inverter: 手順 5、 3の画像 2 Changing the thermostatic cartridge - Thermostatic Bath NF SIRYO CHROME, Replacement of the inverter: 手順 5、 3の画像 3
    • Replacing the inverter

    • Please make sure to properly align the pin of the diverter with the notch indicated by the arrow in the body of the faucet.

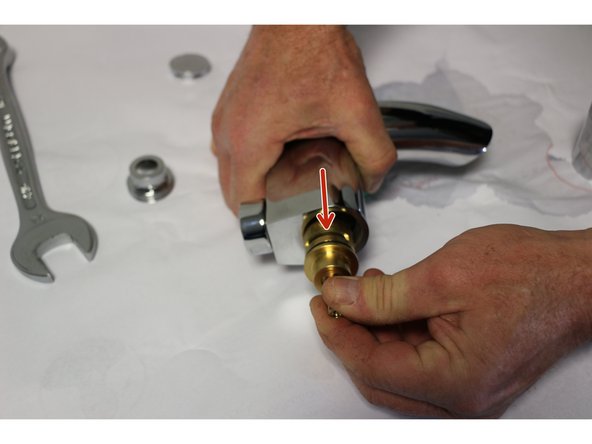
  6. Changing the thermostatic cartridge - Thermostatic Bath NF SIRYO CHROME, Reassembly: 手順 6、 3の画像 1 Changing the thermostatic cartridge - Thermostatic Bath NF SIRYO CHROME, Reassembly: 手順 6、 3の画像 2 Changing the thermostatic cartridge - Thermostatic Bath NF SIRYO CHROME, Reassembly: 手順 6、 3の画像 3
    • Insert the diverter into the body of the faucet.

    • Hand-tighten the inverter mounting nut clockwise.

    • Finish tightening using the 24mm wrench.

  7. Changing the thermostatic cartridge - Thermostatic Bath NF SIRYO CHROME, Putting the handle back in place: 手順 7、 3の画像 1 Changing the thermostatic cartridge - Thermostatic Bath NF SIRYO CHROME, Putting the handle back in place: 手順 7、 3の画像 2 Changing the thermostatic cartridge - Thermostatic Bath NF SIRYO CHROME, Putting the handle back in place: 手順 7、 3の画像 3
    • Align the reference point of the faucet body with the "OFF" marking on the handle.

    • Tighten the fixing screw of the handle using a Phillips screwdriver in a clockwise direction.

    • Put the cover back in place.

ゴール

2 の人々がこのガイドを完成させました。

以下の翻訳者の皆さんにお礼を申し上げます:

fr en

100%

これらの翻訳者の方々は世界を修理する私たちのサポートをしてくれています。 あなたも貢献してみませんか?
翻訳を始める ›

作成者

1人の作成者と共同作成されました。

iRobot

メンバー登録日: 09/24/09

1 ポイント

636のガイドは作成済み

0 件のコメント

コメントを追加

統計データ:

過去 24時間: 0

過去 7 日: 7

過去 30 日: 23

今までの合計 447