メインコンテンツにスキップ

Changing the Bath NF SIRYO CHROME thermostatic cartridge

  1. Changing the Bath NF SIRYO CHROME thermostatic cartridge, Access to the thermostatic cartridge: 手順 1、 3の画像 1 Changing the Bath NF SIRYO CHROME thermostatic cartridge, Access to the thermostatic cartridge: 手順 1、 3の画像 2 Changing the Bath NF SIRYO CHROME thermostatic cartridge, Access to the thermostatic cartridge: 手順 1、 3の画像 3
    • WARNING: Before any intervention, make sure that the inverter is in the "OFF" position and close the water supply to the meter.

    • Using a flat screwdriver, unclip the cover to access the handle fixing screw.

    • Unscrew the fixing screw counterclockwise.

  2. Changing the Bath NF SIRYO CHROME thermostatic cartridge, Dismantling the thermostatic handle: 手順 2、 3の画像 1 Changing the Bath NF SIRYO CHROME thermostatic cartridge, Dismantling the thermostatic handle: 手順 2、 3の画像 2 Changing the Bath NF SIRYO CHROME thermostatic cartridge, Dismantling the thermostatic handle: 手順 2、 3の画像 3
    • Before disassembling, check that the mark on the mixer tap is aligned with the "38°" position, then remove the handle.

    • ATTENTION: before extracting the stop ring (38°), check that the two notches are aligned with the mark on the mixer

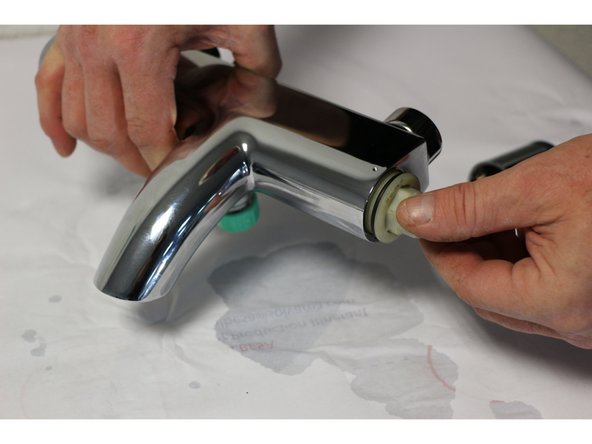
    • Extract the thrust ring

  3. Changing the Bath NF SIRYO CHROME thermostatic cartridge, Removing the thermostatic cartridge: 手順 3、 3の画像 1 Changing the Bath NF SIRYO CHROME thermostatic cartridge, Removing the thermostatic cartridge: 手順 3、 3の画像 2 Changing the Bath NF SIRYO CHROME thermostatic cartridge, Removing the thermostatic cartridge: 手順 3、 3の画像 3
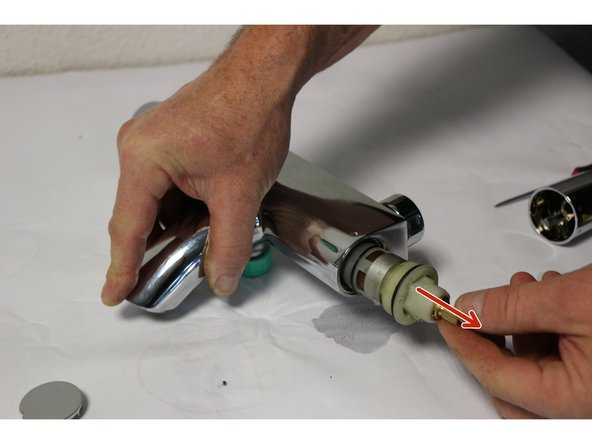
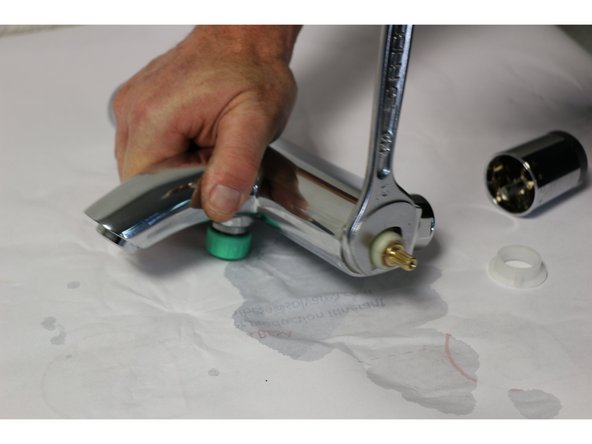
    • Unscrew the thermostatic cartridge anti-clockwise using a 21 wrench.

    • Extract the cartridge by hand.

  4. Changing the Bath NF SIRYO CHROME thermostatic cartridge, Reassembly: 手順 4、 3の画像 1 Changing the Bath NF SIRYO CHROME thermostatic cartridge, Reassembly: 手順 4、 3の画像 2 Changing the Bath NF SIRYO CHROME thermostatic cartridge, Reassembly: 手順 4、 3の画像 3
    • Insert the thermostat in the mixer body.

    • Screw in clockwise by hand.

    • Finish the tightening using the spanner 21.

    • ATTENTION: The tightening torque must not exceed 10Nm. We therefore advise you to use a torque wrench so as not to damage the thread of the thermostatic cartridge.

  5. Changing the Bath NF SIRYO CHROME thermostatic cartridge, Replacing and adjusting the stop ring: 手順 5、 3の画像 1 Changing the Bath NF SIRYO CHROME thermostatic cartridge, Replacing and adjusting the stop ring: 手順 5、 3の画像 2 Changing the Bath NF SIRYO CHROME thermostatic cartridge, Replacing and adjusting the stop ring: 手順 5、 3の画像 3
    • Position the two lines marked on the stop ring facing the point of the mixer tap.

    • Turn on the water supply to proceed with the adjustment step.

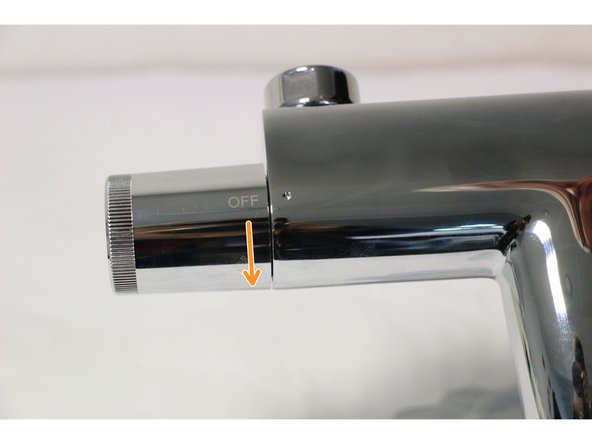
    • Turn the diverter handle to run the water, then place a thermometer under the flow to check the correct temperature, which should be 38°.

    • If the temperature is not 38°, adjust by turning the wheel clockwise to decrease the temperature (-°C).

    • And counterclockwise to increase the temperature (+°C).

  6. Changing the Bath NF SIRYO CHROME thermostatic cartridge, Replacing the handle: 手順 6、 3の画像 1 Changing the Bath NF SIRYO CHROME thermostatic cartridge, Replacing the handle: 手順 6、 3の画像 2 Changing the Bath NF SIRYO CHROME thermostatic cartridge, Replacing the handle: 手順 6、 3の画像 3
    • Align the reference point on the mixer body with the 38° mark on the handle.

    • Tighten the handle fixing screw using a Phillips screwdriver in a clockwise direction.

    • Replace the cover.

終わりに

To reassemble your device, follow these instructions in reverse order.

以下の翻訳者の皆さんにお礼を申し上げます:

fr en

100%

これらの翻訳者の方々は世界を修理する私たちのサポートをしてくれています。 あなたも貢献してみませんか?
翻訳を始める ›

作成者

1人の作成者と共同作成されました。

iRobot

メンバー登録日: 09/24/09

1 ポイント

636のガイドは作成済み

0 件のコメント

コメントを追加

統計データ:

過去 24時間: 1

過去 7 日: 9

過去 30 日: 39

今までの合計 1,418