メインコンテンツにスキップ

Celestron Nature DX Anchor Arm Replacement

必要な工具と部品

  1. Celestron Nature DX Anchor Arm Replacement, Skin Cover: 手順 1、 2の画像 1 Celestron Nature DX Anchor Arm Replacement, Skin Cover: 手順 1、 2の画像 2
    • Using a plastic opening tool, nylon spudger or metal spudger, pry into seam of the skin cover at the center of the device. Lightly lift the tool which should cause the skin cover to rise.

  2. Celestron Nature DX Anchor Arm Replacement: 手順 2、 2の画像 1 Celestron Nature DX Anchor Arm Replacement: 手順 2、 2の画像 2
    • Start peeling the skin away from the center. Apply force as there is an adhesive substance that is binding the skin to the device. Continue peeling until skin cover slides off completely.

  3. Celestron Nature DX Anchor Arm Replacement: 手順 3、 1の画像 1
    • Repeat steps 1 and 2 for the other side.

  4. Celestron Nature DX Anchor Arm Replacement, Focus Knob: 手順 4、 1の画像 1
    • Remove the top cover of the focus knob as shown. Simply twisting and pulling the cover will slide it off.

  5. Celestron Nature DX Anchor Arm Replacement: 手順 5、 1の画像 1
    • Use a magnetic pickup tool or magnetic screwdriver head to remove the guard. The guard should come right off without much resistance.

  6. Celestron Nature DX Anchor Arm Replacement: 手順 6、 1の画像 1
    • Unscrew the focus knob. It should come off without much resistance or pressure.

    • Parts revealed will be heavily lubricated. Consider wearing gloves.

  7. Celestron Nature DX Anchor Arm Replacement, Control Arm: 手順 7、 2の画像 1 Celestron Nature DX Anchor Arm Replacement, Control Arm: 手順 7、 2の画像 2
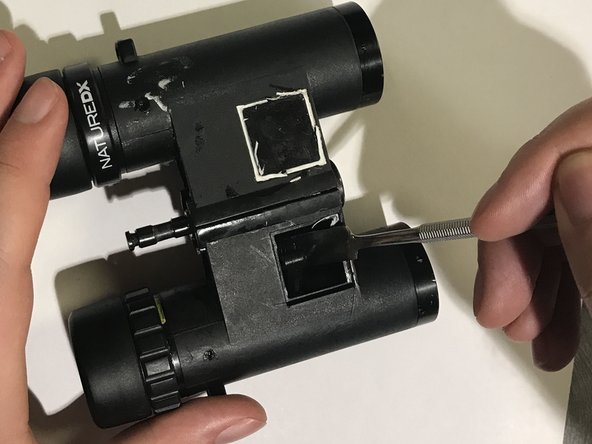
    • Locate the panels in front of the binoculars between the middle axle and the viewing lens and simply pry them off with your fingers

  8. Celestron Nature DX Anchor Arm Replacement: 手順 8、 2の画像 1 Celestron Nature DX Anchor Arm Replacement: 手順 8、 2の画像 2
    • Using a flathead screwdriver, unscrew the highlighted screwhead for the control arm.

    • With your fingers, grab the screw head and pull it out completely once it's unscrewed and replace it with the new control arm if needed.

    • Parts revealed will be heavily lubricated. Consider wearing gloves.

  9. Celestron Nature DX Anchor Arm Replacement, Anchor Arm: 手順 9、 2の画像 1 Celestron Nature DX Anchor Arm Replacement, Anchor Arm: 手順 9、 2の画像 2
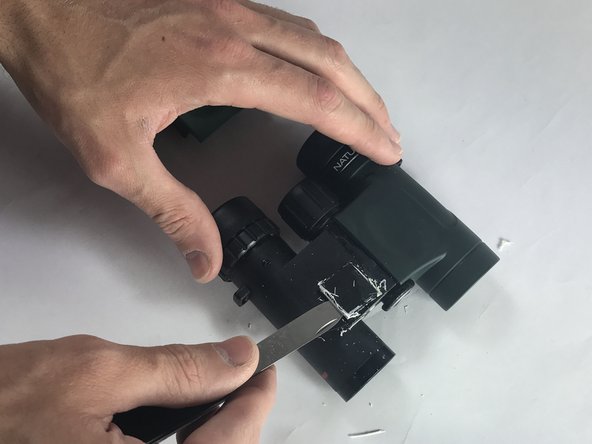
    • Identify the panel on the side you wish replace the anchor arm on, as marked on the photo.

    • Cut the panel open with a knife. Cut the adhesive substance around the panel with the knife and then using said knife, you should be able to lift it off.

  10. Celestron Nature DX Anchor Arm Replacement: 手順 10、 2の画像 1 Celestron Nature DX Anchor Arm Replacement: 手順 10、 2の画像 2
    • Identify the anchor arm. It is circled in red.

    • Using the spudger, lift the anchor arm. It should come off without much resistance.

    • Insert the new anchor arm into the now open slot.

終わりに

To reassemble your device, follow these instructions in reverse order.

作成者

1人の作成者と共同作成されました。

Bryce Colangelo

メンバー登録日: 02/15/17

525 ポイント

5のガイドは作成済み

チーム

USF Tampa, Team S6-G6, Lacy Spring 2017 USF Tampa, Team S6-G6, Lacy Spring 2017人のメンバー

USFT-LACY-S17S6G6

4 メンバー

10のガイドは作成済み

0 件のコメント

コメントを追加

統計データ:

過去 24時間: 2

過去 7 日: 6

過去 30 日: 9

今までの合計 296