メインコンテンツにスキップ

Ceiva LF2003 Internal Plastic Screen Frame Replacement

必要な工具と部品

  1. Ceiva LF2003 Internal Plastic Screen Frame Replacement, Exterior Frame and Matting: 手順 1、 1の画像 1
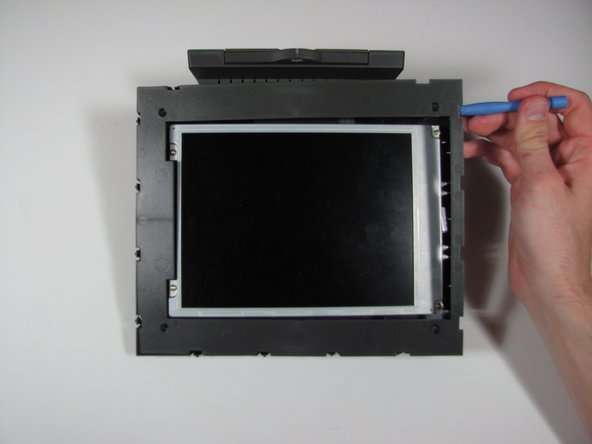
    • Lay the device on its back, and rotate so the base is facing away from you.

  2. Ceiva LF2003 Internal Plastic Screen Frame Replacement: 手順 2、 1の画像 1
    • Grip the frame with your fingers under the edge of the frame, and thumbs pushing down on the front of the device.

  3. Ceiva LF2003 Internal Plastic Screen Frame Replacement: 手順 3、 1の画像 1
    • Lift up the frame with your fingers and push down the rest of the device with your thumbs.

  4. Ceiva LF2003 Internal Plastic Screen Frame Replacement: 手順 4、 1の画像 1
    • Remove the frame and matte from the device.

  5. Ceiva LF2003 Internal Plastic Screen Frame Replacement, Internal Plastic Screen Frame: 手順 5、 1の画像 1
    • Remove the four 7mm Torx T6 screws.

  6. Ceiva LF2003 Internal Plastic Screen Frame Replacement: 手順 6、 2の画像 1 Ceiva LF2003 Internal Plastic Screen Frame Replacement: 手順 6、 2の画像 2
    • Using the plastic opening tool or your fingers, lift up the frame from any edge.

    • Remove the frame from the device.

終わりに

To reassemble your device, follow these instructions in reverse order.

ある他の人がこのガイドを完成しました。

作成者

1人の作成者と共同作成されました。

Casey Glasgow

メンバー登録日: 01/26/14

510 ポイント

5のガイドは作成済み

チーム

Cal Poly, Team 9-25, Maness Winter 2014 Cal Poly, Team 9-25, Maness Winter 2014人のメンバー

CPSU-MANESS-W14S9G25

4 メンバー

5のガイドは作成済み

0 件のコメント

コメントを追加

統計データ:

過去 24時間: 0

過去 7 日: 1

過去 30 日: 1

今までの合計 87