メインコンテンツにスキップ

Ceiling Fan Light Fixture Replacement

必要な工具と部品

  1. Ceiling Fan Light  Fixture Replacement, Light Fixture: 手順 1、 3の画像 1 Ceiling Fan Light  Fixture Replacement, Light Fixture: 手順 1、 3の画像 2 Ceiling Fan Light  Fixture Replacement, Light Fixture: 手順 1、 3の画像 3
    • Working with electrical wires could lead to electrocution.

    • Find your circuit breaker panel and turn off the breaker that corresponds to your ceiling lights.

    • Do this by pushing it to the right.

    • Also flip your light switch to off.

  2. Ceiling Fan Light  Fixture Replacement: 手順 2、 2の画像 1 Ceiling Fan Light  Fixture Replacement: 手順 2、 2の画像 2
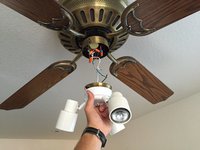
    • Remove the two 1.4 mm Phillips head screws that hold the fixture to the fan itself.

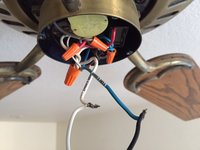
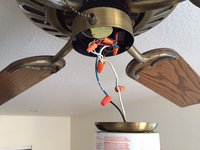
    • Once loose, pull down to expose the two connecting wires.

  3. Ceiling Fan Light  Fixture Replacement: 手順 3、 3の画像 1 Ceiling Fan Light  Fixture Replacement: 手順 3、 3の画像 2 Ceiling Fan Light  Fixture Replacement: 手順 3、 3の画像 3
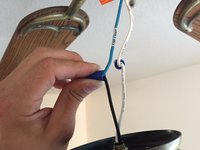
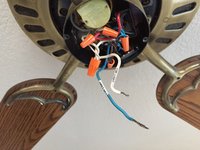
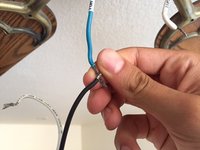
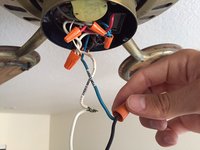
    • Disconnect these wires by twisting the caps in a counter-clockwise direction.

    • You only need to disconnect the wires coming from the lighting fixture.

    • Once both caps are removed, simply pull the wires apart to remove the fixture.

  4. Ceiling Fan Light  Fixture Replacement: 手順 4、 2の画像 1 Ceiling Fan Light  Fixture Replacement: 手順 4、 2の画像 2
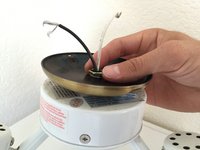
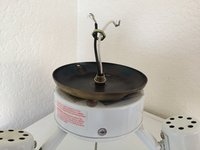
    • Loosen the nut holding the ceiling fan piece to the lighting fixture.

    • This step may require a crescent wrench if finger force is not enough.

  5. Ceiling Fan Light  Fixture Replacement: 手順 5、 1の画像 1
    • Pull upwards to remove the fan piece that holds the light fixture.

    • Your model may require you to twist this piece in a counter-clockwise motion to remove.

  6. Ceiling Fan Light  Fixture Replacement: 手順 6、 1の画像 1
    • Switch out the old fixture with your new fixture by doing the last two steps in reverse order.

  7. Ceiling Fan Light  Fixture Replacement: 手順 7、 2の画像 1 Ceiling Fan Light  Fixture Replacement: 手順 7、 2の画像 2
    • To connect your new fixture, locate the black wire from your light and the colored wire from the fan.

    • Be sure to attached the colored wires to each other, and white wires to each other. (Positive-Positive, Negative-Negative)

    • Twist these together. Do the same with the two white wires.

  8. Ceiling Fan Light  Fixture Replacement: 手順 8、 2の画像 1 Ceiling Fan Light  Fixture Replacement: 手順 8、 2の画像 2
    • Your new light fixture should come with replacement caps. Twist these in a clockwise motion over your wire ends to ensure connection.

    • The old caps work just as well for this if you were not given new ones.

  9. Ceiling Fan Light  Fixture Replacement: 手順 9、 1の画像 1
    • Be sure to neatly tuck in all wires when re-attaching the fixture.

    • Failure to do this will result in not being able to correctly close the gap and put in the screws.

  10. Ceiling Fan Light  Fixture Replacement: 手順 10、 1の画像 1
    • Flip your breaker back on, turn on your light switch, and enjoy your new lights!

終わりに

To reassemble your device, follow these instructions in reverse order.

11 の人々がこのガイドを完成させました。

作成者

2人の作成者と共同で作成されました。

Garrett Janetzky

メンバー登録日: 09/29/15

586 ポイント

1ガイドが承認済み

チーム

Cal Poly, Team 14-1, Green Fall 2015 Cal Poly, Team 14-1, Green Fall 2015人のメンバー

CPSU-GREEN-F15S14G1

4 メンバー

4のガイドは作成済み

11 件のコメント

Amazingly instructive, informative and concise. Brilliant.

Jeanie Bolin-Moore - 返信

Just what I needed. Thanks.

bob.mohler - 返信

Could someone provide the name of the light fixture used in the demonstration?

THOMAS DUFF - 返信

コメントを追加

統計データ:

過去 24時間: 4

過去 7 日: 44

過去 30 日: 196

今までの合計 32,843