はじめに
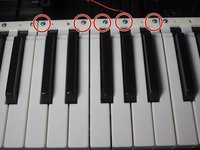
Key's stuck or broken? No problem. Replace sets of keys in no time with the help of a screwdriver.
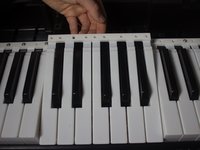
必要な工具と部品


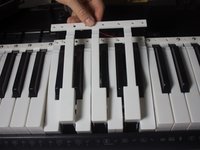
To reassemble your device, follow these instructions in reverse order.
2 の人々がこのガイドを完成させました。
チーム

Cal Poly, Team 13-2, Banghart Winter 2017 Cal Poly, Team 13-2, Banghart Winter 2017人のメンバー
CPSU-BANGHART-W17S13G2
3 メンバー
5のガイドは作成済み
1件のガイドコメント
This guide also works for the Casio LK-175.
The keys are in small groups and you will need to purchase the correct ones. Unfortunately, the ones I received from a seller did not match. I think he thought the part was compatible between my keyboard and the one he pulled them from. I very carefully tried super-gluing the key back onto it's section and so far so good (a few hours). Hopefully, the repair will hold.
Thank you for the guide Samantha.