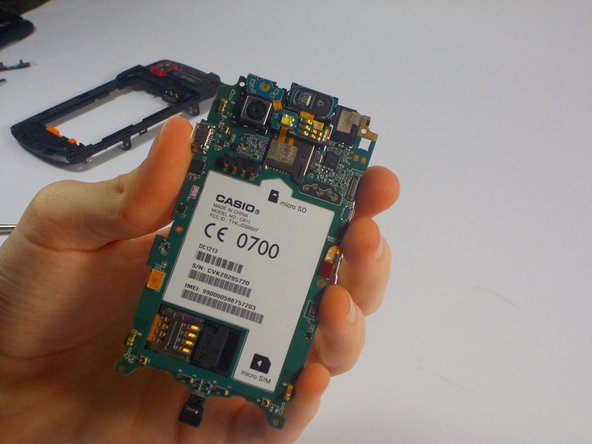
メインコンテンツにスキップ

Casio G’zOne Commando 4G LTE Camera Replacement

必要な工具と部品

  1. Casio G’zOne Commando 4G LTE Camera Replacement, Motherboard: 手順 1、 1の画像 1
    • First, you are going to want to take out the two front screws from the device.

    • The screws are 4mm in length and require a Y0 bit to remove

  2. Casio G’zOne Commando 4G LTE Camera Replacement: 手順 2、 1の画像 1
    • Using the same screw head, remove the back four screws from the device.

  3. Casio G’zOne Commando 4G LTE Camera Replacement: 手順 3、 2の画像 1 Casio G’zOne Commando 4G LTE Camera Replacement: 手順 3、 2の画像 2
    • You should have taken out six screws (two from the front, four from the back). Once you do this, you will have to separate the front and back casing of the phone using a spudger or pry tool.

  4. Casio G’zOne Commando 4G LTE Camera Replacement: 手順 4、 1の画像 1
    • Now, you have six more screws to unscrew (three on each side). They are all the same size but smaller than the first six we took off.

    • These screws are 4mm in length and require a PH00 tip to remove.

  5. Casio G’zOne Commando 4G LTE Camera Replacement: 手順 5、 1の画像 1
    • Once you unscrew all six screws, you can easily separate the plastic shell with your hands.

  6. Casio G’zOne Commando 4G LTE Camera Replacement: 手順 6、 2の画像 1 Casio G’zOne Commando 4G LTE Camera Replacement: 手順 6、 2の画像 2
    • Again, there are six more (and even smaller) screws to take out. Additionally, you have to disconnect a small wire plugged into the motherboard.

    • These screws are 2mm in length and require a PH000 tip to remove.

  7. Casio G’zOne Commando 4G LTE Camera Replacement: 手順 7、 2の画像 1 Casio G’zOne Commando 4G LTE Camera Replacement: 手順 7、 2の画像 2
    • After removing the screws carefully separate the motherboard from the shell with the spudger.

  8. Casio G’zOne Commando 4G LTE Camera Replacement, Camera: 手順 8、 1の画像 1
    • In order to remove the camera, carefully disconnect the wires with the metal spudger.

  9. Casio G’zOne Commando 4G LTE Camera Replacement: 手順 9、 3の画像 1 Casio G’zOne Commando 4G LTE Camera Replacement: 手順 9、 3の画像 2 Casio G’zOne Commando 4G LTE Camera Replacement: 手順 9、 3の画像 3
    • After disconnecting the wires, remove the camera by putting slight pressure of the optical camera lens. The camera the will pop out of the motherboard.

終わりに

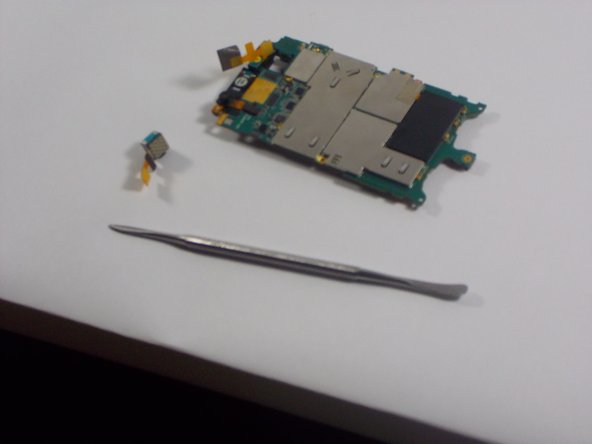
To reassemble your device, follow these instructions in reverse order.

ある他の人がこのガイドを完成しました。

作成者

3人の作成者と共同で作成されました。

Keith Hickey

メンバー登録日: 10/29/15

428 ポイント

3のガイドは作成済み

チーム

UMass Dartmouth, Team 1-9, Miles Fall 2015 UMass Dartmouth, Team 1-9, Miles Fall 2015人のメンバー

UMASSD-MILES-F15S1G9

3 メンバー

10のガイドは作成済み

0 件のコメント

コメントを追加

統計データ:

過去 24時間: 0

過去 7 日: 0

過去 30 日: 1

今までの合計 407