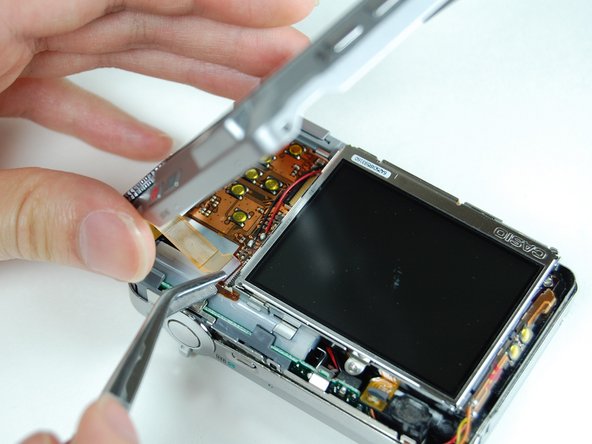
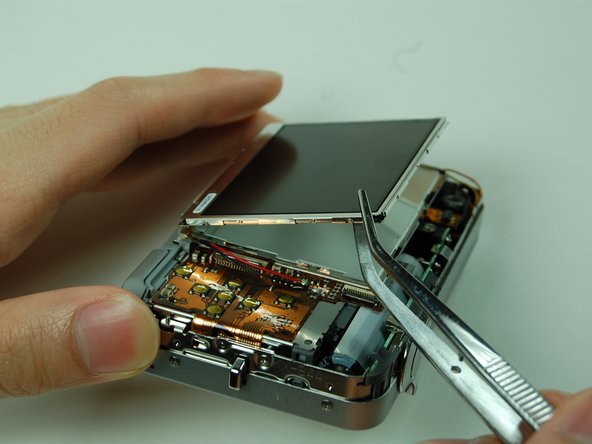
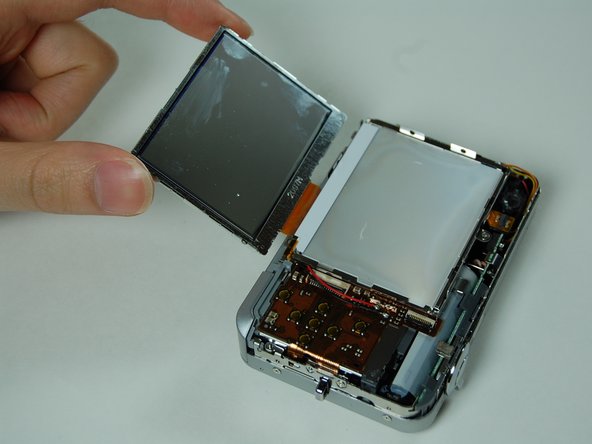
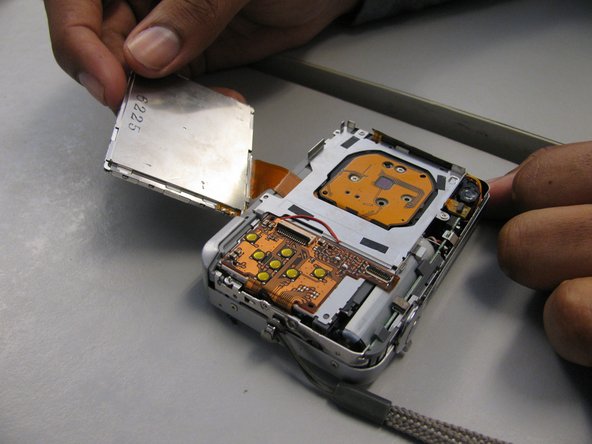
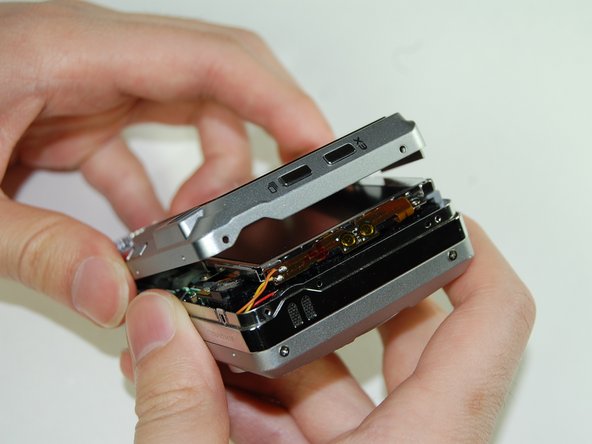
メインコンテンツにスキップ

Casio Exilim EX-Z850 LCD Screen Replacement

必要な工具と部品

  1. Casio Exilim EX-Z850 LCD Screen Replacement, LCD Screen: 手順 1、 1の画像 1
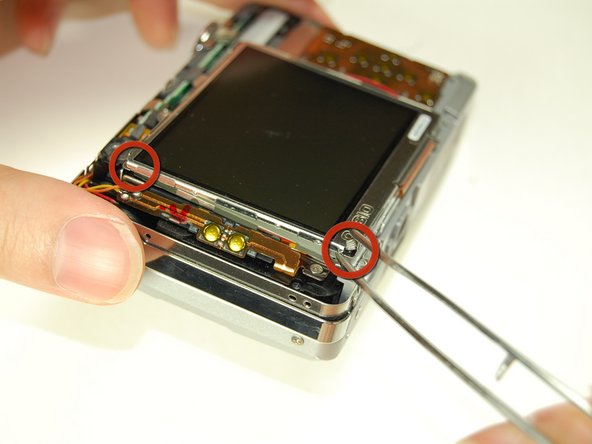
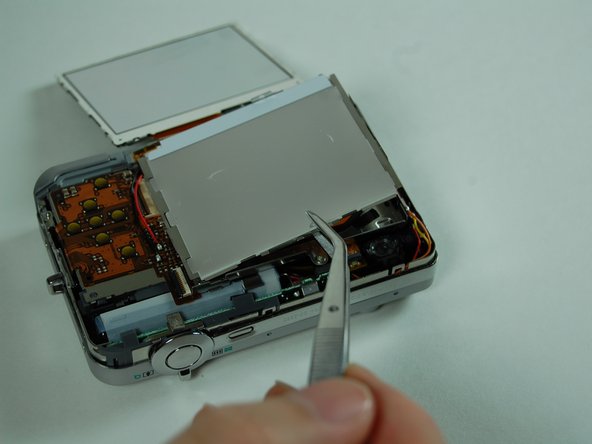
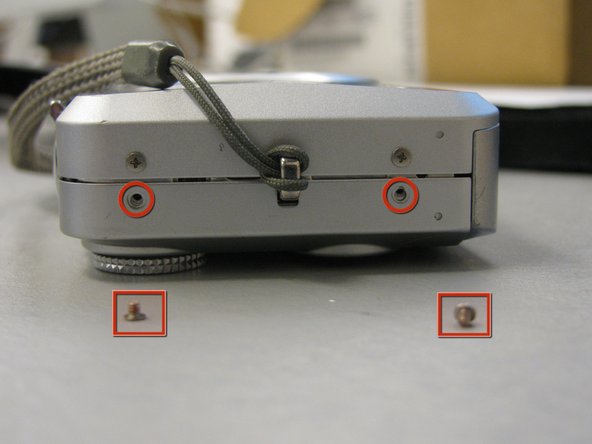
    • Remove the two screws on the side of the speakers with the Phillips 00 Screwdriver, on the portion of the camera that is a part of the back casing.

    • Label screws (where they came from and what step) and set aside in the sorting tray.

  2. Casio Exilim EX-Z850 LCD Screen Replacement: 手順 2、 2の画像 1 Casio Exilim EX-Z850 LCD Screen Replacement: 手順 2、 2の画像 2
    • Remove the two back screws on the bottom of the camera on the same side as the LCD screen.

    • Note: The bottom screws are longer than the top ones, so label the screws accordingly for ease in reassembly. (See attached picture.)

  3. Casio Exilim EX-Z850 LCD Screen Replacement: 手順 3、 1の画像 1
    • Remove the screws on the opposite of the speakers.

    • Label the screws accordingly and add to the sorting tray.

  4. Casio Exilim EX-Z850 LCD Screen Replacement: 手順 4、 2の画像 1 Casio Exilim EX-Z850 LCD Screen Replacement: 手順 4、 2の画像 2
    • Once all screws have been removed, gently pry open the bottom casing.

    • Use the tweezers to carefully remove the ribbon from the LCD screen- NOT from the back casing itself.

    • Set the bottom casing aside.

    • Navigation button may fall out so be cautious of this and set aside if needed.

  5. Casio Exilim EX-Z850 LCD Screen Replacement: 手順 5、 3の画像 1 Casio Exilim EX-Z850 LCD Screen Replacement: 手順 5、 3の画像 2 Casio Exilim EX-Z850 LCD Screen Replacement: 手順 5、 3の画像 3
    • Use the tweezers to pry the LCD screen off from the openings. There are 5 spots that the tweezers can go in to pry the LCD screen off (see attached pictures).

    • There is a ribbon attached to the screen. Be sure not to pull this ribbon off the screen.

  6. Casio Exilim EX-Z850 LCD Screen Replacement: 手順 6、 2の画像 1 Casio Exilim EX-Z850 LCD Screen Replacement: 手順 6、 2の画像 2
    • Use the tweezers to lift up the LCD screen.

    • Grab the LCD screen with the index finger and thumb, leave the ribbon attached to the screen and leave it on the side.

    • Be sure to be very gentle with the LCD screen.

  7. Casio Exilim EX-Z850 LCD Screen Replacement: 手順 7、 3の画像 1 Casio Exilim EX-Z850 LCD Screen Replacement: 手順 7、 3の画像 2 Casio Exilim EX-Z850 LCD Screen Replacement: 手順 7、 3の画像 3
    • Under the LCD screen you will see an LCD casing. You will want to GENTLY pry this off using the tweezers.

    • The casing may possibly be attached to the LCD screen. If so, leave it attached to the screen.

  8. Casio Exilim EX-Z850 LCD Screen Replacement: 手順 8、 3の画像 1 Casio Exilim EX-Z850 LCD Screen Replacement: 手順 8、 3の画像 2 Casio Exilim EX-Z850 LCD Screen Replacement: 手順 8、 3の画像 3
    • Use the tweezers to flip open the connectors holding the ribbon.

    • Pull out the LCD screen with the ribbon from the camera.

    • THIS STEP IS WHEN WHERE YOU SHOULD USE CAUTION AND BE VERY GENTLE!

  9. Casio Exilim EX-Z850 LCD Screen Replacement: 手順 9、 2の画像 1 Casio Exilim EX-Z850 LCD Screen Replacement: 手順 9、 2の画像 2
    • Your LCD screen is now detached.

    • Locate the replacement screen that you will now attach.

  10. Casio Exilim EX-Z850 LCD Screen Replacement: 手順 10、 1の画像 1
    • Reconnect the LCD ribbon to the connectors and flip back down.

    • Ribbon should be inserted straight in and to the right side.

  11. Casio Exilim EX-Z850 LCD Screen Replacement: 手順 11、 1の画像 1
    • Reattach the LCD casing.

    • Flip it back into place.

  12. Casio Exilim EX-Z850 LCD Screen Replacement: 手順 12、 2の画像 1 Casio Exilim EX-Z850 LCD Screen Replacement: 手順 12、 2の画像 2
    • Make sure the LCD screen is firmly connected to the camera.

    • Slightly push the LCD screen down with one finger until you hear a click.

  13. Casio Exilim EX-Z850 LCD Screen Replacement: 手順 13、 2の画像 1 Casio Exilim EX-Z850 LCD Screen Replacement: 手順 13、 2の画像 2
    • Reattach the back casing as well as the small ribbon with it to the camera body.

    • Be carefully reattaching the case. Using both hands might help.

  14. Casio Exilim EX-Z850 LCD Screen Replacement: 手順 14、 1の画像 1
    • Locate the labeled screws from Step 2-on the bottom of the camera.

    • These are the longer screws. Screw them back in.

    • The picture shown does not show the right screw removed and ready to be replaced due to an issue with this specific camera.

  15. Casio Exilim EX-Z850 LCD Screen Replacement: 手順 15、 3の画像 1 Casio Exilim EX-Z850 LCD Screen Replacement: 手順 15、 3の画像 2 Casio Exilim EX-Z850 LCD Screen Replacement: 手順 15、 3の画像 3
    • Locate the labeled screws from Step 1 and Step 3-on the side of the camera.

    • These are the shorter screws. Screw them back in.

    • Congratulations! Your camera has been reassembled.

終わりに

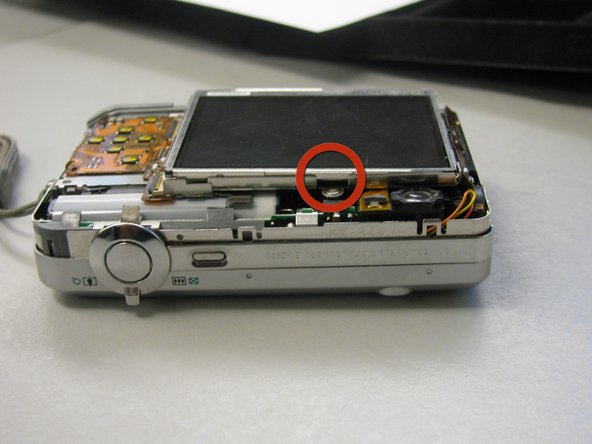
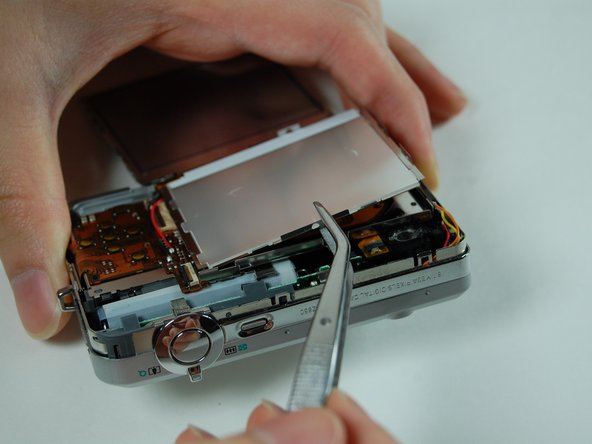
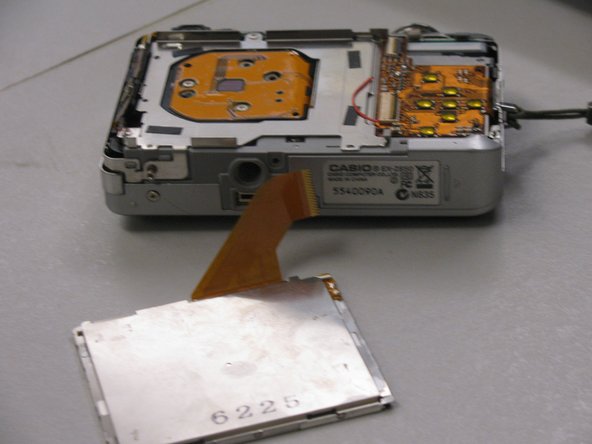
By now you should have been able to get your Casio Exilim EX-Z850 camera's LCD screen functioning.

ある他の人がこのガイドを完成しました。

作成者

10人の作成者と共同で作成されました。

Christian

メンバー登録日: 01/28/11

320 ポイント

3のガイドは作成済み

チーム

Cal Poly, Team 4-38, Regan Winter 2011 Cal Poly, Team 4-38, Regan Winter 2011人のメンバー

CPSU-REGAN-W11S4G38

4 メンバー

13のガイドは作成済み

0 件のコメント

コメントを追加

統計データ:

過去 24時間: 0

過去 7 日: 2

過去 30 日: 13

今までの合計 2,689