メインコンテンツにスキップ

このバージョンは誤った内容を含んでいる可能性があります。最新の承認済みスナップショットに切り替えてください。

必要な工具と部品

  1. この手順は未翻訳です。 翻訳を手伝う。

    : 手順 1、 1の画像 1
    • Remove battery before you begin disassembly.

    • Use a Phillips #00 Screwdriver to remove all four of the screws on the right side of the camera with the lens facing you.

  2. この手順は未翻訳です。 翻訳を手伝う。

    : 手順 2、 1の画像 1
    • Use a Phillips #00 screwdriver, unscrew all four screws on the left side of the camera.

  3. この手順は未翻訳です。 翻訳を手伝う。

    : 手順 3、 1の画像 1
    • Use the Phillips #00 screwdriver to remove all four of the screws on the bottom of the camera.

    • Bottom screws are longer than the top screws, so label accordingly for easy reassembly.

  4. この手順は未翻訳です。 翻訳を手伝う。

    : 手順 4、 3の画像 1 : 手順 4、 3の画像 2 : 手順 4、 3の画像 3
    • Once all screws have been removed, slowly pry open the back casing of the camera.

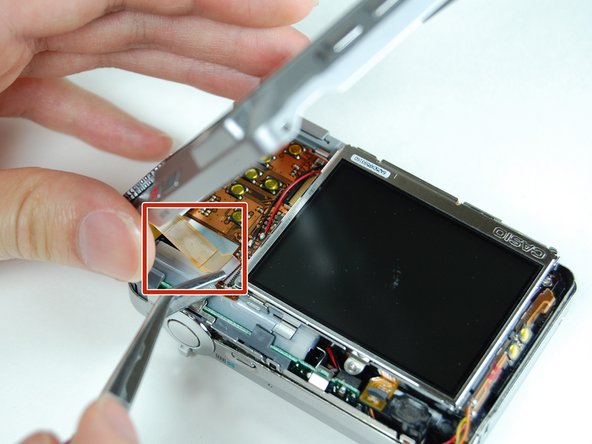
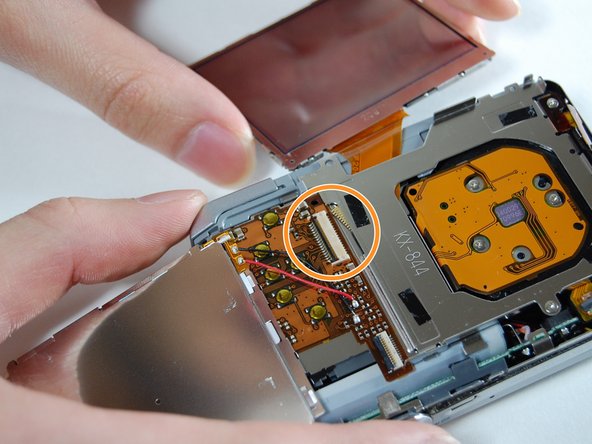
    • Gently remove the ribbon cable from the LCD with tweezers.

    • Set aside back casing of the camera.

  5. この手順は未翻訳です。 翻訳を手伝う。

    : 手順 5、 2の画像 1 : 手順 5、 2の画像 2
    • Use your tweezers to hold the camera secure, while you pull the front cover off of the camera.

  6. この手順は未翻訳です。 翻訳を手伝う。

    : 手順 6、 2の画像 1 : 手順 6、 2の画像 2
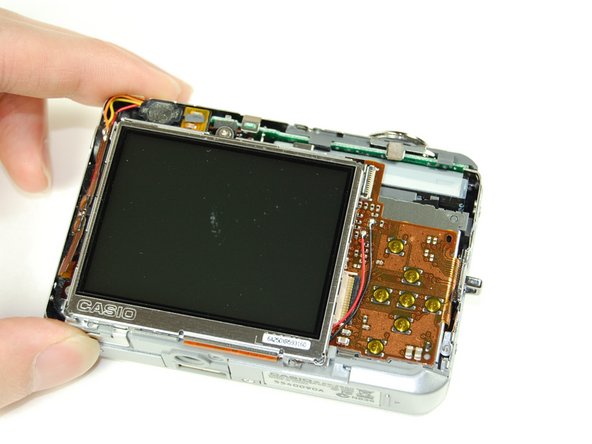
    • The bottom of the LCD screen is secured to the frame by small pieces of black tape. You will need to peel the tape away to release the LCD screen.

    • Use your tweezers to lift the LCD screen from the frame.

  7. この手順は未翻訳です。 翻訳を手伝う。

    : 手順 7、 2の画像 1 : 手順 7、 2の画像 2
    • Lift screen away from the camera with your tweezers.

    • Flip screen over gently with your fingers once it is lifted far away enough from the camera.

  8. この手順は未翻訳です。 翻訳を手伝う。

    : 手順 8、 1の画像 1
    • Use your tweezers to lift the LCD frame from the camera.

  9. この手順は未翻訳です。 翻訳を手伝う。

    : 手順 9、 3の画像 1 : 手順 9、 3の画像 2 : 手順 9、 3の画像 3
    • Use your tweezers to lift the bar holding the ribbon off.

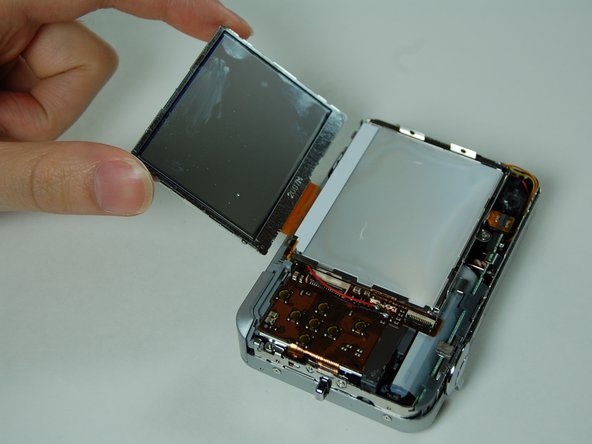
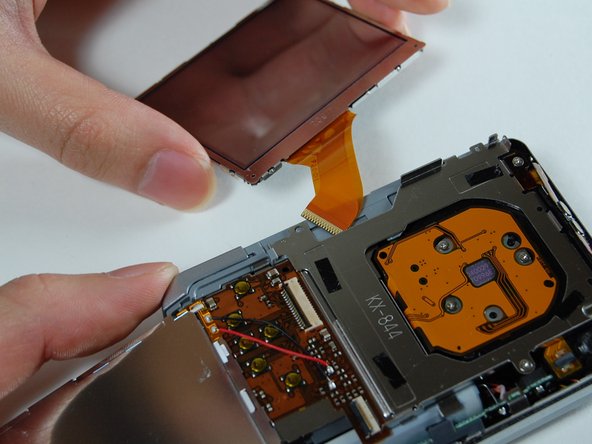
    • Disconnect the ribbon to release the LCD screen.

    • Use your fingers to pull the LCD screen with the attached ribbon from the camera.

  10. この手順は未翻訳です。 翻訳を手伝う。

    : 手順 10、 2の画像 1 : 手順 10、 2の画像 2
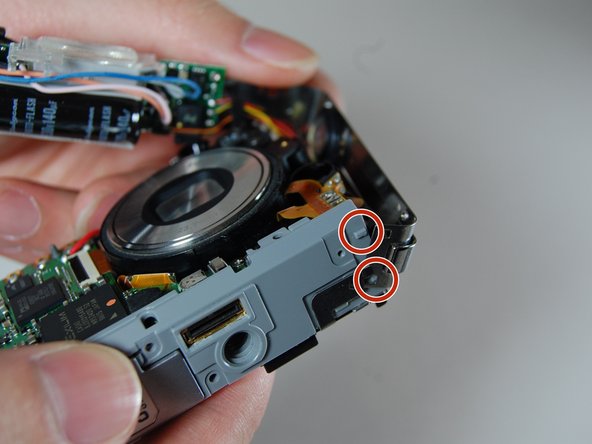
    • Use a Phillips #00 screwdriver to remove the two screws from the side of the camera that has the strap mount.

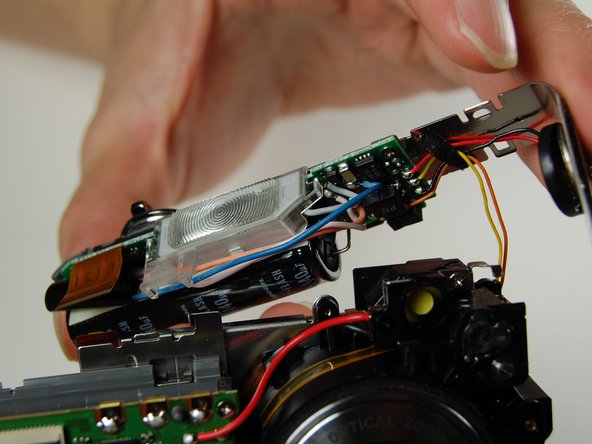
    • Remove strap mount by slowly pulling the side of the case so it will dislocate from the top of the camera.

  11. この手順は未翻訳です。 翻訳を手伝う。

    : 手順 11、 2の画像 1 : 手順 11、 2の画像 2
    • Hold the camera facing toward you. Pull up the bar that is securing the ribbon located to the left of the flash.

    • Disconnect the ribbon by prying it off with your fingers.

  12. この手順は未翻訳です。 翻訳を手伝う。

    : 手順 12、 3の画像 1 : 手順 12、 3の画像 2 : 手順 12、 3の画像 3
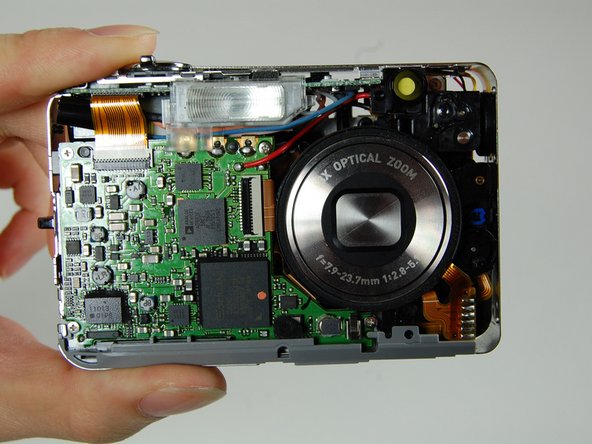
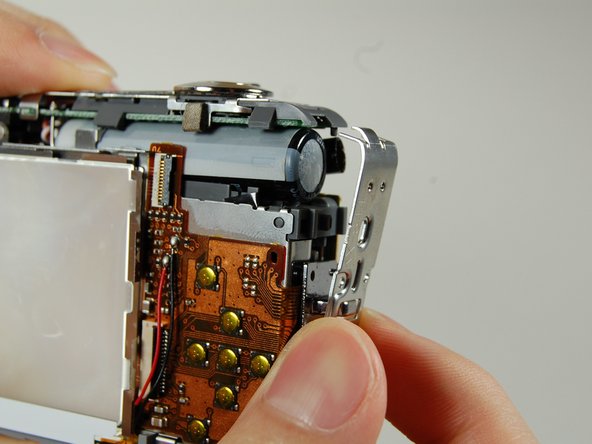
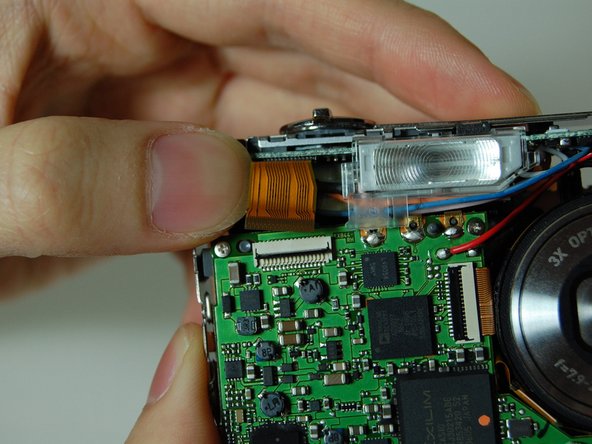
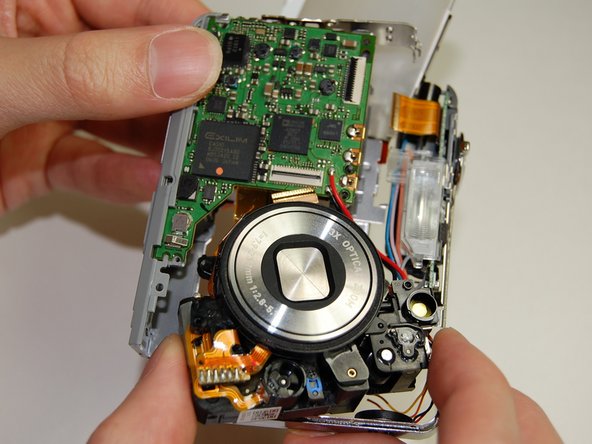
    • With the lens facing towards you, pull the L-shaped frame away from the camera.

    • Do not disconnect any of the wires from the camera when pulling the frame.

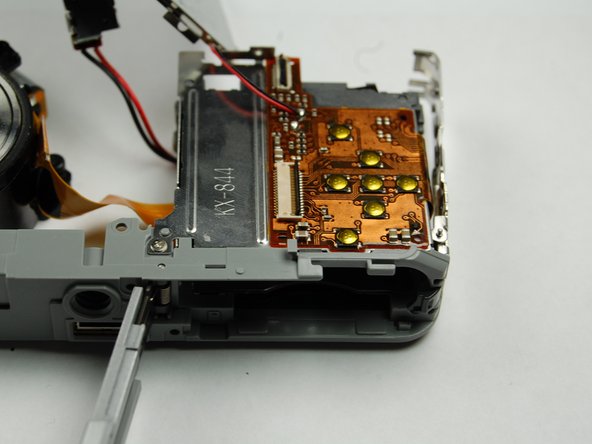
    • Remove the frame from the two studs and metal tabs keeping it in place at the bottom of the camera.

  13. この手順は未翻訳です。 翻訳を手伝う。

    : 手順 13、 2の画像 1 : 手順 13、 2の画像 2
    • Locate the logic board to the left of the lens. You will see a bar securing a ribbon. Flip the bar up to release the ribbon.

    • Disconnect the ribbon.

  14. この手順は未翻訳です。 翻訳を手伝う。

    : 手順 14、 2の画像 1 : 手順 14、 2の画像 2
    • Use your Phillips #00 screwdriver to remove the two screws connecting the frame to the back of the camera.

    • Lift the frame away on the LCD screen side of the camera.

  15. この手順は未翻訳です。 翻訳を手伝う。

    : 手順 15、 2の画像 1 : 手順 15、 2の画像 2
    • This is what your camera should look like now that you have the battery casing isolated.

ゴール

作成者

13人の作成者と共同で作成されました。

Logan

メンバー登録日: 01/10/11

313 ポイント

2のガイドは作成済み

チーム

Cal Poly, Team 4-38, Regan Winter 2011 Cal Poly, Team 4-38, Regan Winter 2011人のメンバー

CPSU-REGAN-W11S4G38

4 メンバー

13のガイドは作成済み

0 件のコメント

コメントを追加

統計データ:

過去 24時間: 0

過去 7 日: 5

過去 30 日: 7

今までの合計 3,799