メインコンテンツにスキップ

Casio Exilim EX-Z80 Back and Front Cover Replacement

必要な工具と部品

  1. Casio Exilim EX-Z80 Back and Front Cover Replacement, Battery: 手順 1、 2の画像 1 Casio Exilim EX-Z80 Back and Front Cover Replacement, Battery: 手順 1、 2の画像 2
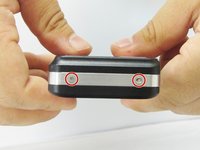
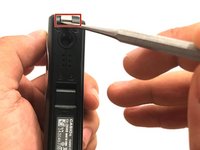
    • Locate the battery compartment at the bottom of the camera.

    • With your thumb, gently press down on the compartment door and slide to the left to open.

  2. Casio Exilim EX-Z80 Back and Front Cover Replacement: 手順 2、 2の画像 1 Casio Exilim EX-Z80 Back and Front Cover Replacement: 手順 2、 2の画像 2
    • With your index finger, gently pull back gray release lever for the battery to pop out.

    • Gently pull the battery out of the slot.

  3. Casio Exilim EX-Z80 Back and Front Cover Replacement, Back and Front Cover: 手順 3、 3の画像 1 Casio Exilim EX-Z80 Back and Front Cover Replacement, Back and Front Cover: 手順 3、 3の画像 2 Casio Exilim EX-Z80 Back and Front Cover Replacement, Back and Front Cover: 手順 3、 3の画像 3
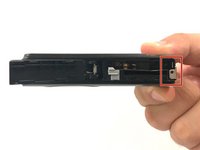
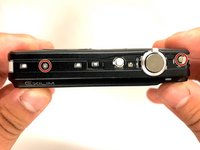
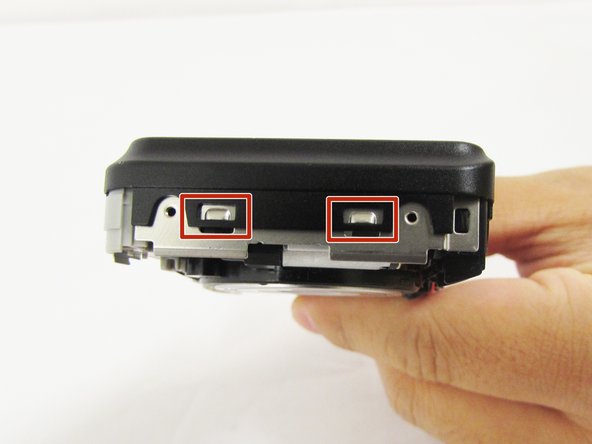
    • Remove the four 3 mm black screws from the bottom of the camera using a Phillips #000 screwdriver.

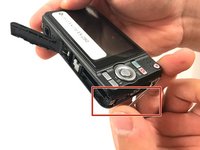
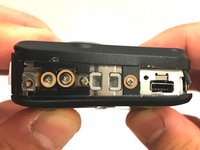
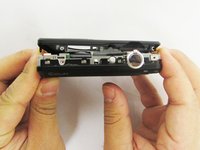
    • Open the battery compartment with your thumb or index finger.

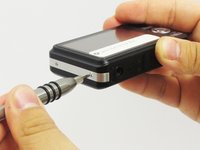
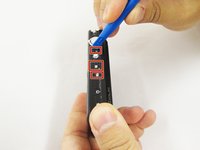
    • Remove the single 2 mm silver screw that is now exposed using a Phillips #000 screwdriver.

  4. Casio Exilim EX-Z80 Back and Front Cover Replacement: 手順 4、 3の画像 1 Casio Exilim EX-Z80 Back and Front Cover Replacement: 手順 4、 3の画像 2 Casio Exilim EX-Z80 Back and Front Cover Replacement: 手順 4、 3の画像 3
    • Open the USB port tab.

    • Remove the single 2 mm silver screw using a Phillips #000 screwdriver.

  5. Casio Exilim EX-Z80 Back and Front Cover Replacement: 手順 5、 2の画像 1 Casio Exilim EX-Z80 Back and Front Cover Replacement: 手順 5、 2の画像 2
    • Remove the two 2 mm silver screws using a Phillips #000 screwdriver.

  6. Casio Exilim EX-Z80 Back and Front Cover Replacement: 手順 6、 2の画像 1 Casio Exilim EX-Z80 Back and Front Cover Replacement: 手順 6、 2の画像 2
    • Carefully remove the silver strip from left side. Open the battery cover and remove the metal strip with fingers by sliding it to the left.

  7. Casio Exilim EX-Z80 Back and Front Cover Replacement: 手順 7、 2の画像 1 Casio Exilim EX-Z80 Back and Front Cover Replacement: 手順 7、 2の画像 2
    • With the metal spudger, pry out the edge of the silver strip at the bottom right side of the camera.

    • Carefully remove the remaining part of the metal strip.

  8. Casio Exilim EX-Z80 Back and Front Cover Replacement: 手順 8、 2の画像 1 Casio Exilim EX-Z80 Back and Front Cover Replacement: 手順 8、 2の画像 2
    • Remove the two 2 mm silver screws from the top corners of the camera using a Phillips #000 screwdriver.

    • Remove the three 2 mm screws from the left side using a Phillips #000 screwdriver.

  9. Casio Exilim EX-Z80 Back and Front Cover Replacement: 手順 9、 3の画像 1 Casio Exilim EX-Z80 Back and Front Cover Replacement: 手順 9、 3の画像 2 Casio Exilim EX-Z80 Back and Front Cover Replacement: 手順 9、 3の画像 3
    • Using a small opening tool carefully release all lock tabs at the top and on the side of the camera from their locked position.

    • Using your hands, carefully separate the front and back panel from the camera.

終わりに

To reassemble your device, follow these instructions in reverse order.

作成者

5人の作成者と共同で作成されました。

Caroline Villasenor

メンバー登録日: 04/11/17

331 ポイント

3のガイドは作成済み

チーム

0 件のコメント

コメントを追加

統計データ:

過去 24時間: 0

過去 7 日: 5

過去 30 日: 20

今までの合計 471