メインコンテンツにスキップ

Carrera Mario Copter Motor Replacement

必要な工具と部品

  1. Carrera Mario Copter Motor Replacement, Battery: 手順 1、 1の画像 1
    • Flip the quadrocopter over so that the underside of the device is facing up.

    • Unplug the battery cable from the socket on the quadrocopter.

  2. Carrera Mario Copter Motor Replacement: 手順 2、 1の画像 1
    • Push the battery upward with your thumbs to loosen it from the tight slot until your thumbs can not reach the bottom of the battery anymore.

  3. Carrera Mario Copter Motor Replacement: 手順 3、 1の画像 1
    • Pull the battery away from the slot to remove it.

  4. Carrera Mario Copter Motor Replacement, Rotor Blade: 手順 4、 1の画像 1
    • Using the JIS #00 screwdriver, hold the rotor blade still and unscrew the 4.762mm screw in the center of the blade.

  5. Carrera Mario Copter Motor Replacement: 手順 5、 1の画像 1
    • Lift the screw out and set it aside.

    • Lift the rotor blade out.

    • Be sure to place the rotor blades properly for stable flight. With the quadrocopter facing you, the front rotor blades should be red with blade A on the right and B on the left. The rear rotor blades should be blue with blade B on the right and A on the left.

  6. Carrera Mario Copter Motor Replacement, Motor: 手順 6、 1の画像 1
    • With the PH1 screwdriver, unscrew the four 7.1mm screws located underneath the quadrocopter.

    • Pull the base out and set the foam piece aside

  7. Carrera Mario Copter Motor Replacement: 手順 7、 1の画像 1
    • From the precision tweezers set, use the round-end tweezers to pull and wiggle the white-head wires from the motherboard.

    • Be sure to pull from the connector. Otherwise you run the risk of slicing through the wires.

  8. Carrera Mario Copter Motor Replacement: 手順 8、 2の画像 1 Carrera Mario Copter Motor Replacement: 手順 8、 2の画像 2
    • Using the PH0 screwdriver, unscrew the 3.2 mm screw on the base.

    • While all four locations are shown, you will only have to remove the screw/s corresponding to the motor/s you are replacing.

    • Pull the rotor leg out from the base

  9. Carrera Mario Copter Motor Replacement: 手順 9、 2の画像 1 Carrera Mario Copter Motor Replacement: 手順 9、 2の画像 2
    • Using the PH0 screwdriver, unscrew the 4 mm screw where the leg meets the motor case/ rotor stand.

    • Pull the leg apart from the motor case/ rotor stand

  10. Carrera Mario Copter Motor Replacement: 手順 10、 2の画像 1 Carrera Mario Copter Motor Replacement: 手順 10、 2の画像 2
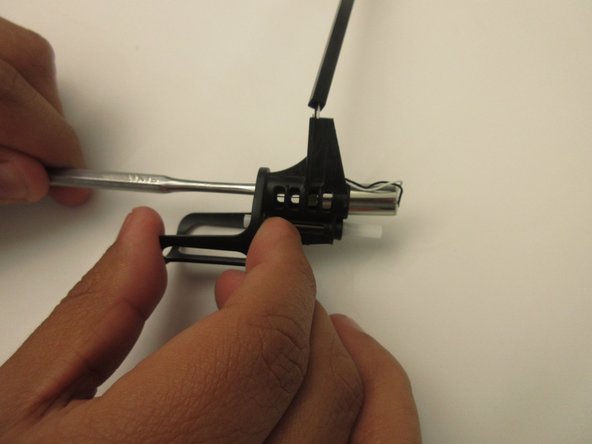
    • Using the metal spudger of your choice, remove the clip at the top of the motor.

    • Use the thinner side of the spudger to push the motor through and out of the case.

  11. Carrera Mario Copter Motor Replacement: 手順 11、 1の画像 1
    • Cut the connection head off and pull the wiring out of the leg.

終わりに

To reassemble your device, follow these instructions in reverse order.

作成者

1人の作成者と共同作成されました。

Edgar Lopez-Allende

メンバー登録日: 10/20/17

207 ポイント

2のガイドは作成済み

チーム

UW Tacoma, Team S1-G6, Rose Fall 2017 UW Tacoma, Team S1-G6, Rose Fall 2017人のメンバー

UWT-ROSE-F17S1G6

4 メンバー

10のガイドは作成済み

0 件のコメント

コメントを追加

統計データ:

過去 24時間: 1

過去 7 日: 2

過去 30 日: 6

今までの合計 431