はじめに
If you need to replace the bottom conical burr, follow this guide to access it. The bottom conical burr is essential to having finely ground coffee, and if it is dull or no longer working, it needs to be replaced. For this guide you will need a Torx Security T20 Bit Screwdriver and an extension bit. To access the bottom conical burr, you will need to follow previous guides on replacing the outside metal casing. This guide is simple once you’ve finished the other.
必要な工具と部品
-
-
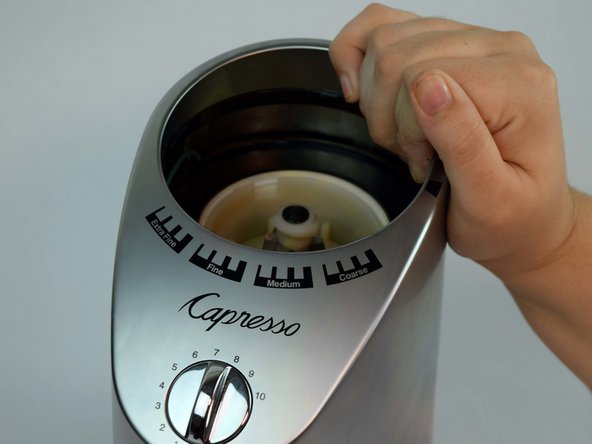
Twist the top plastic container to the left counterclockwise.
-
Pull upwards to remove.
-
-
-
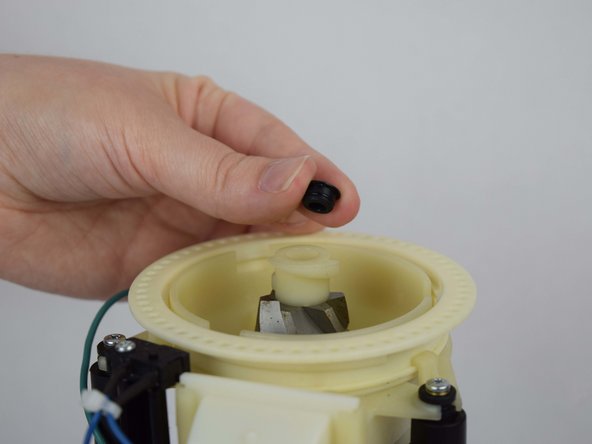
Twist the top burr to the left counter clockwise.
-
Pull upwards to remove.
I own a model 560. Removing the grinder requires a Torx 20, which is in the center of the top burr. If used, the screw is coated with coffee grinds.
-
-
-
Remove four 11.59mm T10 screws.
My housing is plastic, and was just held on by clips holding the outer part to the base, I gently pried the housing away and lifted the housing off. It’s a Capresso model 560
panchocole - 返信
Mine is as well. I tried digging the “rubber washers” out but it was only scratching plastic.
There are 5 areas you can slide a slim flathead into and gently wiggle to get the casing to slide out from the base. Be firm yet gentle.
-
-
-
Lift the metal outside casing off the black base.
-
Flip the outside casing forward so you have access to the inside of it.
-
-
-
-
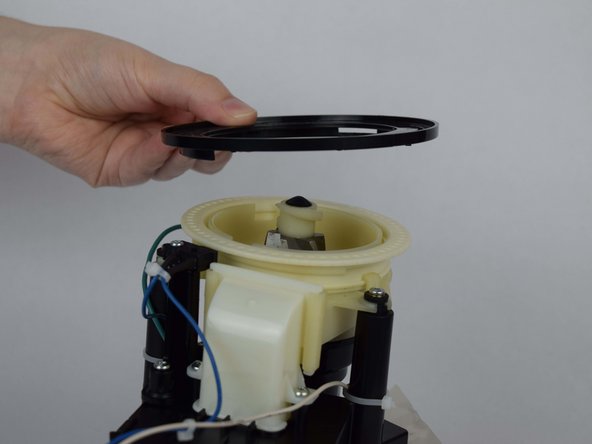
Grab the edge of the plastic black ring that sits on top of the device and gently pull up to release.
-
-
-
This is the correct position of bearings and springs when the screw and bottom burr are removed.
I have reassembled shown as above, but now the grinder only puts out a fine ground coffee at any setting.
Whats up?
Fixed this by setting grinder to extra fine with beans in, grinding, then slowly working the grinder back to coarse.
Essentially, the grid is more fine when the screw is not in all the way. The grid is more coarse when it is fully tightened. If you have super fine grind all of the sudden, you may think you have the screw in all they way but in fact, the plastic parts are most likely not aligned. The plastic pieces on the between the bottom bur grinder hae slots and need to be aligned properly. (the bottom metal bur grinder is the smaller one - in the left hand of the person in picture 14) ) IF the plastics parts are not mated correctly, the grind will be very fine, and slow. When I aligned the slots properly, I was good to go. In step 15, you can see the slots on the bottom plastic piece. The top plastic piece is where the screw goes. It’s tough to align, but you’ll know you got it when you grind.
-


To reassemble your device, follow these instructions in reverse order.
To reassemble your device, follow these instructions in reverse order.
7 の人々がこのガイドを完成させました。
チーム

USF Tampa, Team S1-G1, Leahy Fall 2018 USF Tampa, Team S1-G1, Leahy Fall 2018人のメンバー
USFT-LEAHY-F18S1G1
4 メンバー
5のガイドは作成済み
11 件のコメント
Step 5. In my machine there are 5 taps im bottom that has to be released with a screwdriver, before outer cap can be liftet up.
Step 9, It is essential to mark the location of black plastic ring in regards to white plastic part with holes AND in regards to ex. white square plastic part before removing part. Othervise you can’t assemble or you could destroy the burrs when you adjust the grinder to very fine grinds
Hi is it possible to remove the top burr? If yes how?
Thanks
Great description of how to remove the bottom burr. Would be even greater if a new burr was available, which it is not.
wow - Appreciate the instructions but…….screw this….$85 for a new whole new Capresso Infinity Conical Grinder….. https://www.amazon.com/gp/product/B0000A...
Bradley, you’re missing the point. Yes, you could just replace your old grinder with a new one, toss the old one into the “great away” , aka garbage, aka landfull, but that thinking is no longer sustainable. We’re now up to a whopping 8 billion people on the planet. We need to find more sustainable ways to continue to live on earth. It’s everyone’s business.
The bottom burr and springs are tricky to remove because, if you are not careful when removing this set of parts, tiny ball bearings or springs may get away from you; I think that is why steps 10 and 11 are added above. If you don't have tiny fingers, have a tweezers handy for picking up and putting the ball bearings and springs back into place. Also keep a good, bright flashlight handy because the springs and bearings of my model--an Infinity 565--sit into indentations on a black round part underneath; black makes indentations difficult to locate. To reassemble the bottom burr, the bearings, and the springs, I used Aaron Deutsch's diagram: https://aarondeutsch.com/2021/11/capress... Now why does Aaron's reassembly diagram make sense? I'm not an engineer and don't have the slightest idea, but my grinder works well now that I've cleaned the deep-sitting parts.
I agree with Dorothe - 7/15/19 above. I had not read these comments before disassembling the grinder, and during reassembly I noted the large number of possibilities regarding just WHERE to put the black ring. Looking at the images suggested correct positioning - but I couldn't be sure. I also noted the white ring with the pinholes could be rotated almost 180 degrees, and there was a notch in the white ring as well. I rotated the white ring full counterclockwise and noted the notch lined up with the indexing ball. I also found a black sharpie mark on the black ring AND a blue mark on the discharge chute. So I lined those up too. Then the bean hopper fit perfectly back into position, and all was well in the world.
Also - for my grinder (plastic) the cover is held in place by 4 snaps on the bottom - NOT screws. You'll need a flat blade screwdriver to GENTLY pry the case open.
This video is excellent!
https://www.youtube.com/watch?v=YdZvzKb4...
The machine has the same parts inside as the Capresso !